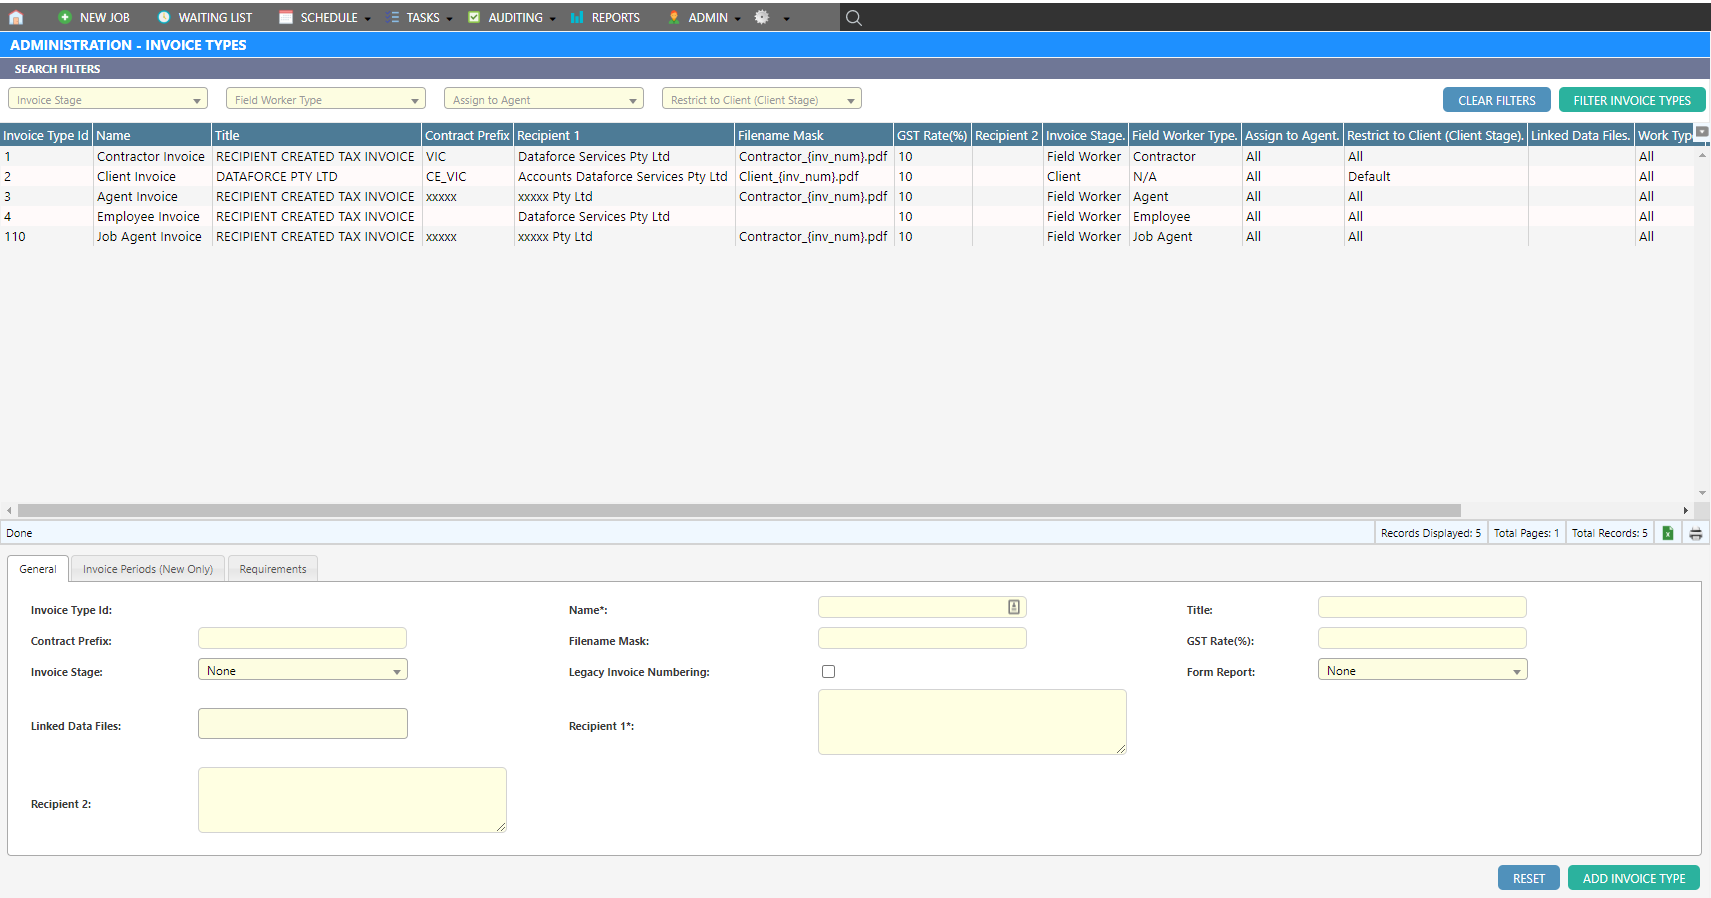
Adding a New Invoice Type
Steps to Add a New Invoice Type
-
Open the Invoice Types screen by navigating to
Configuration Invoices Invoice Types.

-
Fill in the required details to create a new invoice type in the bottom section of the screen.
Field Descriptions
Refer to the table below for an explanation of each field:
| Property | Description |
|---|---|
| Name | The name of the invoice type. |
| Title | The title of the invoice. This title appears on the invoice template. |
| Contract Prefix | A prefix used for the invoice reference number. |
| Filename Mask | Defines the filename of the invoice when downloaded. |
| GST Rate (%) | Sets the tax rate for the invoice. |
| Invoice Stage | Specifies the stage of invoicing: either Field Worker Invoice or Client Invoice. |
| Recipient 1 | Primary recipient of the invoice (e.g., the ACP). |
| Recipient 2 | Secondary recipient of the invoice. |
| Invoice Period Start | Start date of the invoice period. |
| Period Length | Duration of each invoice period. |
| Field Worker Type | Required for field worker invoices if the Field Worker Invoice stage is selected. |
| Assign to Agent | Assigns agents to the invoice type. |
| Restrict to Client | Limits the invoice type to specific clients (applicable to the Client Stage). |
| Work Type | Specifies the work types to be applied to the invoice type. |
For more information on using the newly created invoice type, see this documentation.
Creating a Job Agent Invoice
To create an invoice type specifically for a job agent:
- Follow the steps in Adding a New Invoice Type.
- Ensure the following fields are configured:
- Set Invoice Stage to Field Worker Invoice.
- Set Field Worker Type to Job Agent.
For additional guidance, check out this overview.
