Learn how to add an agent
Creating an Agent
-
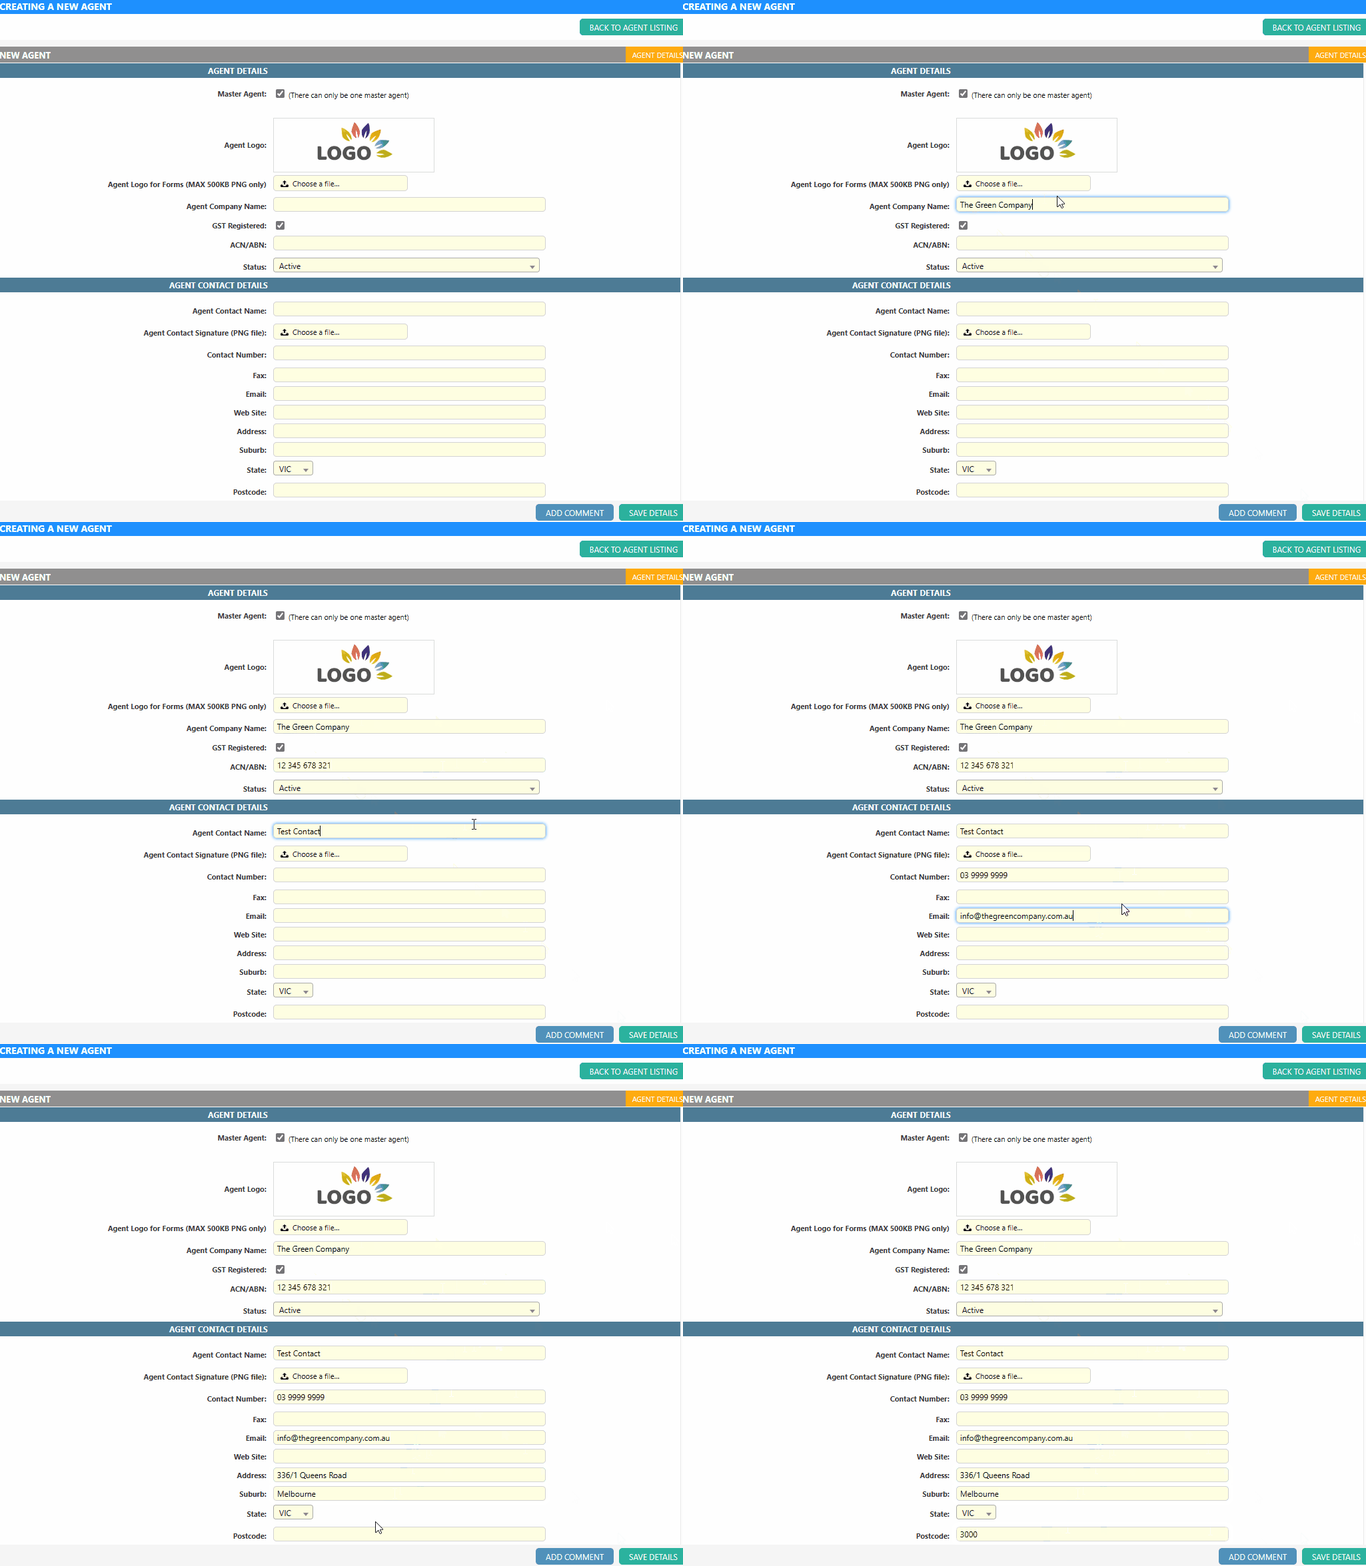
Open the Agent Management screen by clicking Admin Agents Agent Register.
-
Click “Add Agent”.
-
Enter the Agent’s information into the provided fields.
Refer to Agent Details Fields for more information about those fields. -
Click Save Details at the bottom-right of the page to complete creating the agent.
-
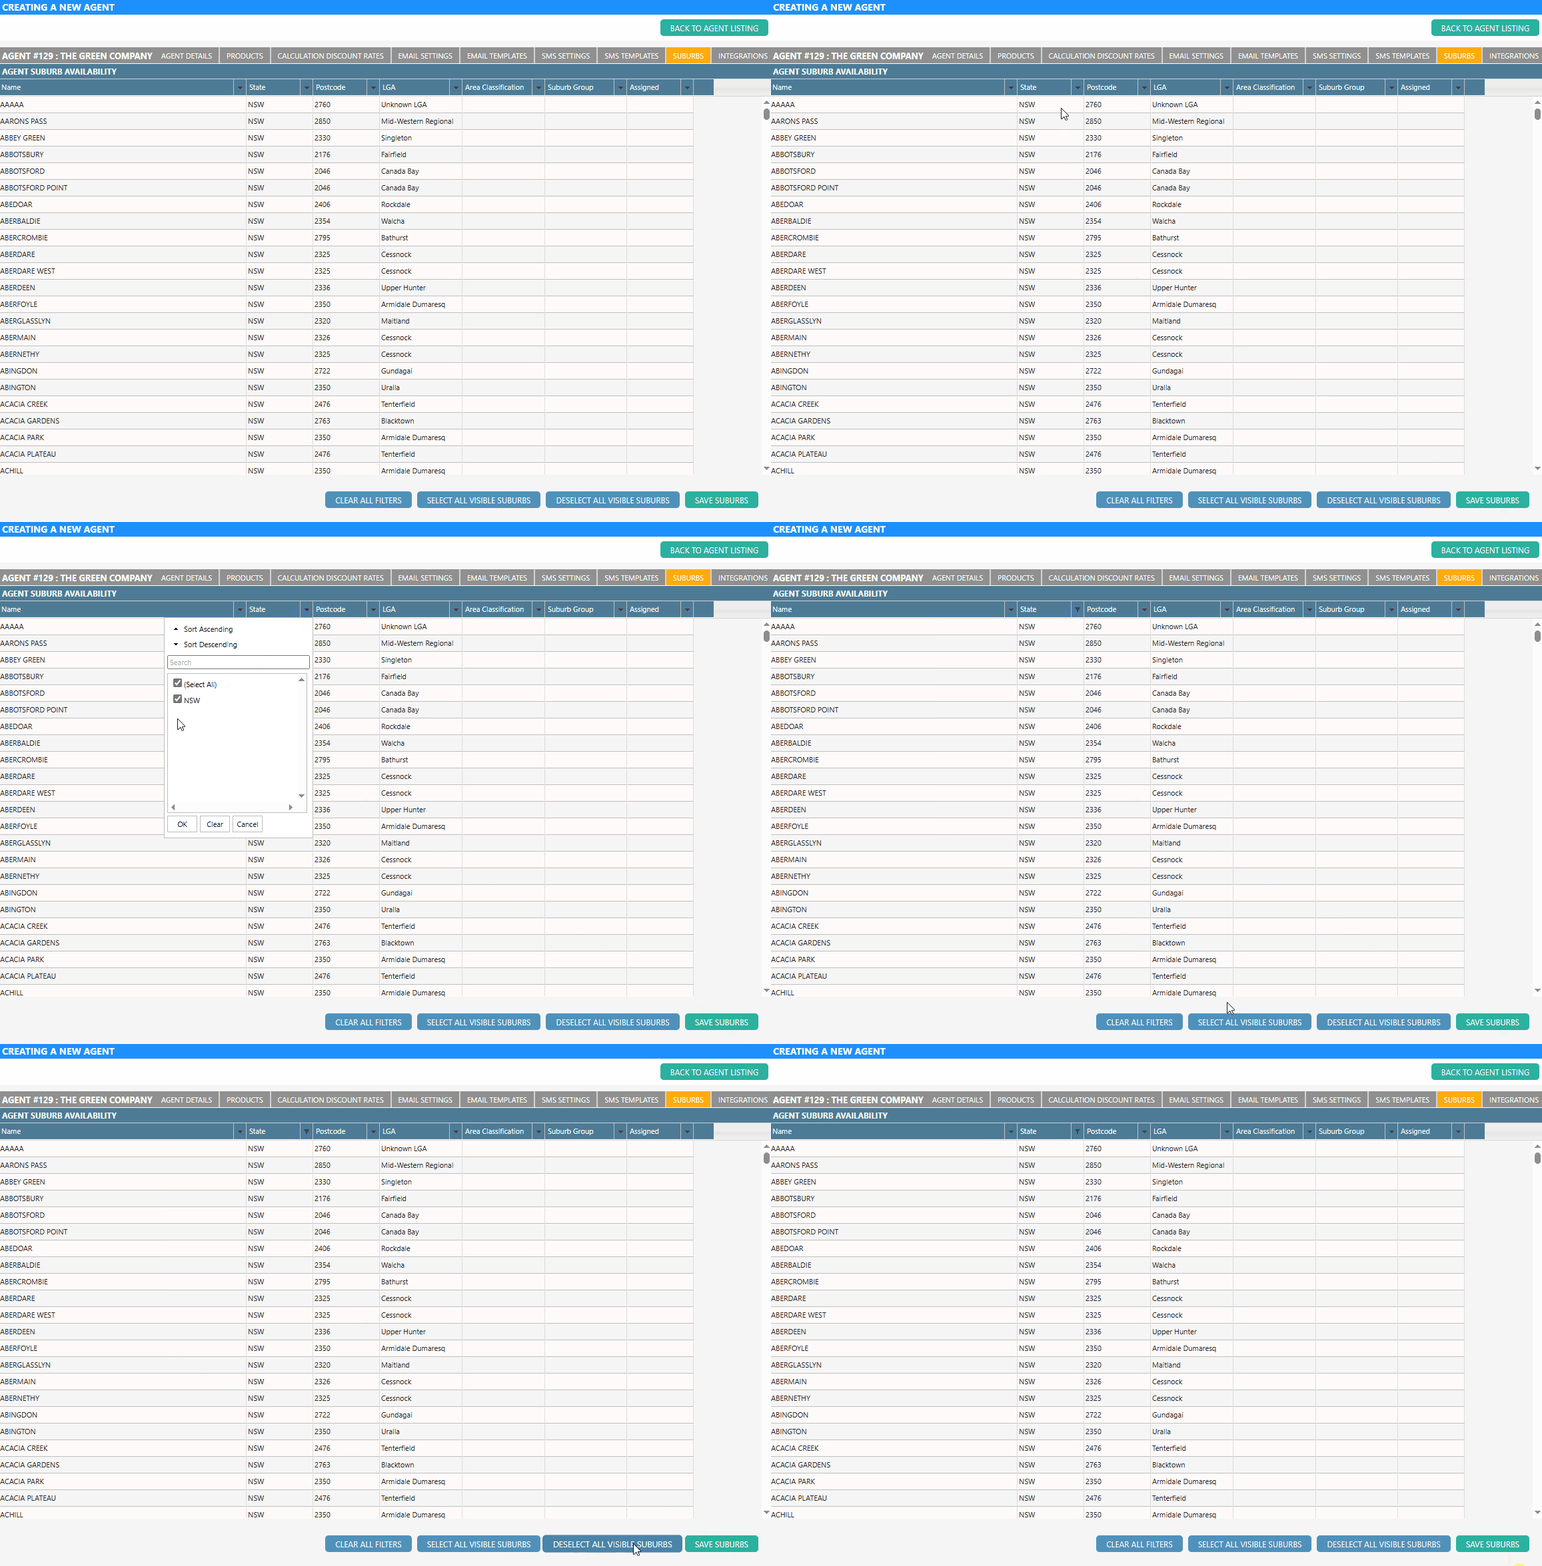
Assign the agent to suburbs through the “Suburbs” tab. Without any availability, you will not be able to assign this Agent’s Field Workers to any suburb.
- There are multiple buttons and filters provided in this screen to help users select the appropriate suburbs quickly.
- Using the state filter, click the arrow icon next to the state column.
- Select the appropriate state.
- The list will now be filtered to display suburbs within the selected state.
- Select the suburb that should be available for that agent or click “select all visible suburbs” if the agent is available for all suburbs within the selected state.
- Click Save Suburbs.
Agent Details Fields
The following table contains all of the required information to add a basic product.
| Property | Description |
|---|---|
| Agent Logo | The logo will be displayed on the Quotation and Invoice screen in Dataforce Runabout. In addition to that, the agent logo can be mapped into forms via form designer. Note: Logo must be at least 450 pixels wide and 150 pixels tall. |
| Alternate Header Image | An alternative logo to use in the Dataforce ASAP header bar for users who have this Agent set as their primary agent. Note: Logo must be at least 450 pixels wide and 150 pixels tall. |
| Field worker Invoices | To specify the type of invoice for the Field Workers who work under this agent. Field worker can be invoiced individually or together under one agent. |
| Invoice Method | Select Recipient Created Tax Invoice if you want to use Dataforce ASAP to create and send RCTI invoices for this agent and their Field Workers. |
| Account Name BSB Account Number |
Specify the bank account that will receive payments. |
| Payments Gateway Provider | The payment gateway provider used for receiving credit card payments. Before using this option you will need a payment gateway account with one of the supported payment providers. SecurePay, Bpoint, Eway or BPointDirect. Go here to find out how to setup a payment gateway. |
| Payment Gateway Username Payment Gateway Password |
You will need to enter your payment gateway account details to start receiving credit card payment in Dataforce ASAP. |
| Brochure | The brochure that will be included in customer emails. |
| Logo For Form | A high-resolution logo that can be mapped into a form through the form designer. |
| Agent Groups | The Agent Groups that this Agent belongs to. You can setup the Agent’s product access through their Agent Group. Agent Group will be useful if you have products that are available for more than one agent. |
| Client Access | The clients for whom this agent can create jobs for. |


