Overview
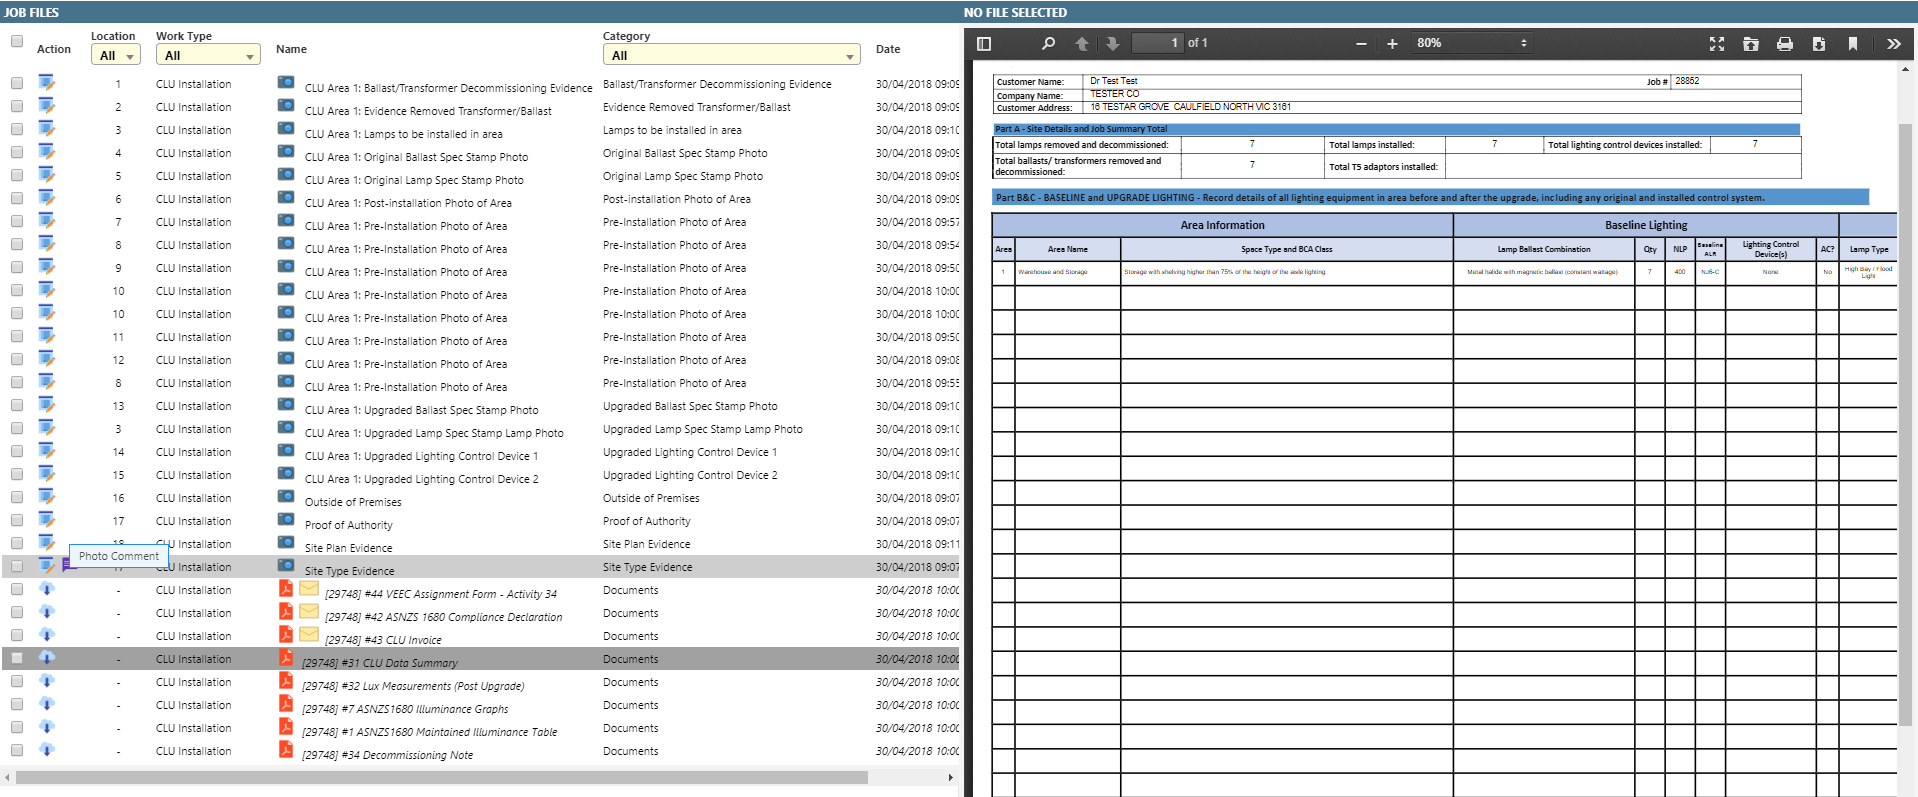
In Dataforce ASAP, all files associated with the appointments from a job are collated into one list which can be found under the Files tab (blue) for each job.
Job files can include:
- Images (Uploaded through Dataforce ASAP or Dataforce Runabout).
- Forms (Generated through Dataforce ASAP).
- Signatures (Captured through Dataforce Runabout).
- User uploaded files (Any file type, e.g. PDF, mp3, jpg).
- File packs.
Most files, including Dataforce ASAP generated forms, images and signatures can be viewed within the job files tab by selecting the file’s row.
Alternatively, files can be downloaded individually or in bulk.
Managing Job Files
Uploading Files
Files of any type can be uploaded to the Dataforce ASAP system.
To add a job file:
- Open the job.
-
Select the Files and Photos from the navigation menu.
-
Select Upload Files.
-
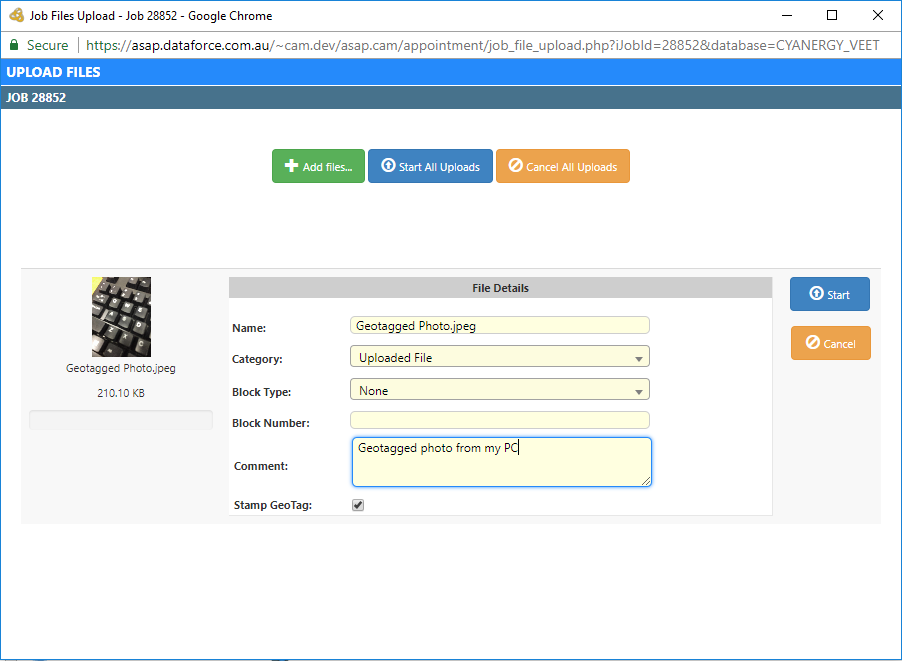
Add files by dragging them onto the window or selecting Add Files.
-
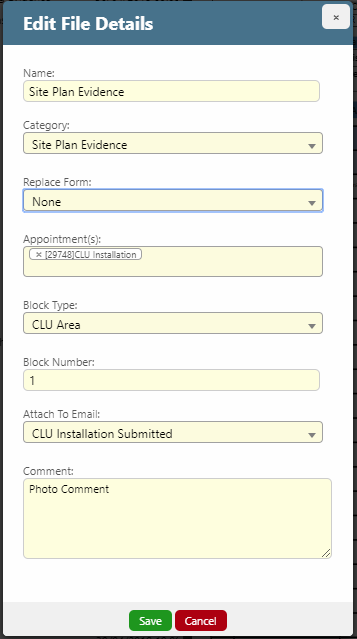
Update the file details (these details can be modified later).
Note: If uploading an image with geotag information, Dataforce ASAP will automatically stamp the following information at the top of the image:
• Address (retrieved through the image co-ordinate data).
• Latitude.
• Longitude.
• Datetime.
To prevent this process, deselect the Stamp GeoTag option. - Select Start All Uploads.
Images uploaded that use the JPG and PNG formats will be re-sized to reduce their download time. As of Dataforce ASAP version 12.1, these files can be sent down to Dataforce Runabout and inherited into image questions.
Downloading Files
Some files, such as forms, can be downloaded individually using the download icon (cloud icon in example below).
- If you’re attempting to download multiple files or if the icon is not available, select the checkbox for all files that should be downloaded.
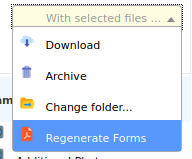
- Select the Download option from the ‘With Selected files’ dropdown, as shown below.
Download Emailed Forms
When a form is sent within an email, Dataforce ASAP will save each form into the email archive. Dataforce ASAP will display these archived forms with each line showing an email icon with a green tick and suffixed with the word (Emailed). When operators download or preview these forms, Dataforce ASAP will show the latest version in the archive.
These archived forms are grouped together and rendered on screen above the normal forms which are generated when the download button is clicked. To prevent confusion, if a form is shown in the archived section, it will not display again in the standard forms section and if an operator uploads a paper copy of the form, Dataforce ASAP will use this upload and ignore the email archive.
View earlier versions
An operator can review earlier versions in the email archive by:
- Clicking the line in the job files to preview.
- At the top preview section, click the dropdown to see previous versions by the date they were sent on.
- Use the mouse to select the form version to view.
Change Form to use previous version
- Click the line in job files to preview.
- At the top preview section, click the dropdown to see previous versions by the date they were sent on.
- Use the mouse to select the form version to view.
- If the form is not the latest, Dataforce ASAP prints the button shown in the screenshot above.
- Click the button Set As Active Form.
Force Refresh, Ignore the archive form
- Click the line in job files to preview.
- At the top preview section, click the dropdown and scroll to the top and select the option Regenerate Form from Current Data.
- Click the button Set As Active Form.
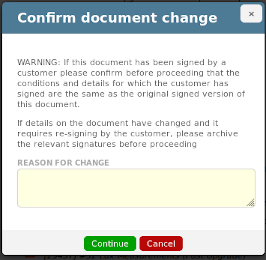
- Enter a reason as to why into this pop-up dialog.
- Click Continue.
Force Refresh for multiple forms
- Select one or more forms using the checkbox on each line.
- Select Regenerate Forms from the ‘With Selected files’ dropdown, as seen above.
- Complete the required comment from the model (it will not appear if none of the forms are in the archive).
Deleting Files
To delete a file(s):
-
Select the checkbox for all files to be deleted.
-
Select Archive from the ‘With Selected files’ dropdown.
Restoring Files
To retrieve a deleted file:
-
Select the show archived checkbox.
-
Select the checkbox for each file that must be restored.
-
Select Restore from the ‘With Selected files’ dropdown.
Change File Folders in Bulk.
To update multiple files’ folder settings:
-
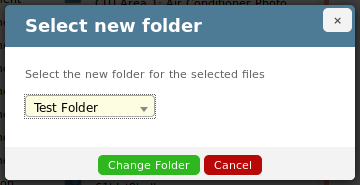
Select the checkbox for each file that must have the folder changed.

-
From the popup, select the new folder and click the Change Folder button to save.
Controlling the Modular Tabs
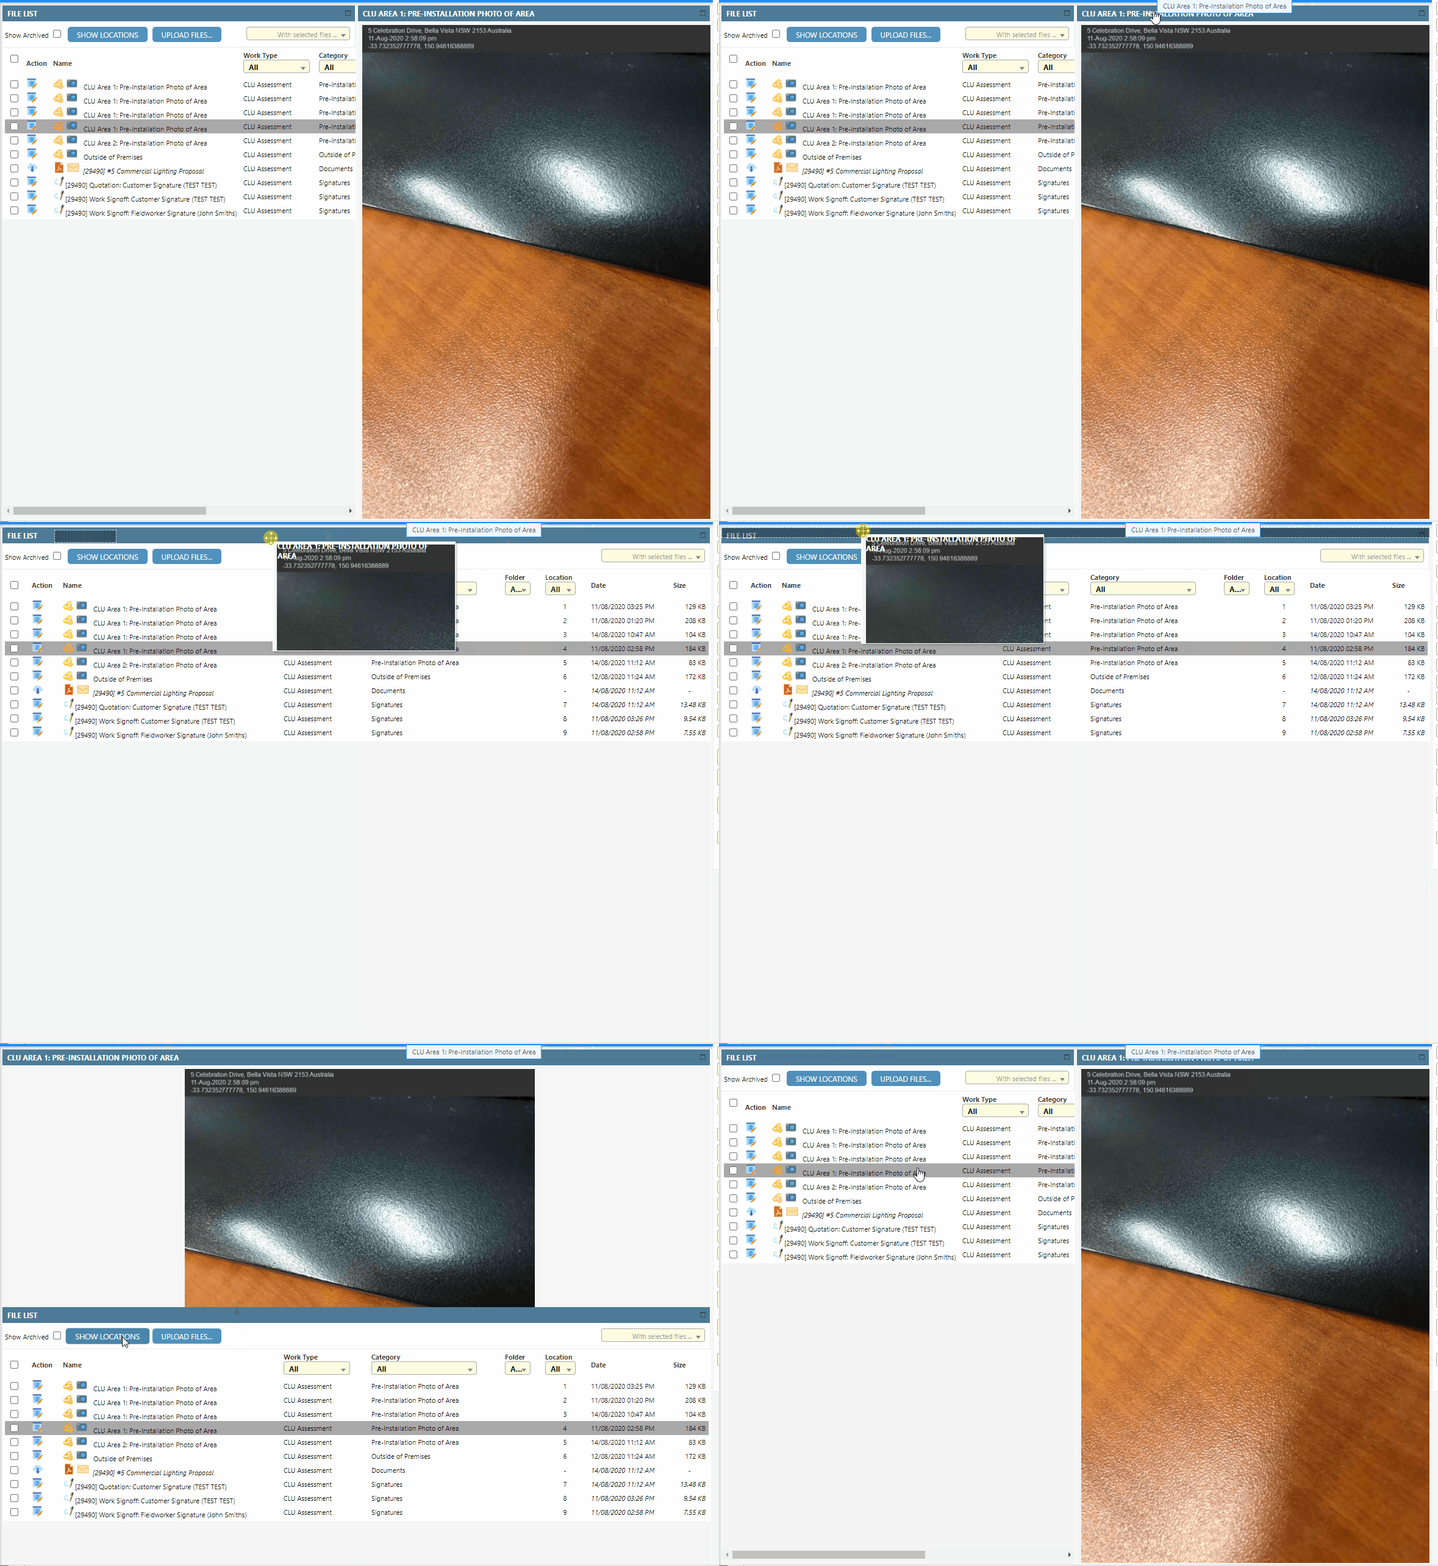
The preview and directory tab can be moved and adjusted according to your personal preference.
To control this, refer to the following gif below.
File Details
File details give Dataforce ASAP and users a method for categorizing and including required files for appointments.
For example, when an image is taken for an area through Dataforce Runabout, Dataforce ASAP assigns the image:
- The question’s file category
- The appointment
- The block type
- The block number
When uploading an image, if the file details are manually set to match that which Dataforce ASAP would normally assign, it will appear in the appointment’s questions.
The following details can be set for all job files, (excluding Dataforce ASAP generated forms) by selecting the Edit File Details icon (pen and paper icon in example below):
| Detail | Description |
|---|---|
| Name | A description of the file. |
| Category | The file category the file belongs to. |
| Folder | The file folder the file belongs to. |
| Replace Form | When selected, the file will override the Dataforce ASAP generated form for the selected appointment. |
| Folder | An extra method grouping for files. |
| Appointment(s) | Appointments within the job that should include the file. |
| Block Type | The question block (area) within the selected appointment in which the file belongs. |
| Block Number | The block number for the block type selected above. |
| Attach to Email | When selected, Dataforce ASAP will attach the file to the email type when sent. |
| Comment | A comment on the file, visible through the job file list. |
