Overview
Sales pipelines can be used to track the different stages your leads go through before they become a customer.
Dataforce ASAP allows you to create multiple sales pipelines, as well as multiple stages within each sales pipeline.
Sales Pipelines
Sales Pipelines can be created via the Sales Pipeline configuration screen by an administrator.
You can create as many Sales Pipelines as required.
You may chose to have a different Sales Pipelines for each of your customer types, or work types, or you may decide to use your Sales Pipelines as funnels by starting with a Pipeline with a broader customer scope before moving leads into more specific Pipelines.
The configuration of your Sales Pipelines is entirely up to you and specific to your businesses needs.
Sales Pipeline Stages
Sales Pipeline Stages are Stages within a Sales Pipeline and can be created via the Sales Pipeline Stages configuration screen by an administrator.
You can create as many Stages within a Sales Pipeline as required.
Sales Pipeline Stages can be colour coded, and sorted to ensure that leads follow a pre-determined workflow through the pipeline.
You may also mark a Sales Pipeline Stage as ‘Sale Won’ which indicates that leads moved to this stage are considered ‘Won’ or ‘Closed’. ie, the lead is now a Customer and you wish to created and schedule an appointment. Moving leads/jobs into a once of these stages will trigger a prompt asking the operator if they wish to create an appointment.
Adding a job to a sales pipeline
In order to manage leads/jobs using Sales Pipelines, you will first need to create the job and add it to a Sales Pipeline.
There are multiple ways to add a job to a Sales Pipeline.
During job creation
During job creation, after entering customer details and answering job questions, you will be presented with a quotation for the job and given the option of either creating an appointment, or creating the job only. If ‘Job only’ is selected, you will then be given the option of selected a Sales Pipeline Stage for the job.

After job creation (single job)
For existing jobs, the Sales Pipeline Stage can be changed in two ways
- Via the Sales Pipeline management screen
- Within the Job Actions screen
- Open the job
- Click on ‘Job Actions’ in the side navigation menu
- Click on ‘Change Sales Pipeline Stage’
- Select the new Sales Pipeline stage
- Click ‘Confirm’
After job creation (multiple jobs)
You can add multiple jobs to a Sales Pipeline, or change the Sales Pipeline of multiple jobs at once by using the Bulk Action “Change Sales Pipeline Stage”
To perform a bulk update on Sales Pipeline stages
- In advanced search, select ‘Show Sales Leads’ from the select first dropdown list immediately under the ‘Advanced Search’ title
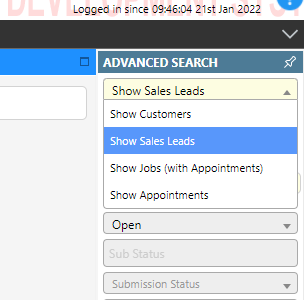
- In the ‘For bulk action’ field select ‘Change Sales Pipeline Stage’
- Apply additional filter options to find the jobs you wish to update as required
- Click ‘Search’
- Jobs without appointments that match your search criteria will be listed
- Select any jobs that you wish to change the Sales Pipeline for by holding the CTRL key on your keyboard and left-clicking the jobs

- Click ‘Perform bulk update - Change Sales Pipeline Stage’
- You will be presented with a dialog where you can select a new Sales Pipeline Stage
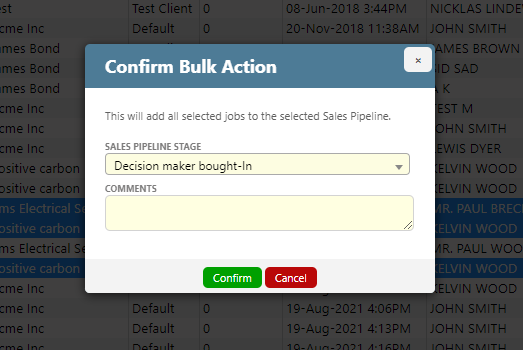
- Select the required Sales Pipeline Stage, enter a comment and click ‘Confirm’
Managing your leads using Sales Pipelines
The sales pipeline management screen allows you to move jobs between pipeline stages by dragging and dropping jobs from one pipeline stage to another.
To open the Sales Pipeline management screen:
- Click ‘Sales Pipelines’ on the main menu
-
Select the Sales Pipeline you wish to view from the Sales Pipeline screen
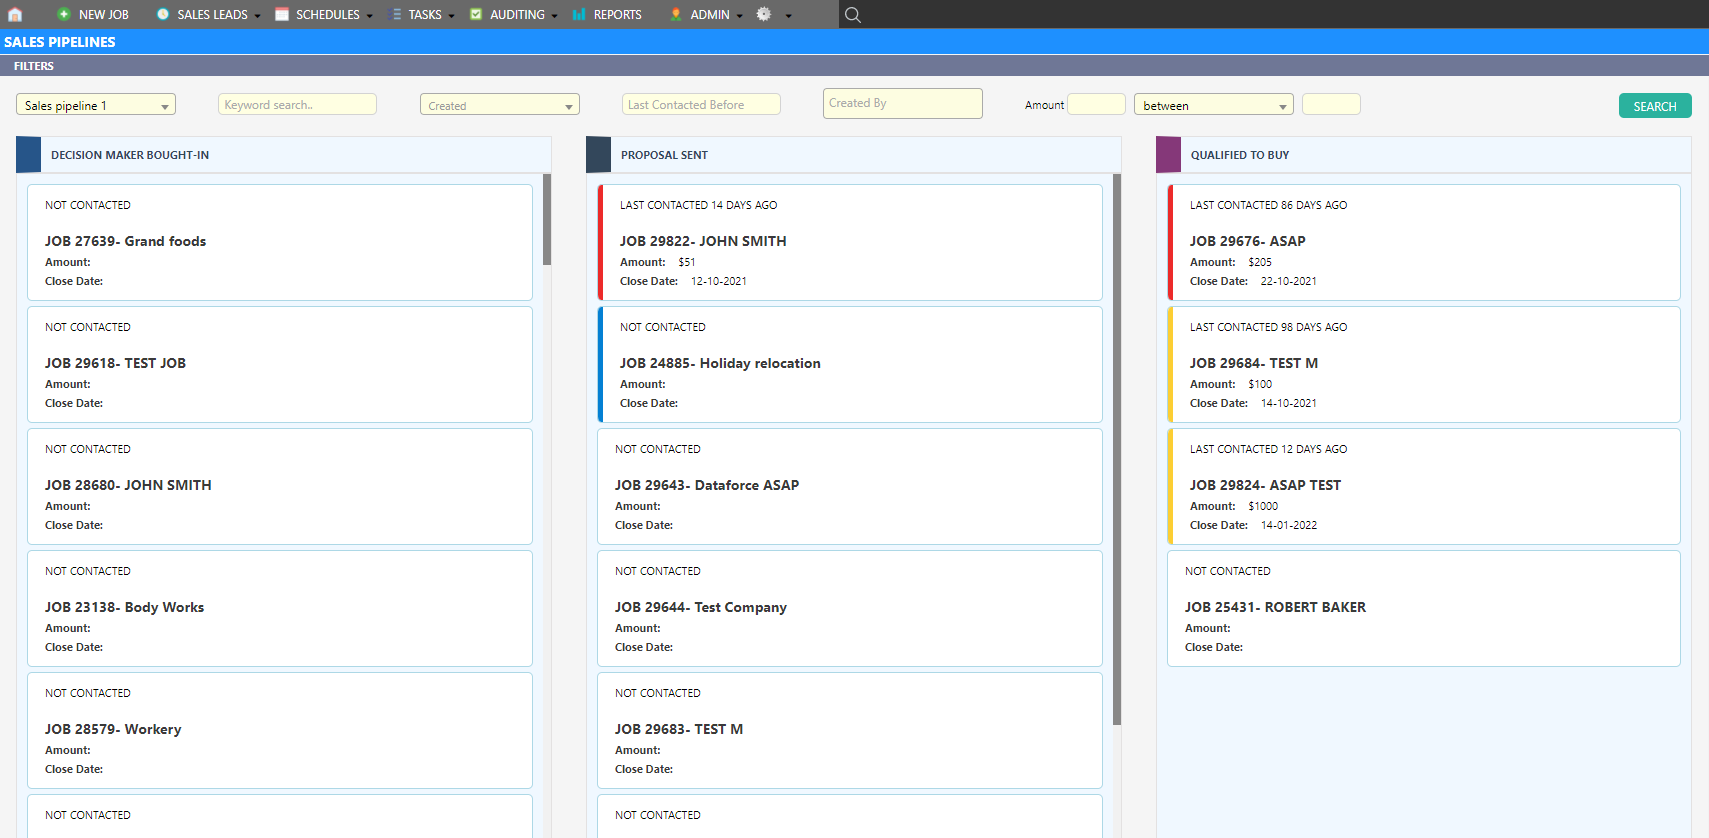
The Sales Pipeline management screen is used to track and manage the progress of Sales Leads. All jobs in a Sales Pipeline will be listed in a column corresponding to their Sales Pipeline Stage.
You can now move jobs between stages by left-clicking and dragging & dropping the job to the new stage
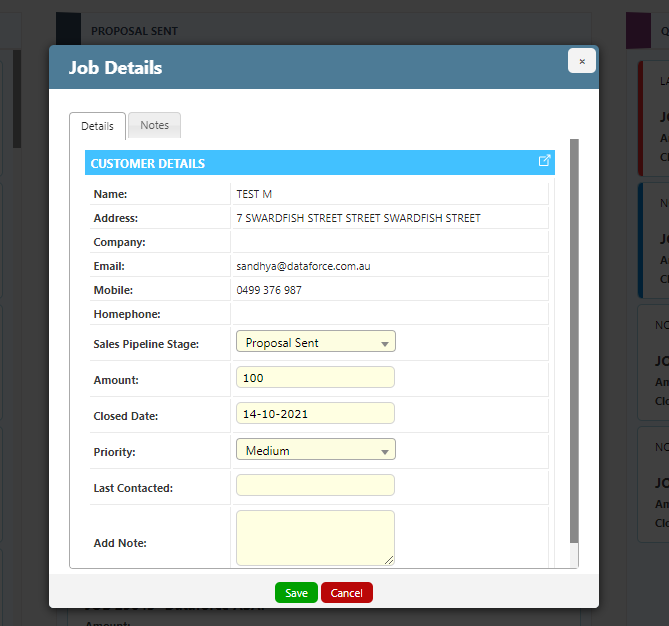
Left-clicking on a job will open the Job details view where you can:
- Add notes
- Change the closed date of the sale
- Enter the date you last contacted the customer
- Enter an estimated amount for the job
There are also various filters available for filtering the jobs that appear in the Sales Pipeline.
Moving a job to a different Sales Pipeline
If you need to move a job to a different pipeline, rather than just changing the stage within a pipeline, you can do the following:
- Click on the job to bring up the details screen
- Select the new pipeline and stage from the ‘Sales Pipeline Stage’ dropdown list
-
Click ‘Save’