The following guide provide suggestions on creating a User Account for your Aggregator Partners to allow them to gather what they need to complete a submission.
Please first read over our other Account setup pages if this your first time creating a User Account.
ASAP limits Access with rules for the Job Agent or Job Client.
Agents are your third party contractors or lead generators and Clients are your Aggregation/Other Partners.
If your not using Clients to manage Aggregator relationships please reach out to ASAP Support for help on setting up Clients.
Are Aggregators Clients?
To check open Client Register.
- Click Admin menu button.
- Select Clients from the dropdown.
- In sub-menu select Client Register.
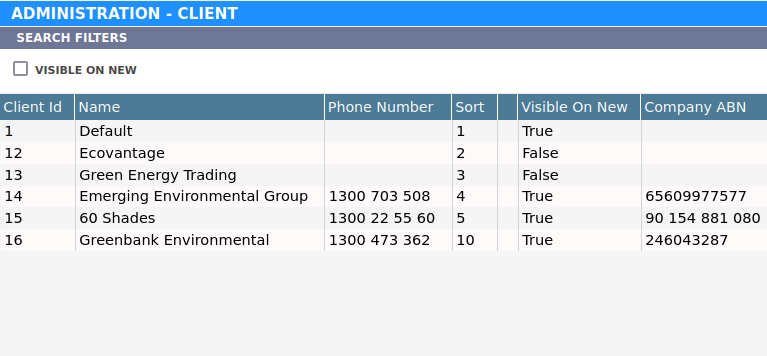
Clients will be named after various Certificate Aggregators if none are in your Register then you may be using a simpler method of replacing the defaults assignment forms with the Aggregators custom Assignment forms.
To check if this what your been doing.
- Open Settings(Cog Wheel Icon) in Menu.
- Select Forms from the dropdown.
- In the sub-menu select Form Types

- If you see names on assignment forms like ‘STC Form - Hot Water - Greenbank’ or ‘STC Form - Hot Water - GreenBot’ in the Job Files Tab
- Choose a form from the grid to view settings bottom
- Select Require Requirements tab

- If this form is linked to the Default Client (like shown above) your using Aggregators forms in place of default forms.
This means that your not tracking which partner owns a Job and therefore we can’t have access rules and need to provide them same access as your operators are using.
Selecting A User Role with a Restriction
If you’re using Clients to track a Jobs Aggregator then a Client restriction can be used to limit the Jobs shown.
This is done through the User Role it will need Access All Agents but Not Access All Clients like the example below.

To view your roles read over the help page User Roles.
Your instance may have an existing role it will have a title like ACP User Access Control By Client or Aggregation Role before you use it please verify it has the rule settings as shown above.
Which Permissions on a Role?
Your partners will need to create a Submission file, review Appointments/Desktop Audits and download Job Assets there fore you will want to provide them the following permissions, if their is an existing role please check it has the following:
Select all permission options under the Groups:
- Datafiles & Submissions.
- Auditing.
Select limited permissions under the Groups:
- Jobs
- Appointments
For example permissions Under Appointment:
- View
- Updated Customer
- Appointment Comments Summary.
- Certificate Submission Status
- View Appointment Questions
For example permissions Under Job:
- View
- Quote/Invoice
- View Calculations
- View Files
- View Job File Packs
- Emails
- Transaction and View Transactions
- View Questions
Set User with the Role
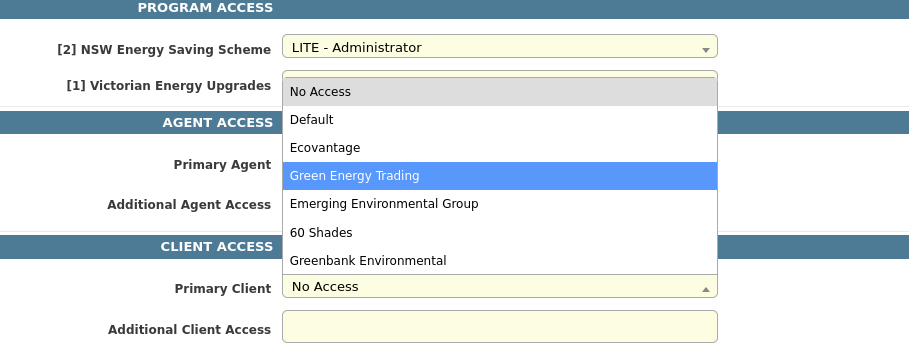
When creating the Aggregators Users set the role Under Program Access as shown below

The example above we have a role called ‘Aggregation Role’ and we gave the user access to VEU Program your next step is to set which Client they have access too inside the Program.
Save the User and open the ESS/VEU/RET Program then do the following:
- Open a Program ASAP Start Button.
- Open Admin > Access Control > Users.
- Search for user in the grid and double click the row to edit.
- Navigate to Client Access section and set the Client to the Aggregator.
Tips
We recommend that you create a Test account with your details first and login and verify that when an Appointment Search is run it returns Jobs assigned to their Client and not any others.
Also Navigate through ASAP Appointments screens to ensure they can review question/audits/assets as well checking they can generate a Submission File.
You may change the accounts User Details to match ACP and send them the login credentials.
If you skip the testing step above please keep in mind that when an Account is created we send a Welcome Email (with password), you may want to create the Account with your Email first and then update it later with the ACP’s email.
This ensure they won’t get the login details until you provided them.