General Appointment/Job Searches
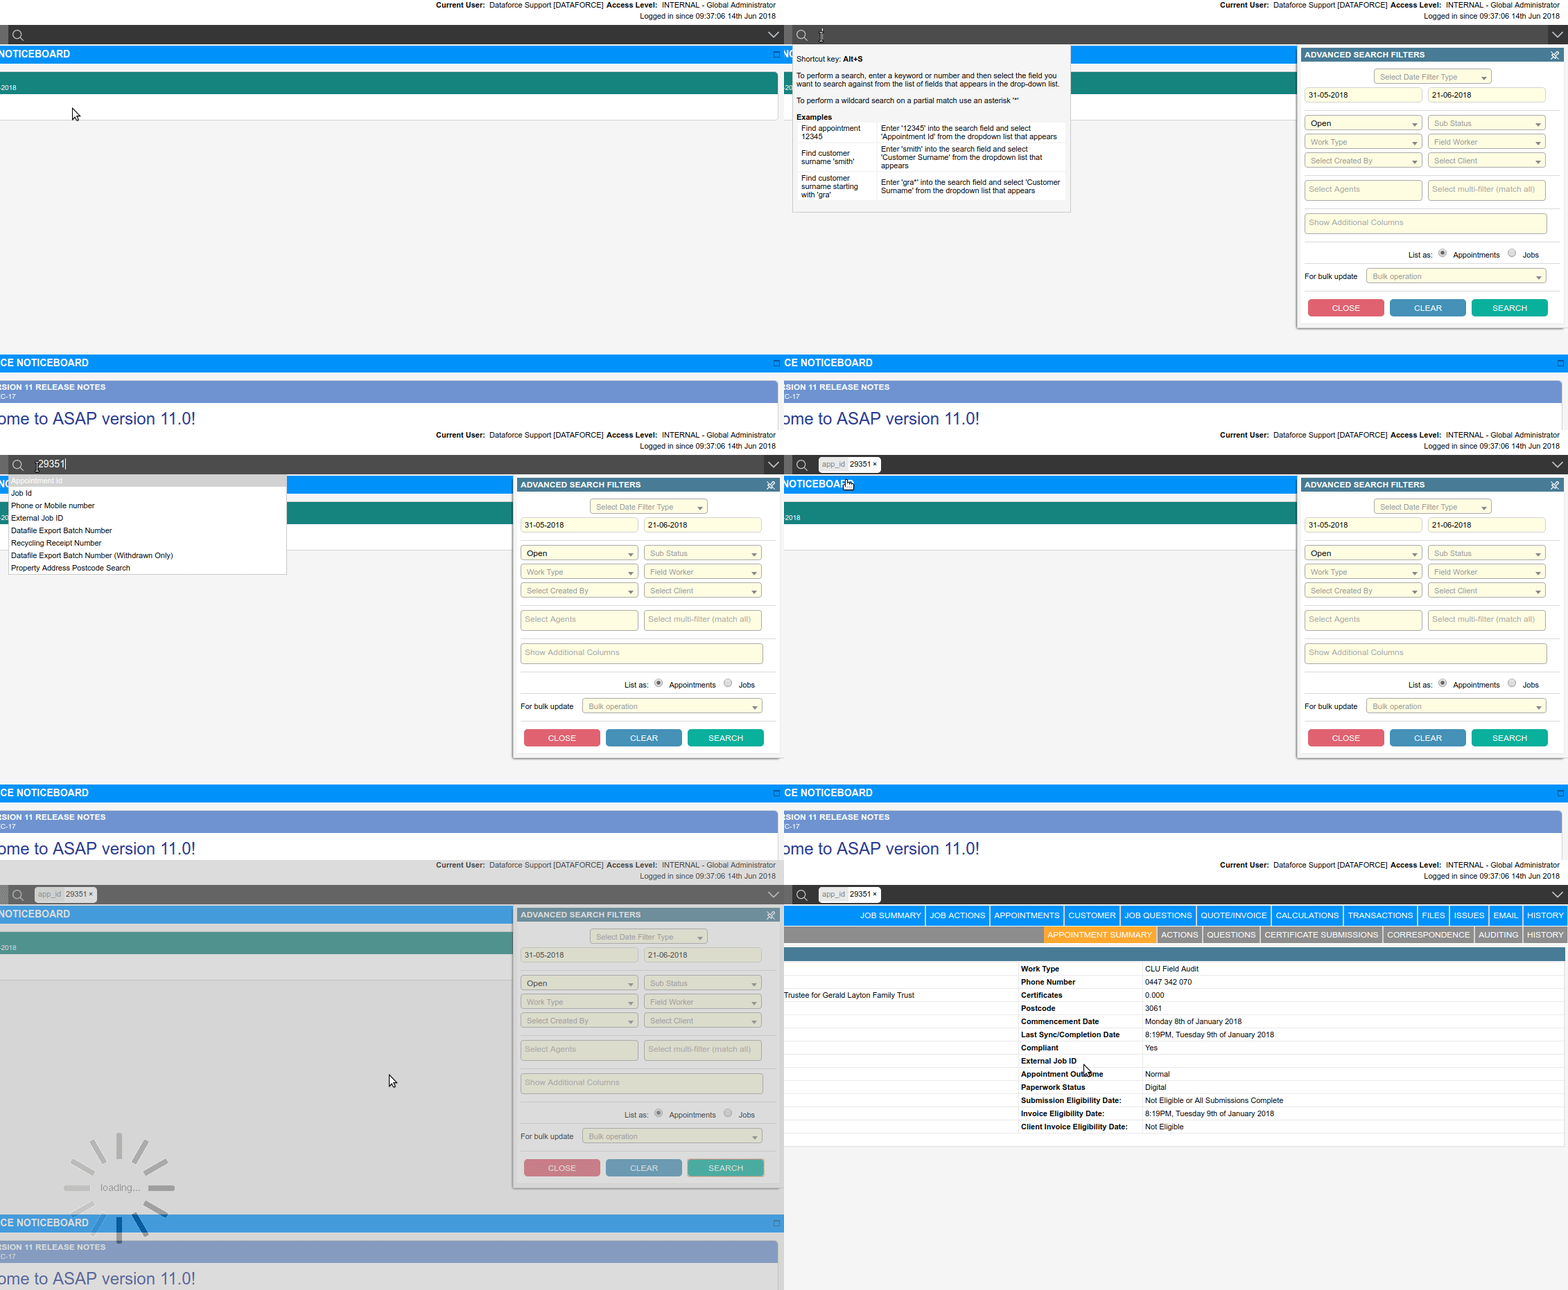
Search for Appointment using an Appointment ID
- Click the search bar and enter the appointment number.
- Select the appointment ID from the dropdown.
- Press the enter key or click the search button in the Advanced Search Filters dialog.
- You will be taken to the Appointment Summary tab if an appointment is found.
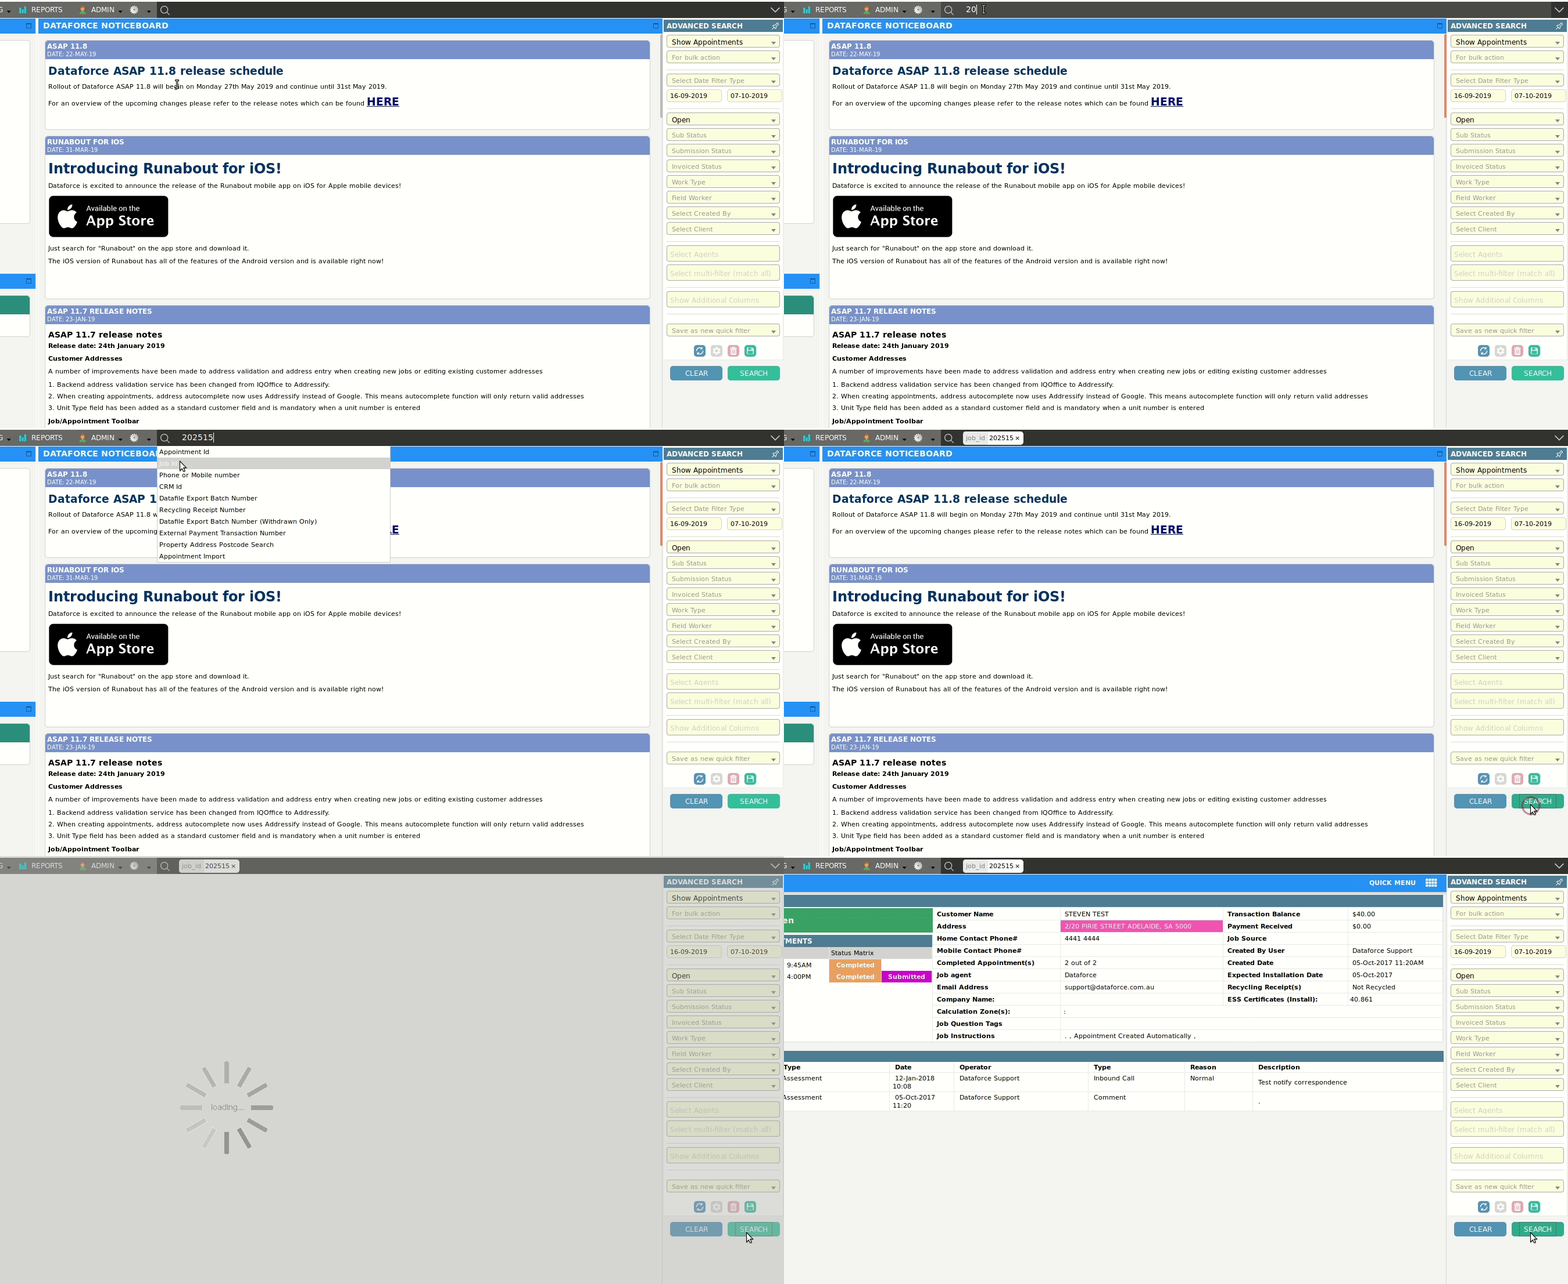
Search for Appointment using a Job ID
- Click the search bar and enter the job number.
- Select the job ID from the dropdown.
- Use the enter key or click the search button in the Advanced Search Filters dialog.
- You will be taken to the Job Summary tab if an appointment is found.
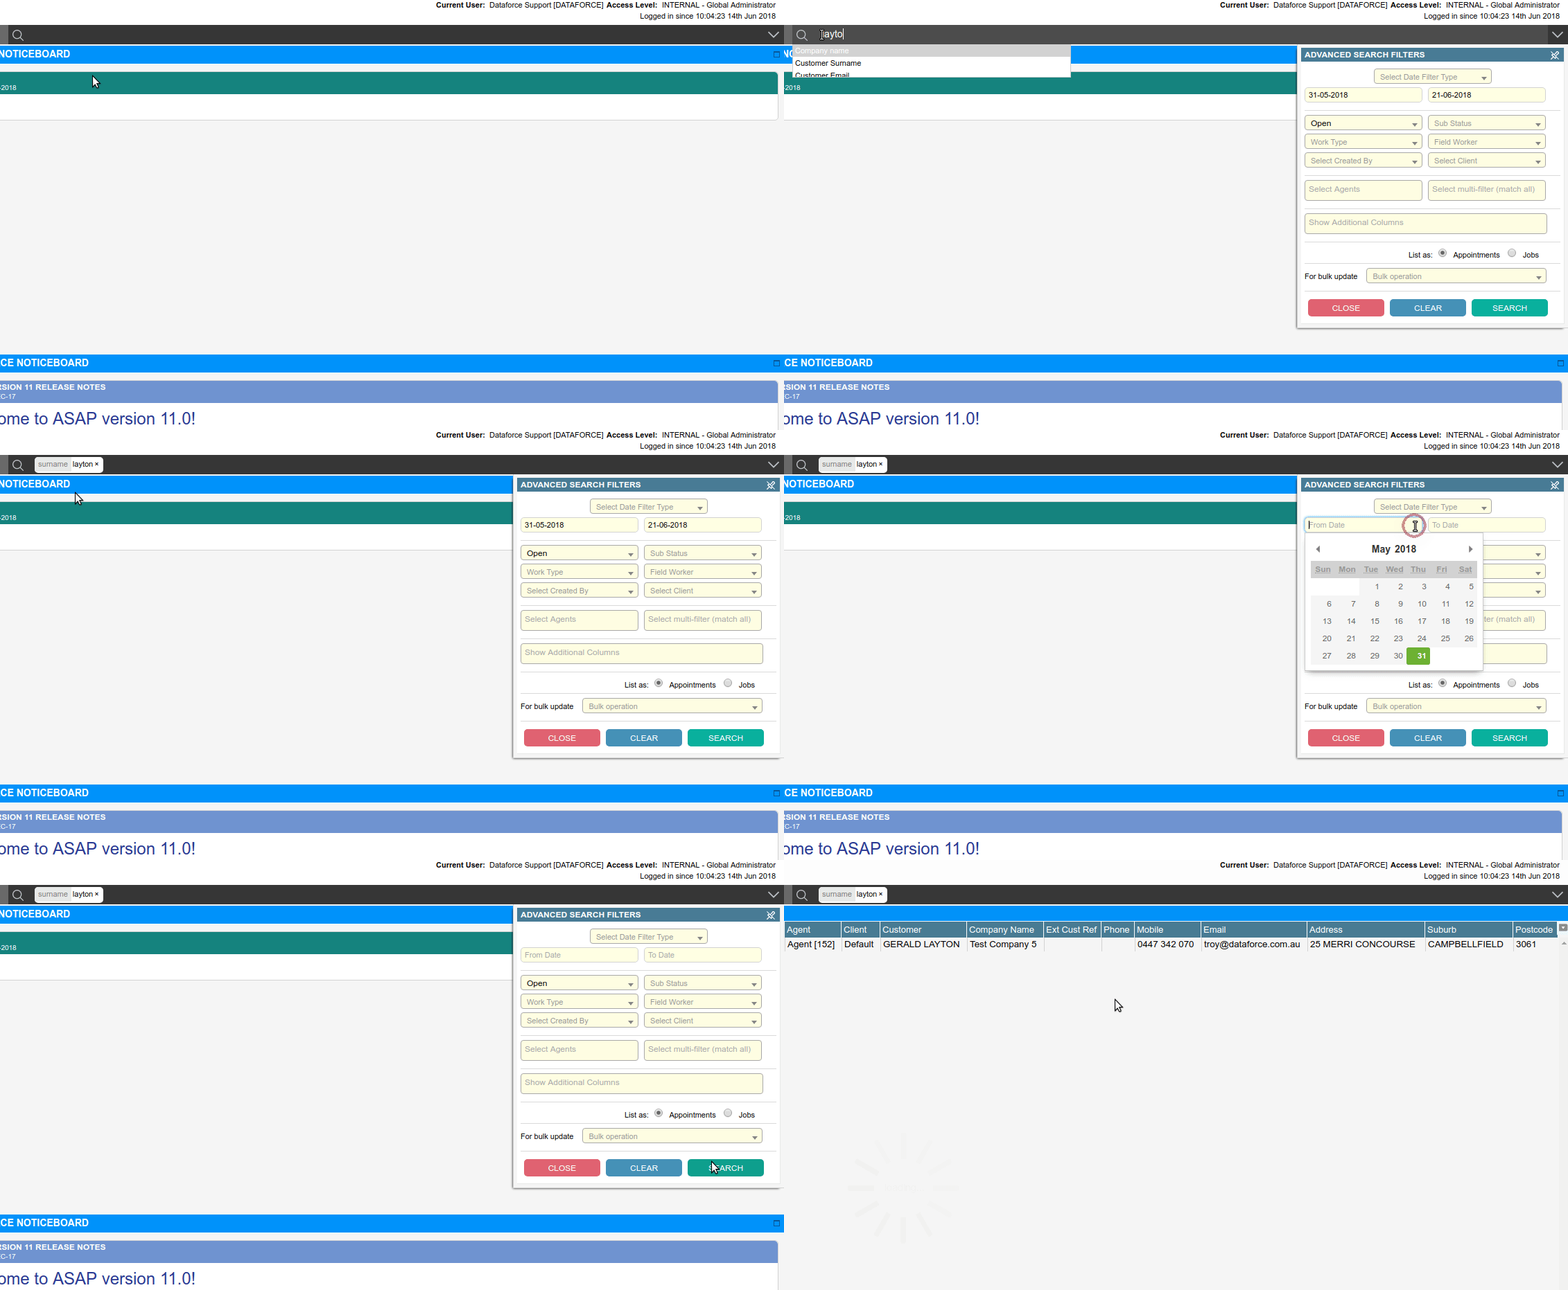
Search By Customer Surname
- Click the search bar and enter the customer’s surname.
- Select customer surname from the dropdown.
- Clear the dates from the Advanced Search Filters dialog.
- Use the enter key or click the search button in the Advanced Search Filters dialog.
- You will see a list of appointments load into the grid below, if matches were found.
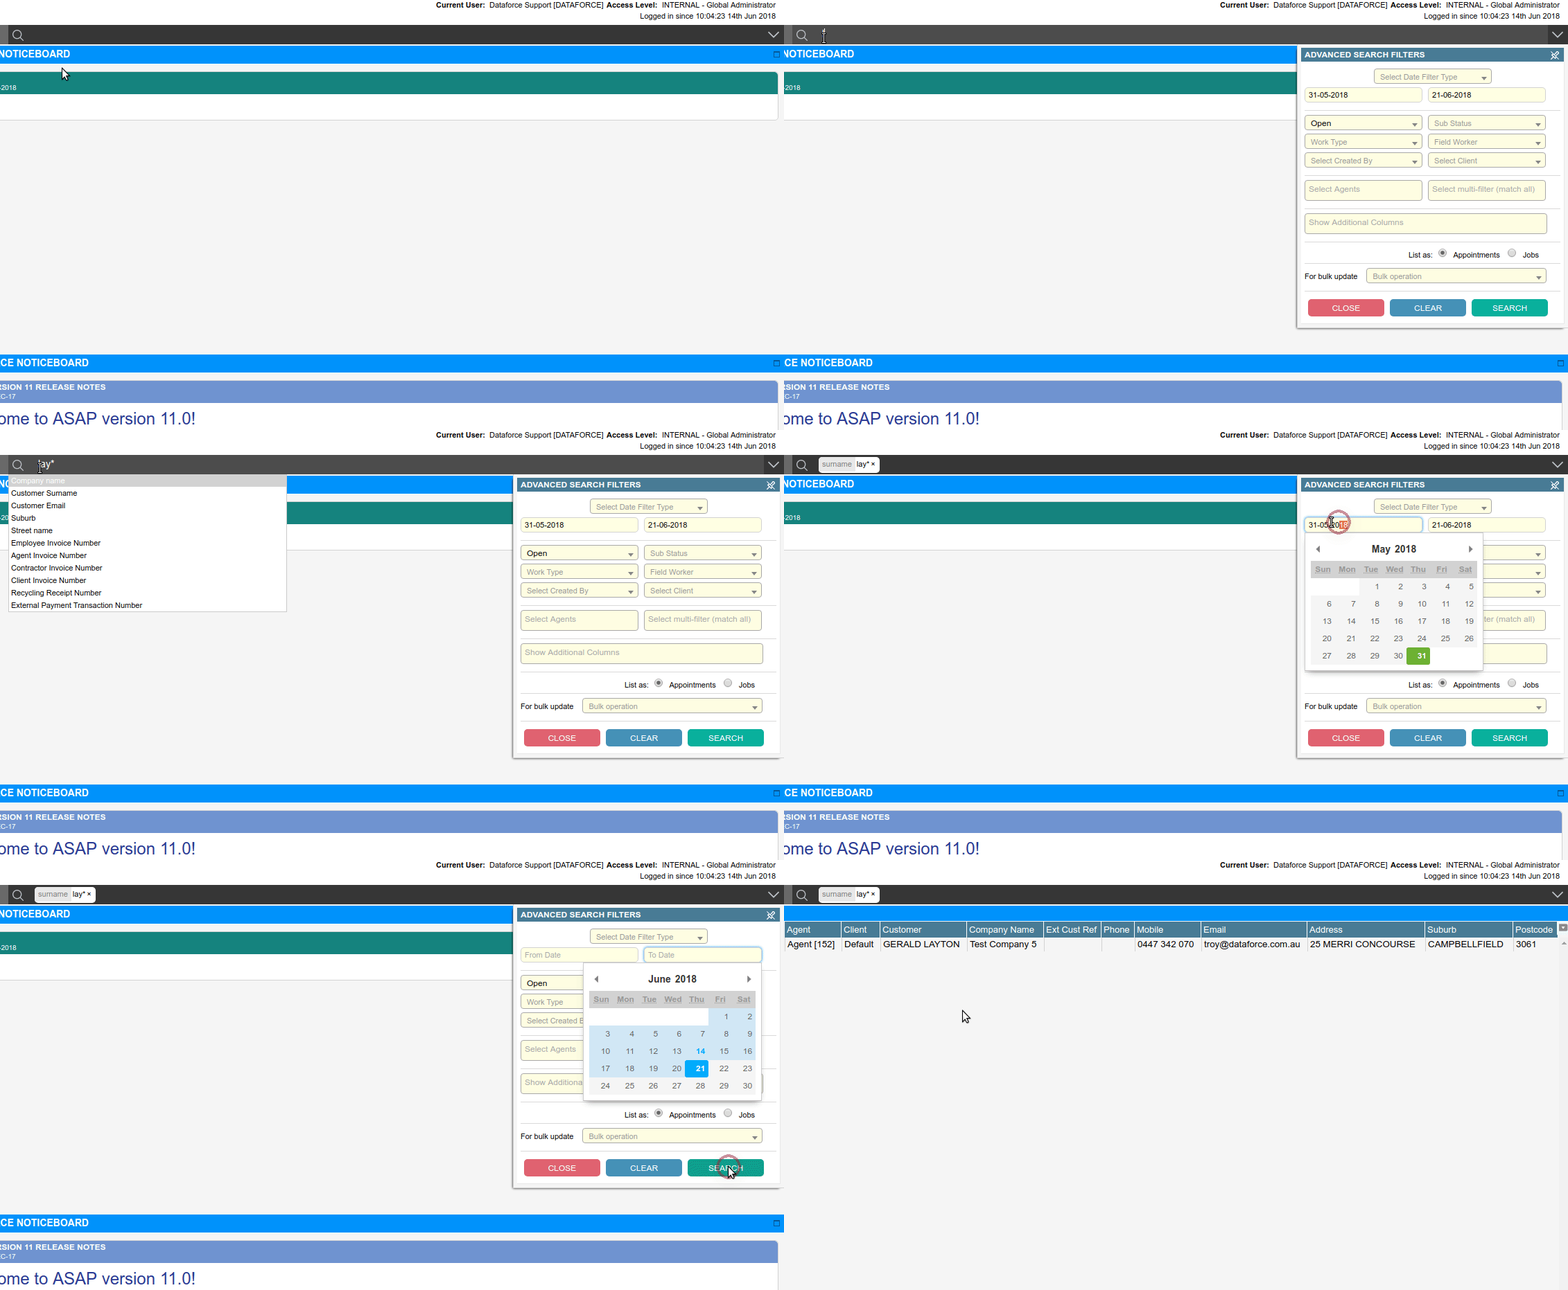
Search By Partial Customer Surname Name
- Click the search bar and enter the customer’s surname and append with a wild card character ‘*’ (asterisk).
- Select customer surname from the dropdown.
- Clear the dates from the Advanced Search Filters dialog.
- Use the enter key or click the search button in the Advanced Search Filters dialog.
- You will see a list of appointments load into the grid below, if matches were found.
Search By Company Name
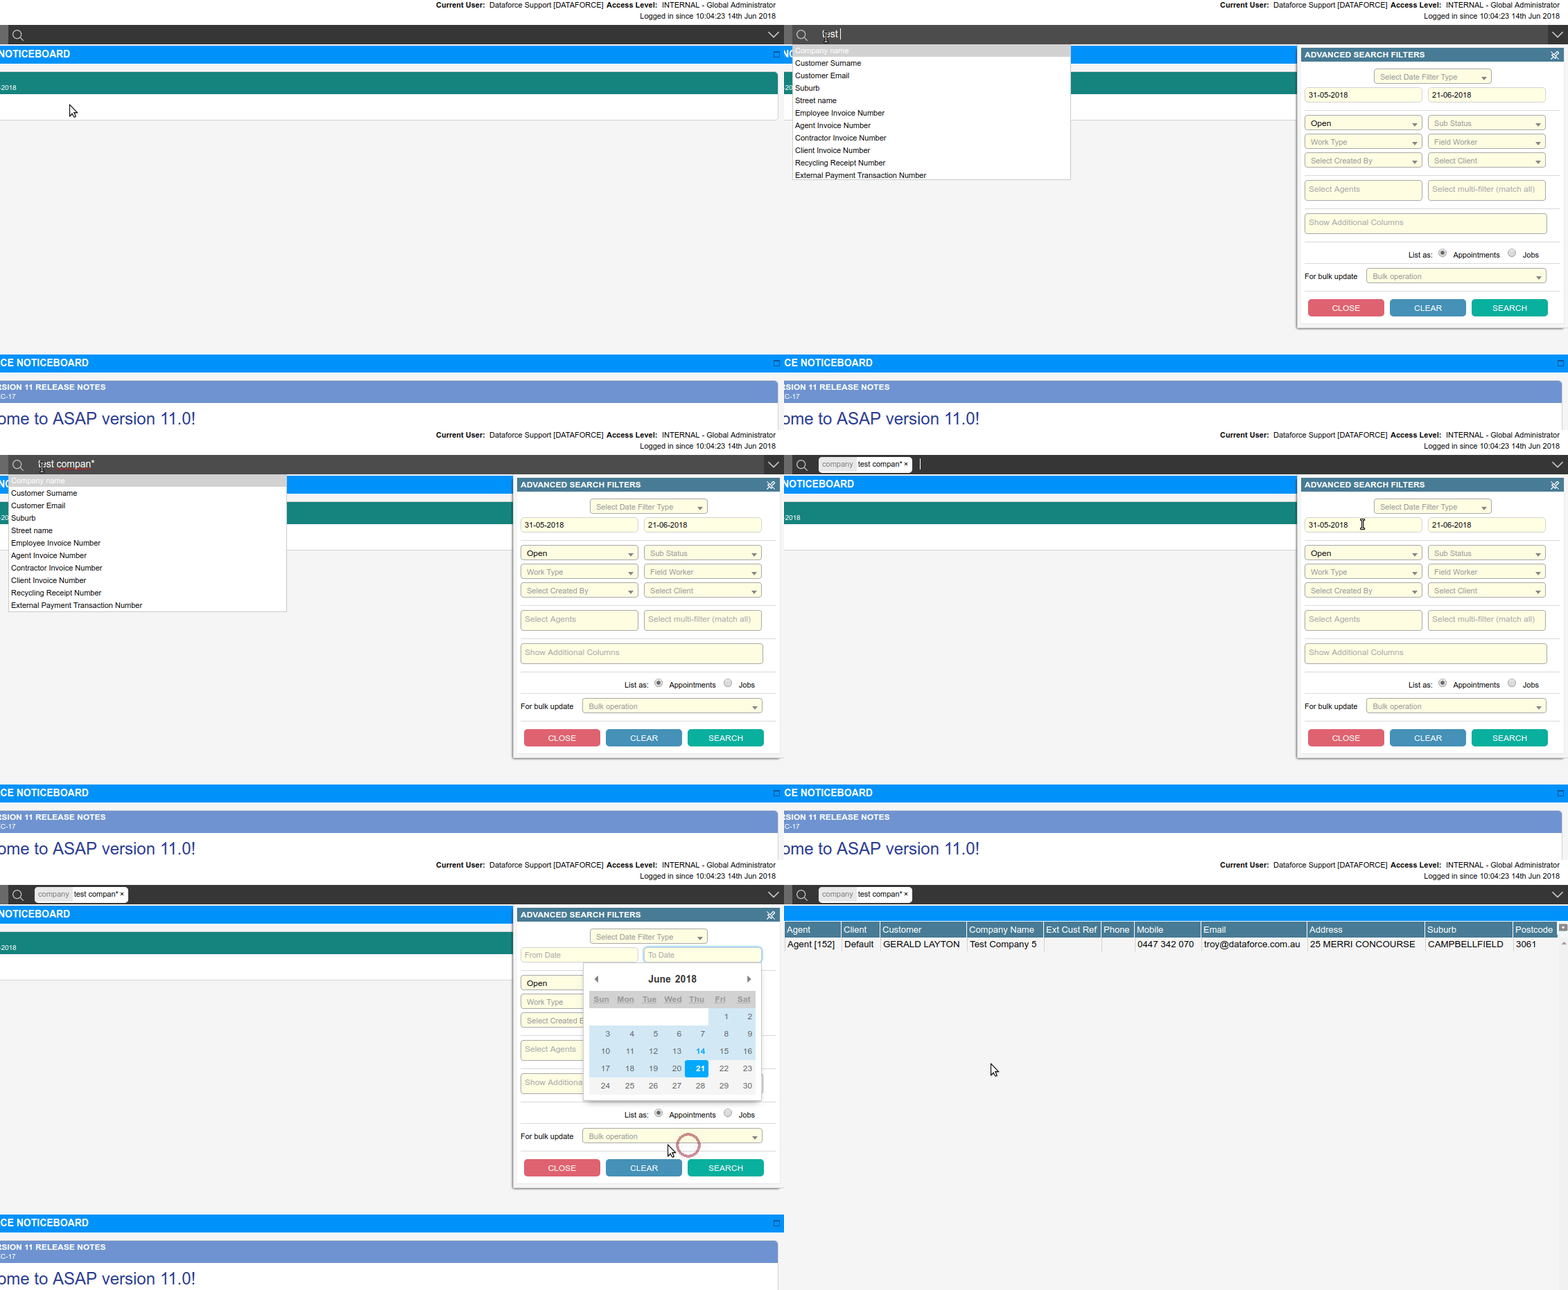
- Click the search bar and enter the company name (append with a wild card character ‘*’ if partial search).
- Select company name from the dropdown.
- Clear the dates from the Advanced Search Filters dialog.
- Use the enter key or click the search button, in the Advanced Search Filters dialog.
- You will see a list of appointments load into the grid below, if matches were found.
Search By Postcode
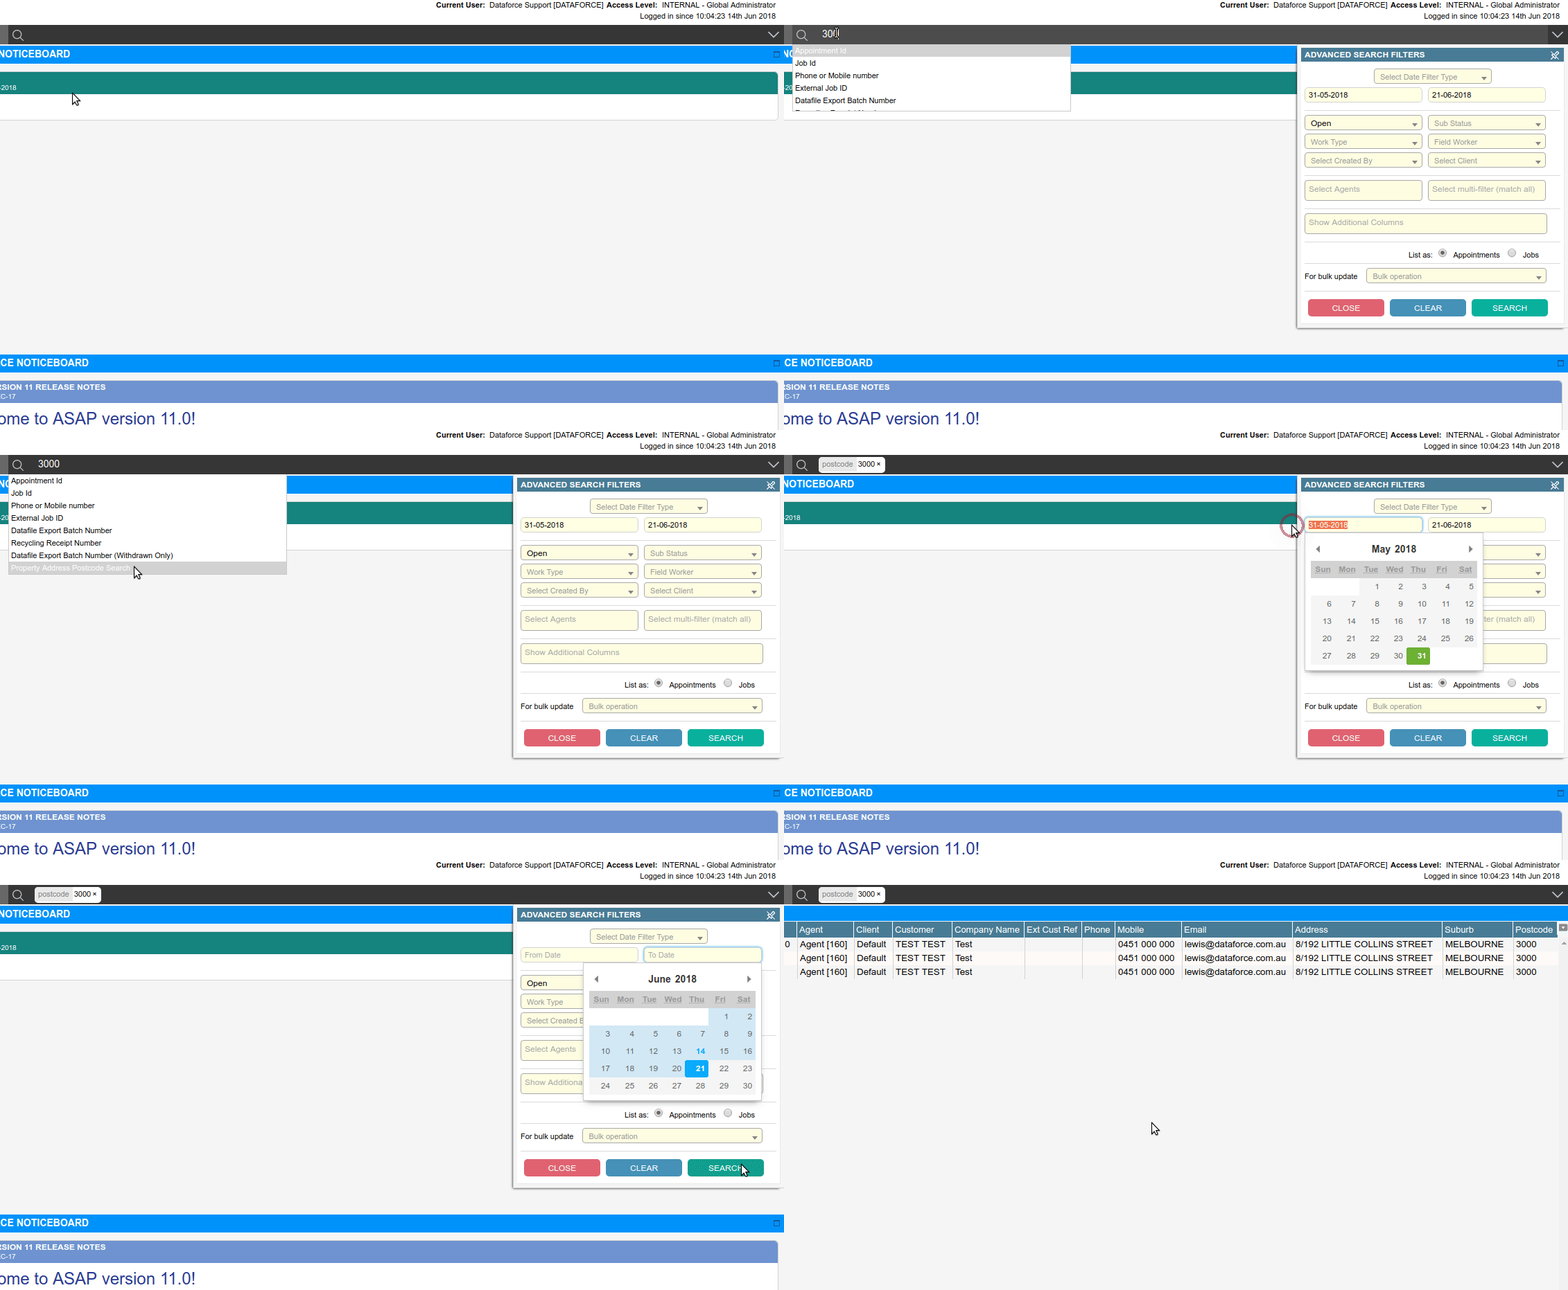
- Click the search bar and enter the postcode.
- Select property address postcode search from the dropdown.
- Clear the dates from the Advanced Search Filters dialog.
- Use the enter key or click the search button in the Advanced Search Filters dialog.
- You will see a list of appointments load into the grid below, if matches were found.
Search by Appointments by a Field worker
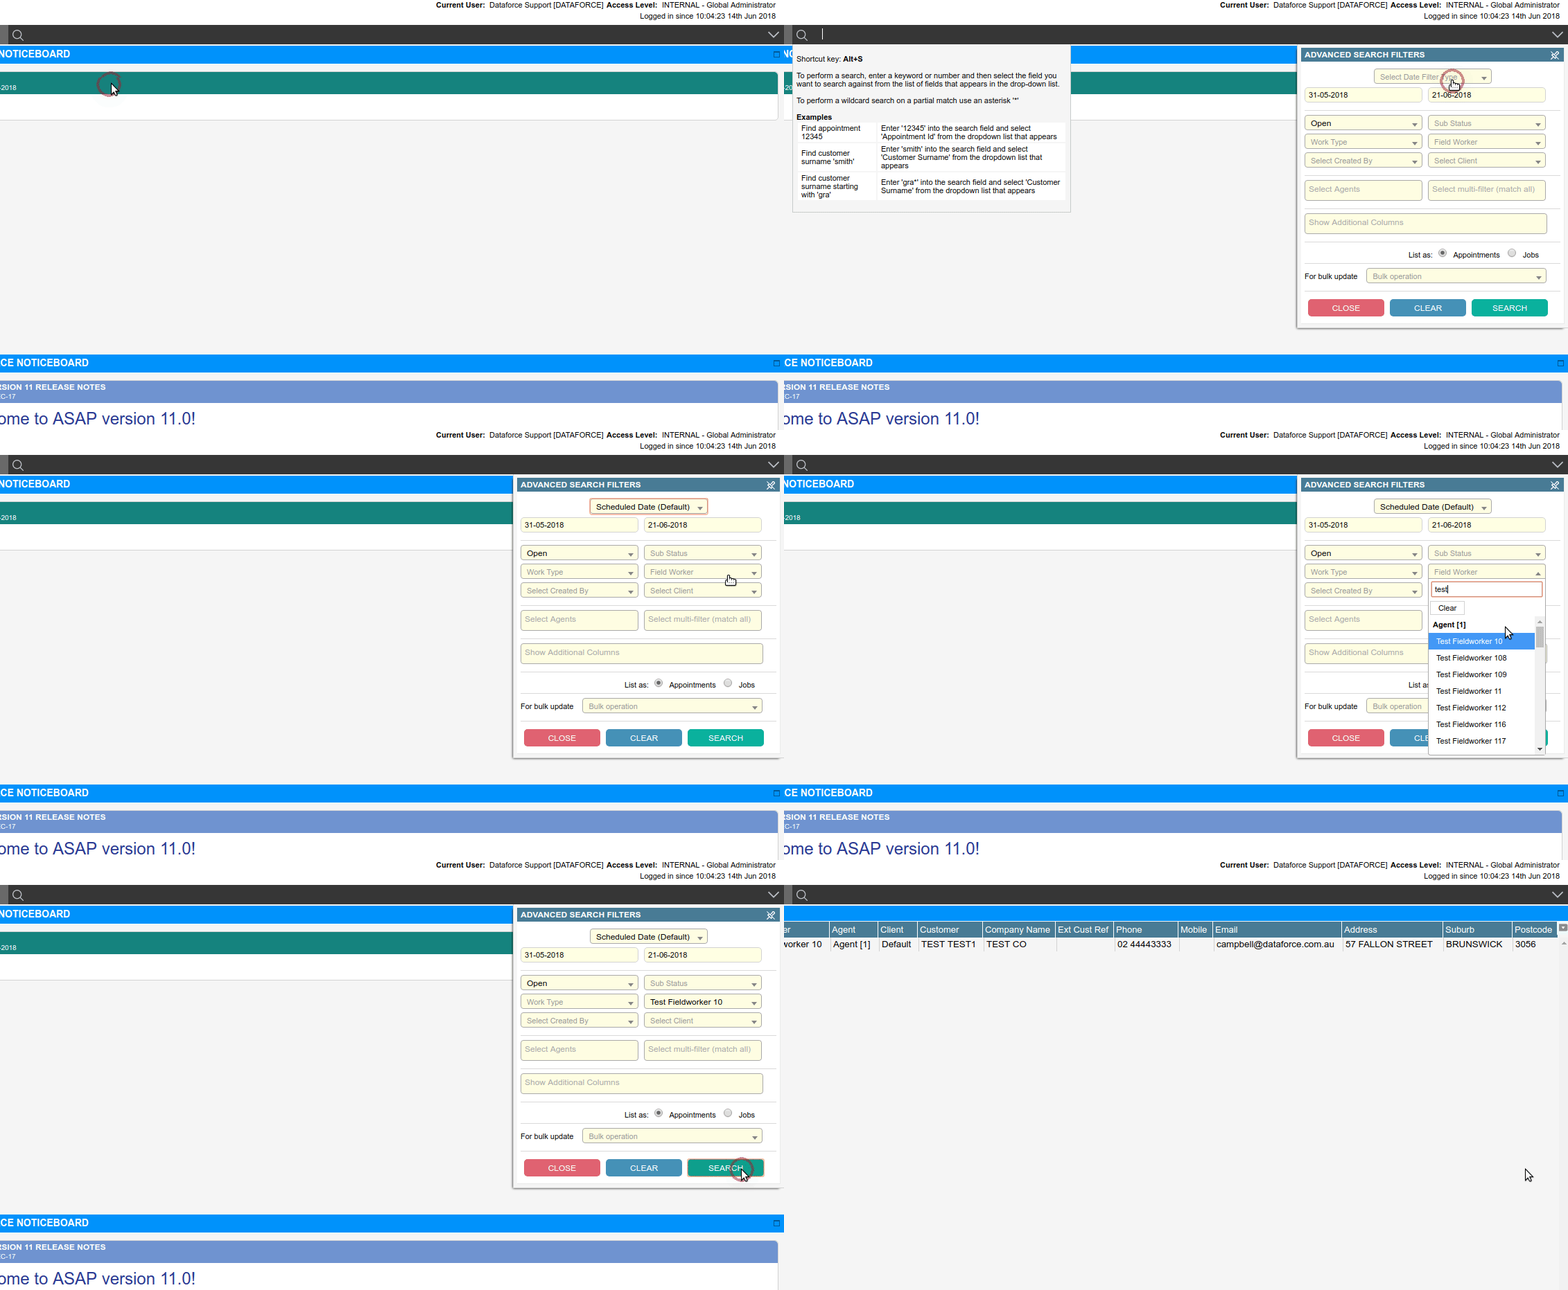
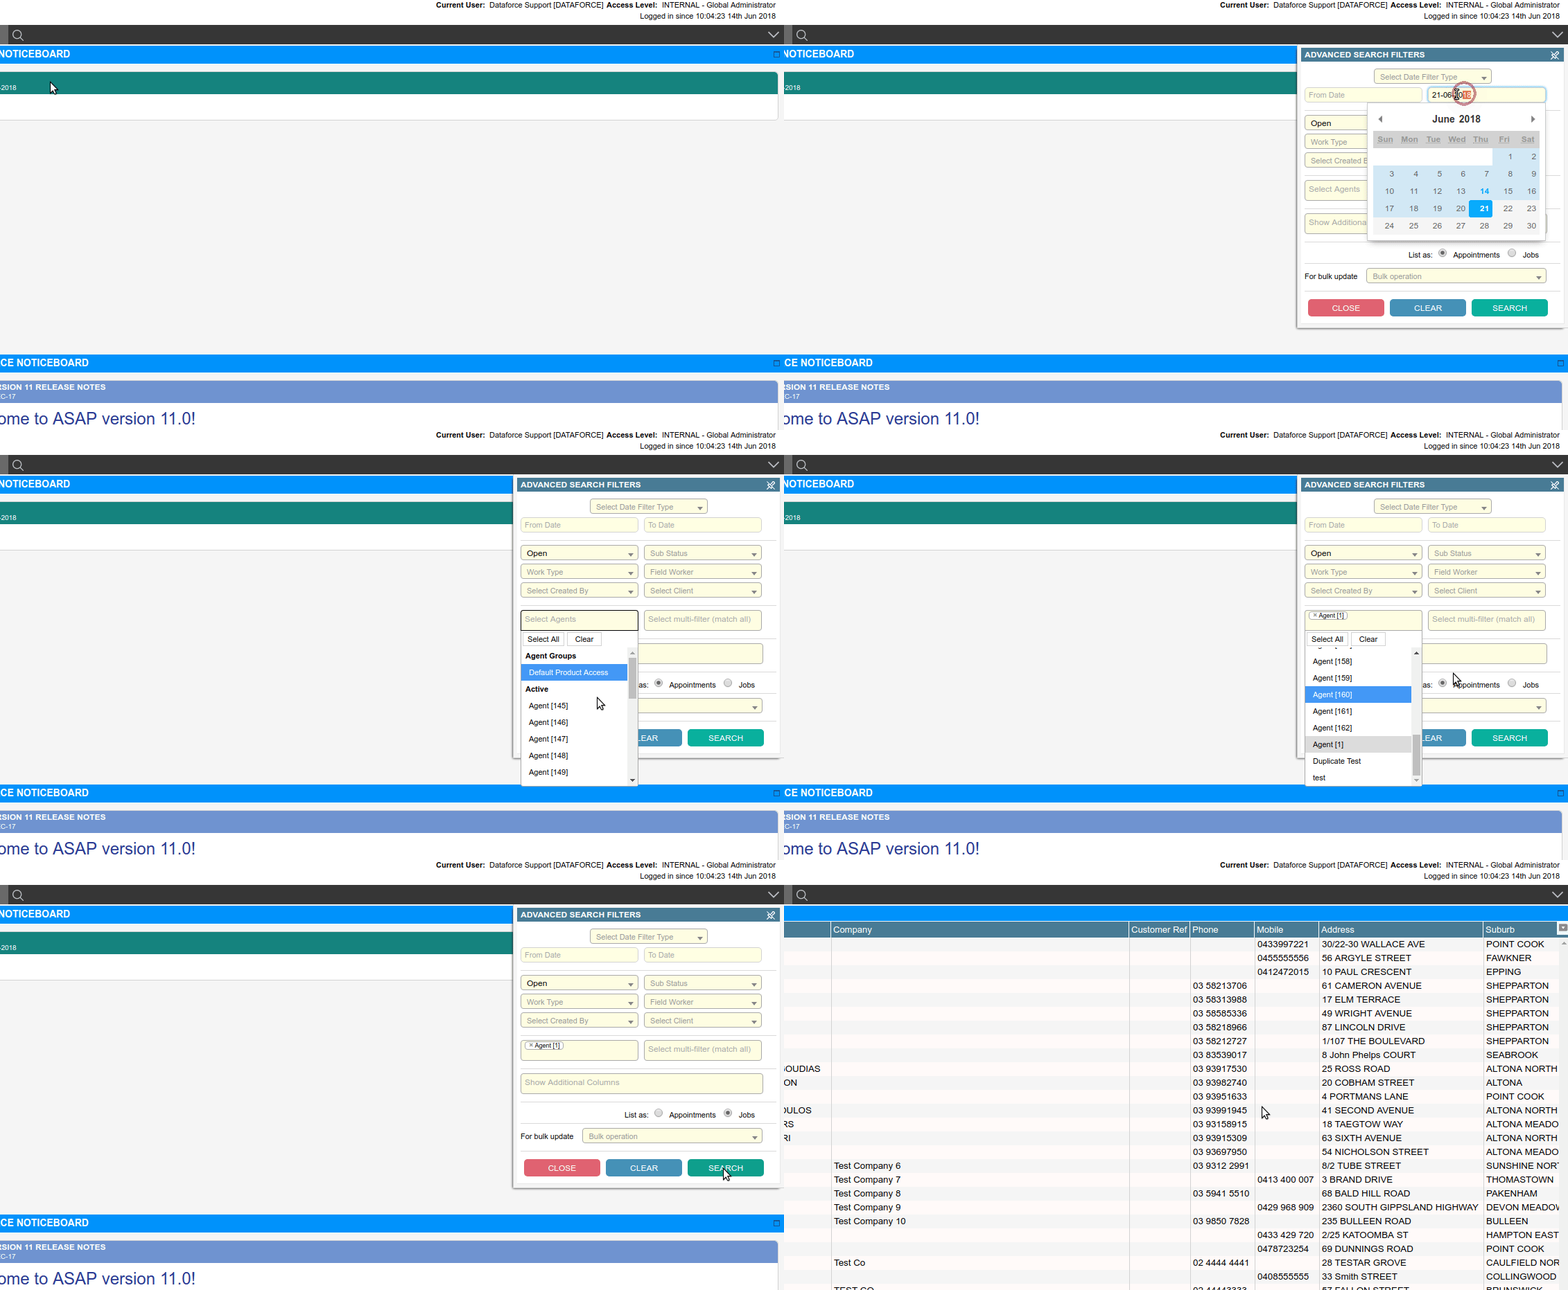
- Click the search bar to open the Advanced Search Filters dialog.
- Go to the dialog and set a date range, or clear the dates for a full search.
- Select the field worker from the dropdown.
- Click the search button in the Advanced Search Filters dialog.
- You will see a list of appointments load into the grid below, if matches were found.
Search for Appointments by an Agent
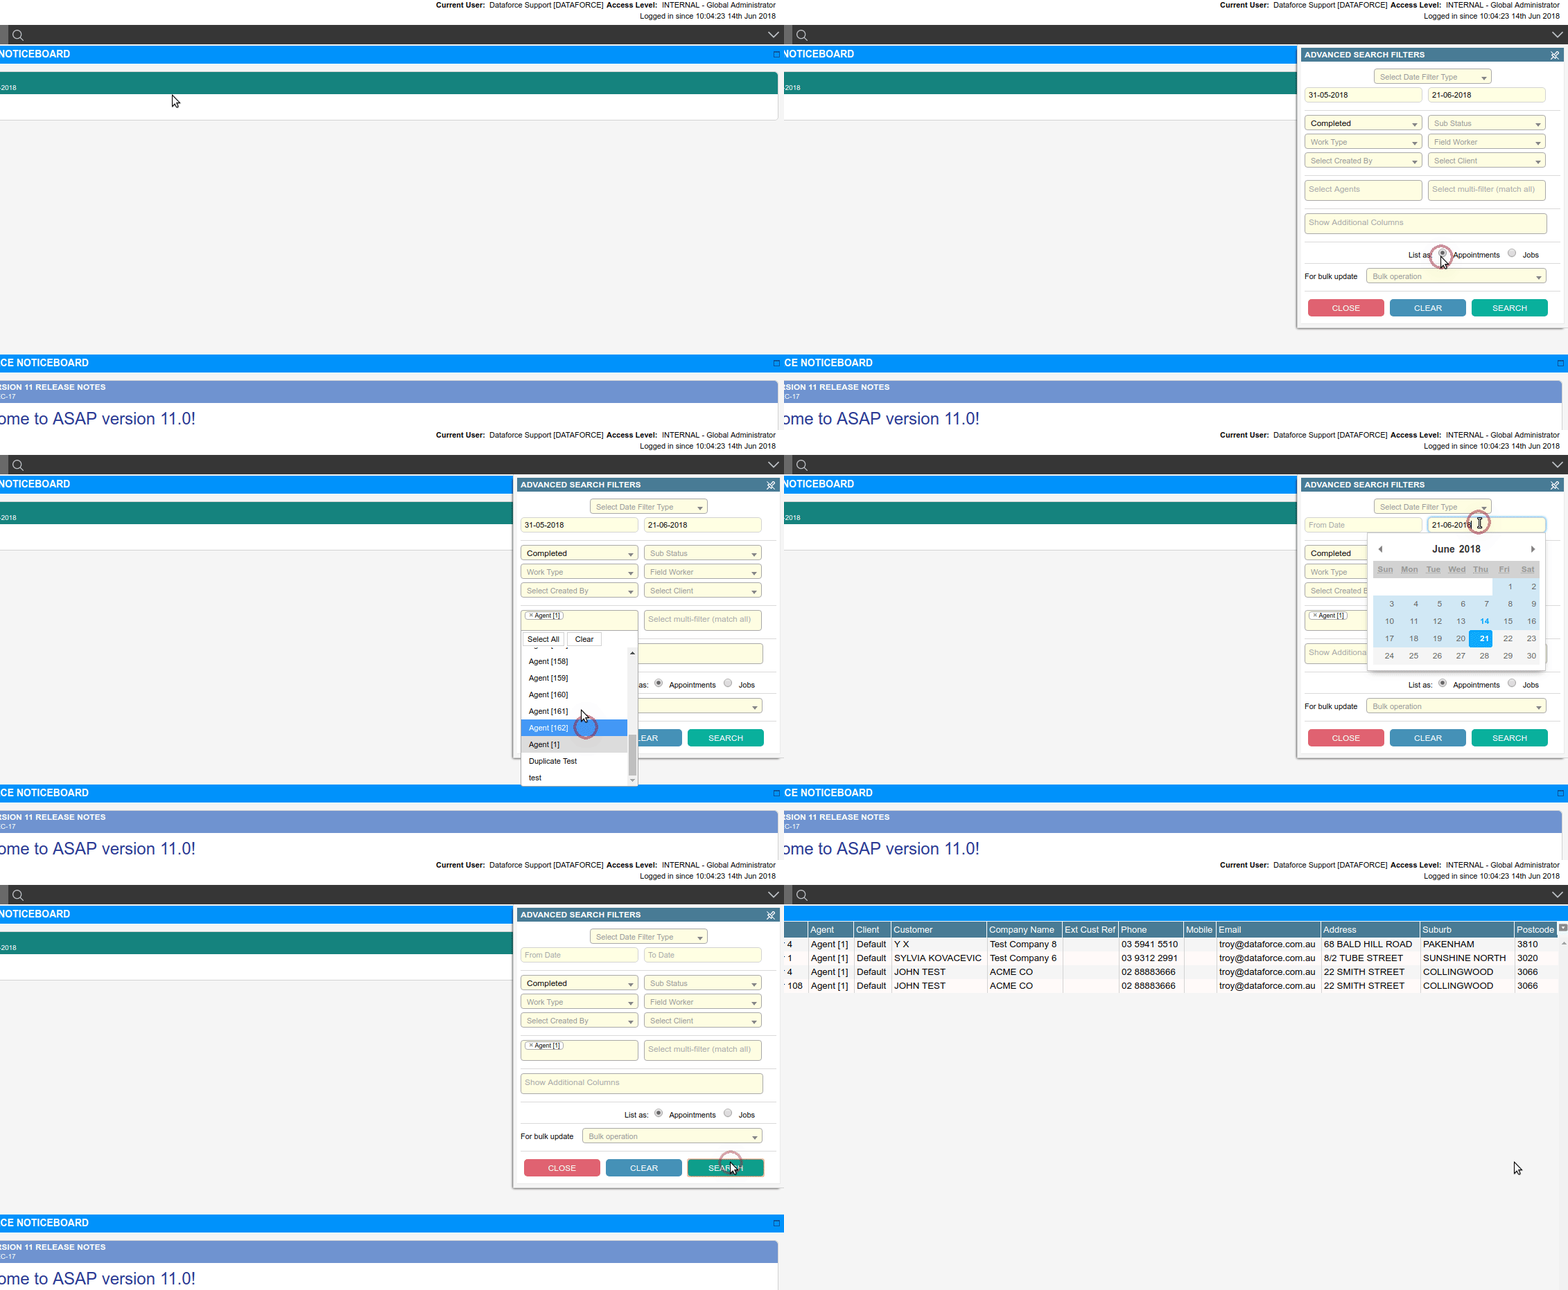
- Click the search bar to open the Advanced Search Filters dialog.
- Go to the dialog and set a date range, or clear the dates for a full search.
- Select the agent from the dropdown.
- Ensure that, in the list as option, Appointments is selected.
- Click the search button in the Advanced Search Filters dialog.
- You will see a list of appointments load into the grid below, if matches were found.
Search Jobs by the Job Agent
- Click the search bar to open the Advanced Search Filters dialog.
- Go to the dialog and set a date range, or clear the dates for a full search.
- Select the field worker from the dropdown.
- Ensure that, in the list as option, Jobs is selected.
- Click the search button, in the ‘Advanced Search Filters’ dialog.
- You will see a list of appointments load into the grid below, if matches were found.
Search Appointments by a Work Type
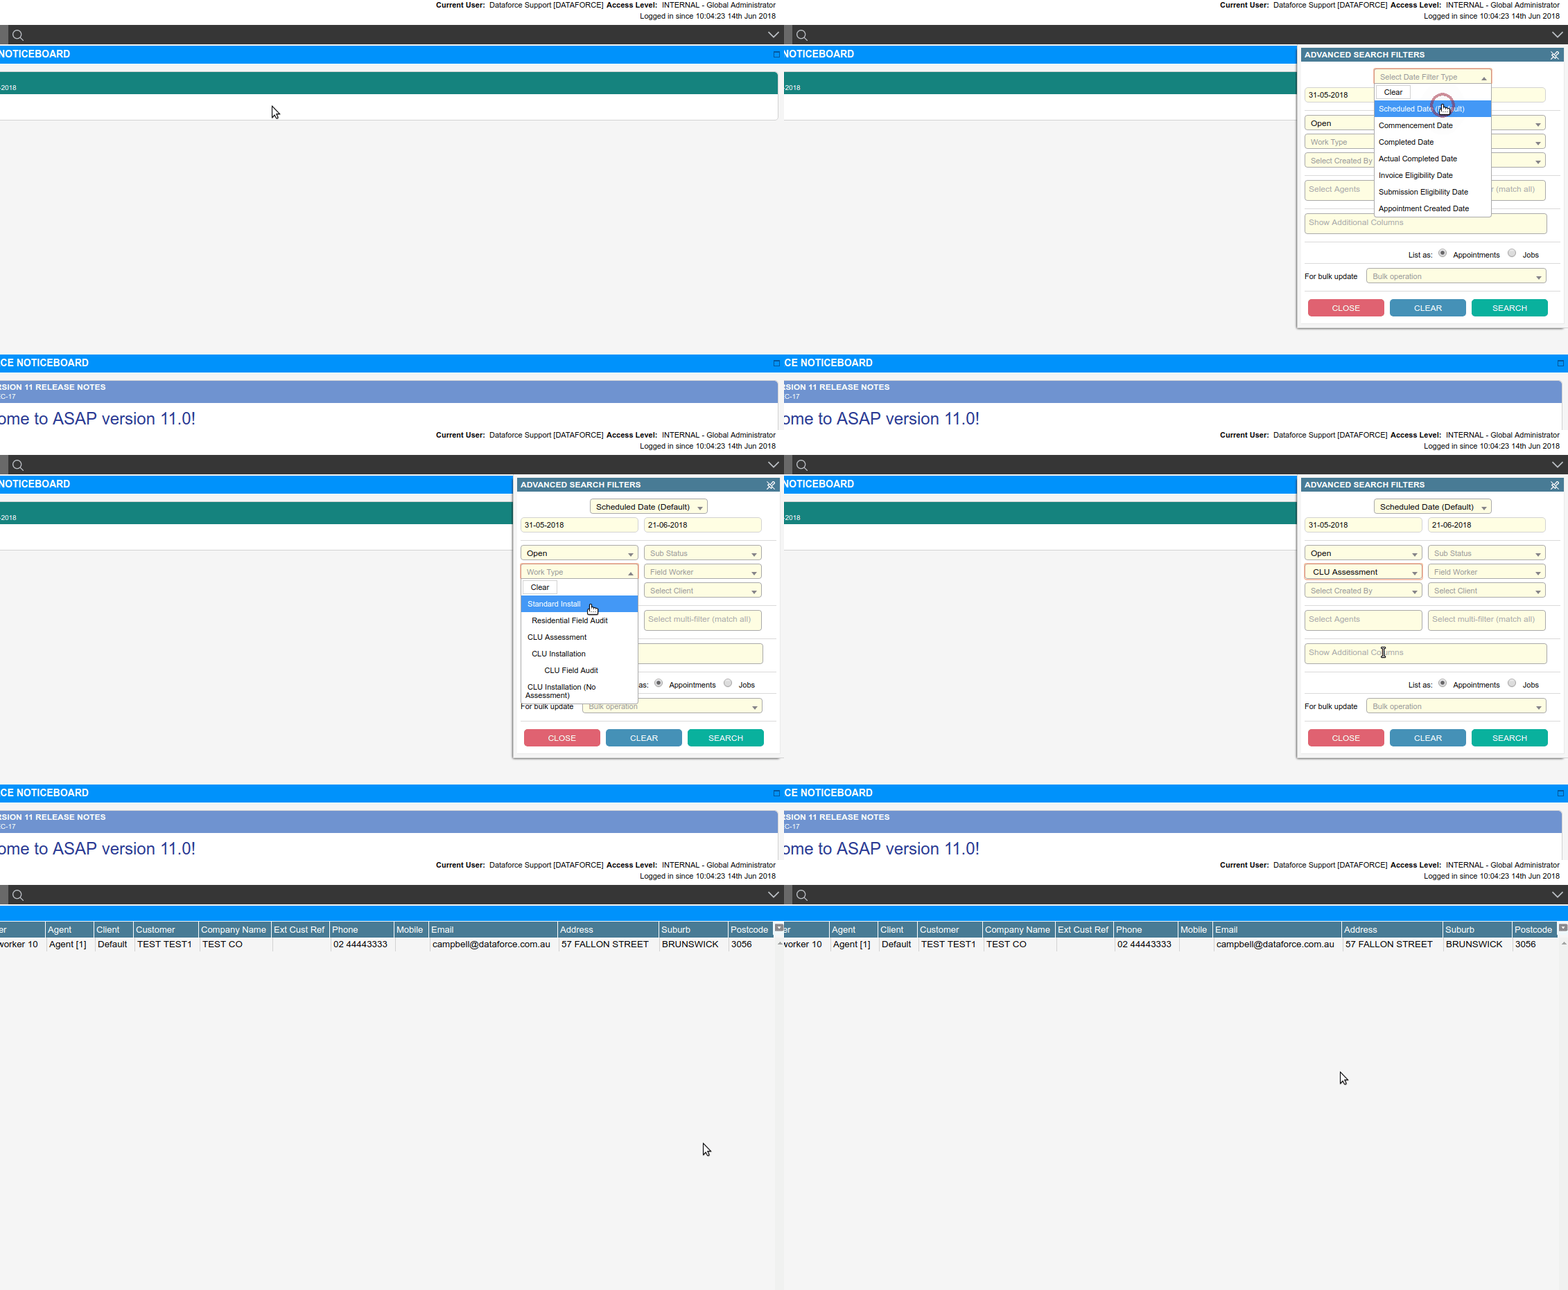
- Click the search bar to open the Advanced Search Filters dialog.
- Go to the dialog and set a date range, or clear the dates for a full search.
- Select the work type from the dropdown.
- Click the search button, in the Advanced Search Filters dialog.
- You will see a list of appointments load into the grid below, if matches were found.
Search Appointments by Customer Type (Business/Residential)
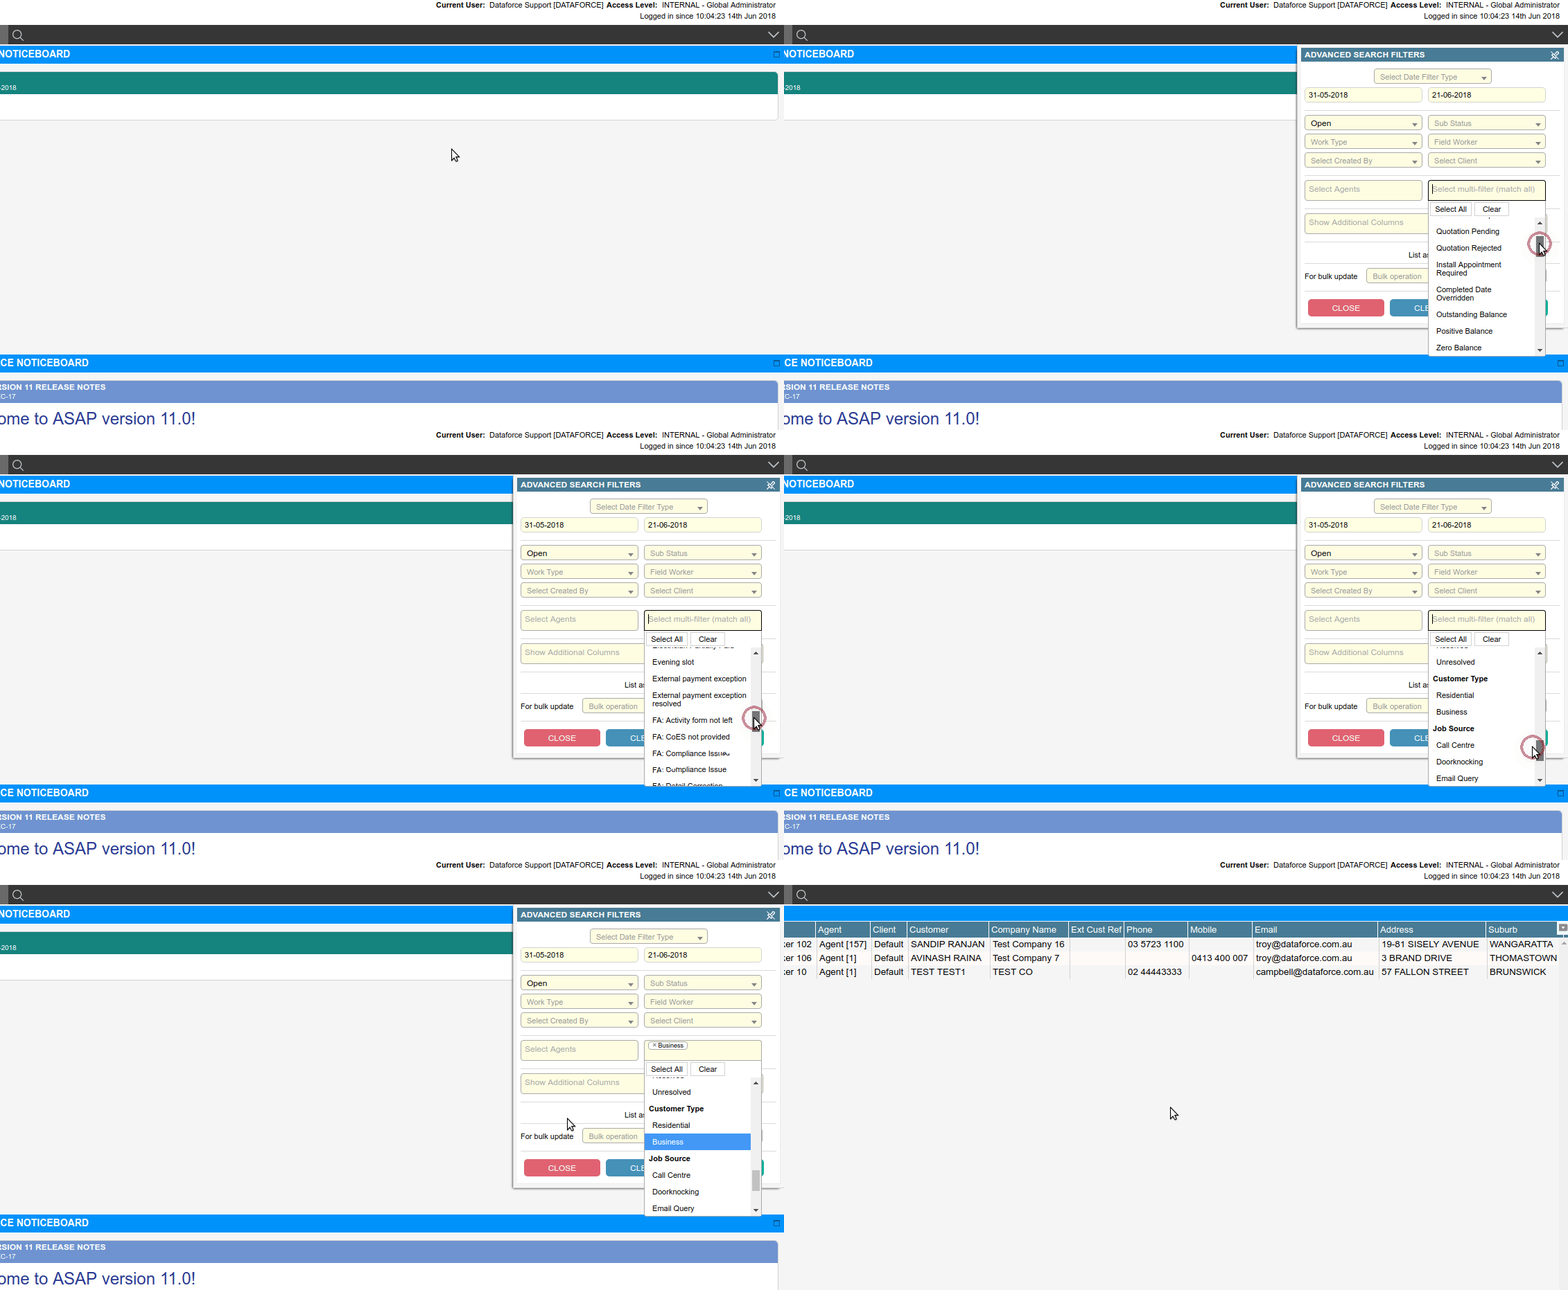
- Click the search bar to open the Advanced Search Filters dialog.
- Go to the dialog and set a date range, or clear the dates for a full search.
- From the multi-filter dropdown, scroll down to the customer type group and, select the required type.
- Click the search button in the Advanced Search Filters dialog.
- You will see a list of appointments load into the grid below, if matches were found.
Search Appointments by their Status
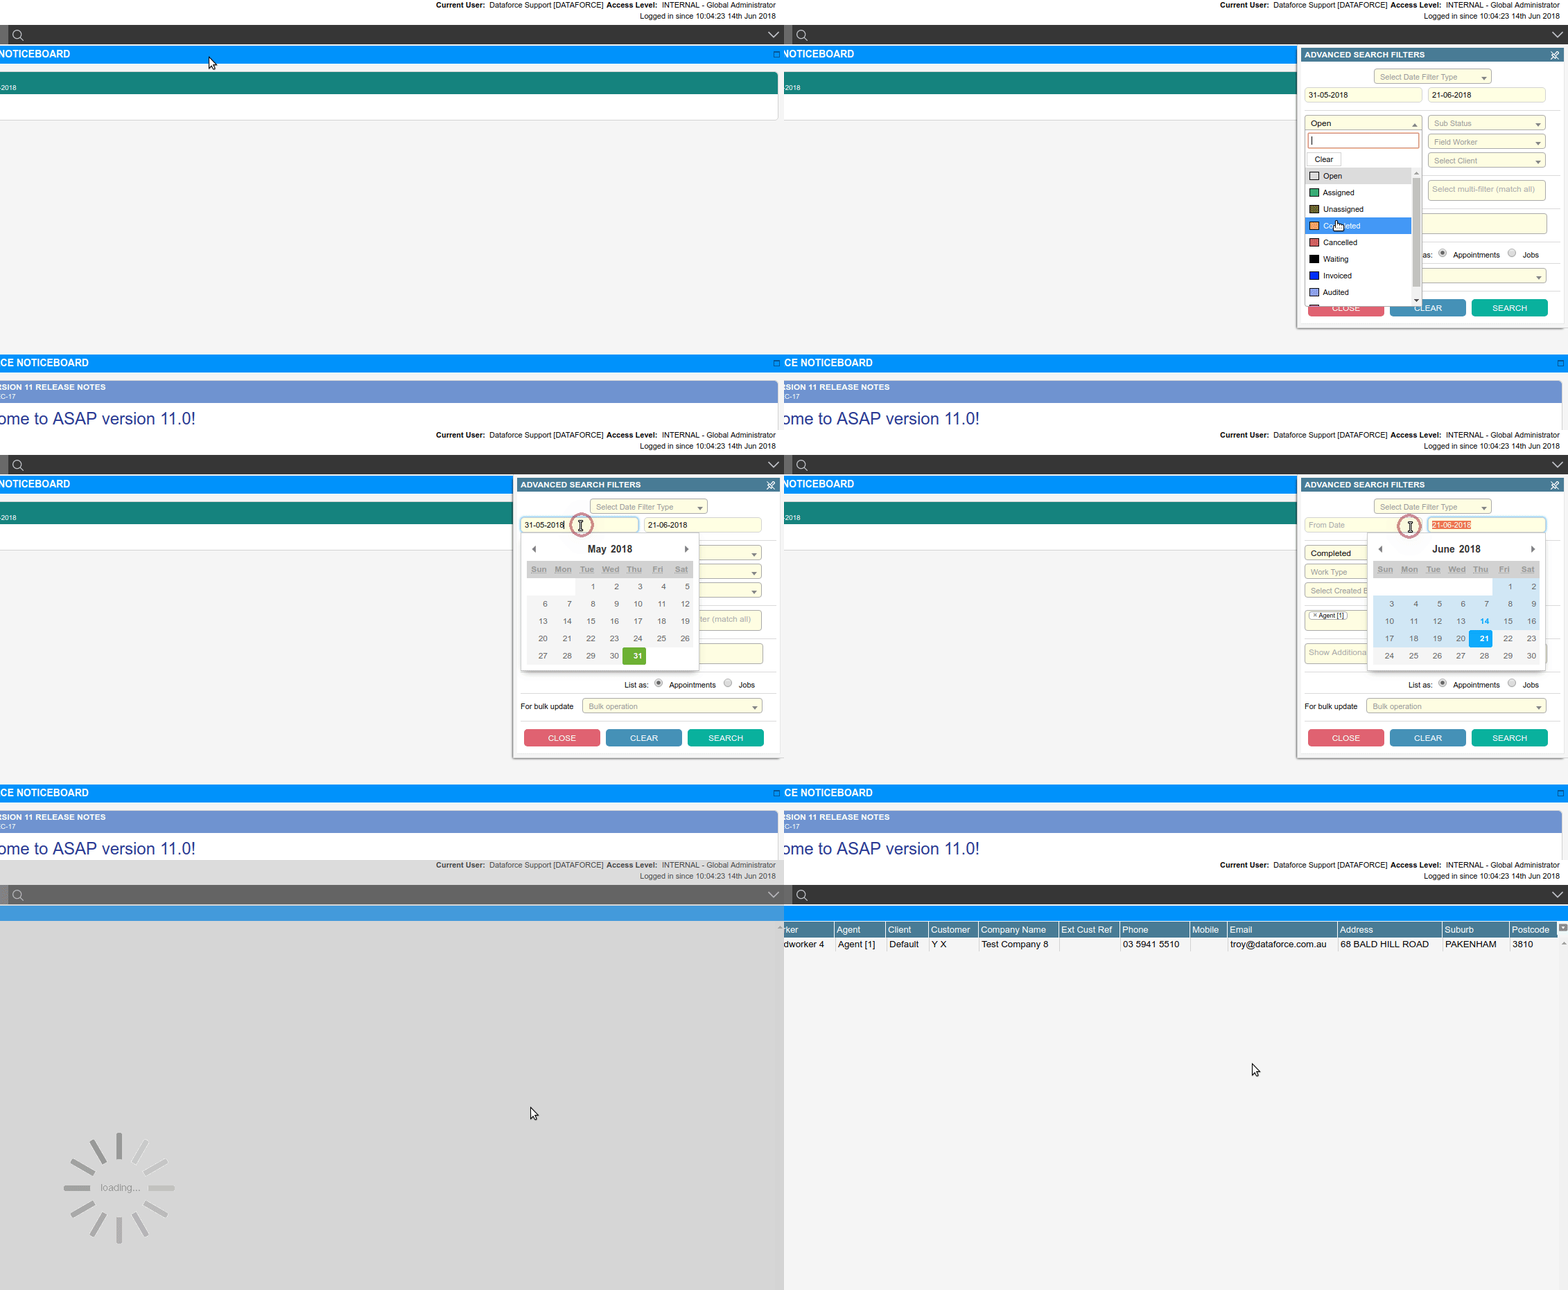
- Click the search bar to open the Advanced Search Filters dialog.
- Go to the dialog and set a date range, or clear the dates for a full search.
- From the status dropdown, select completed and, from the sub status dropdown, select partial.
- Click the search button in the Advanced Search Filters dialog.
- You will see a list of appointments load into the grid below, if matches were found.
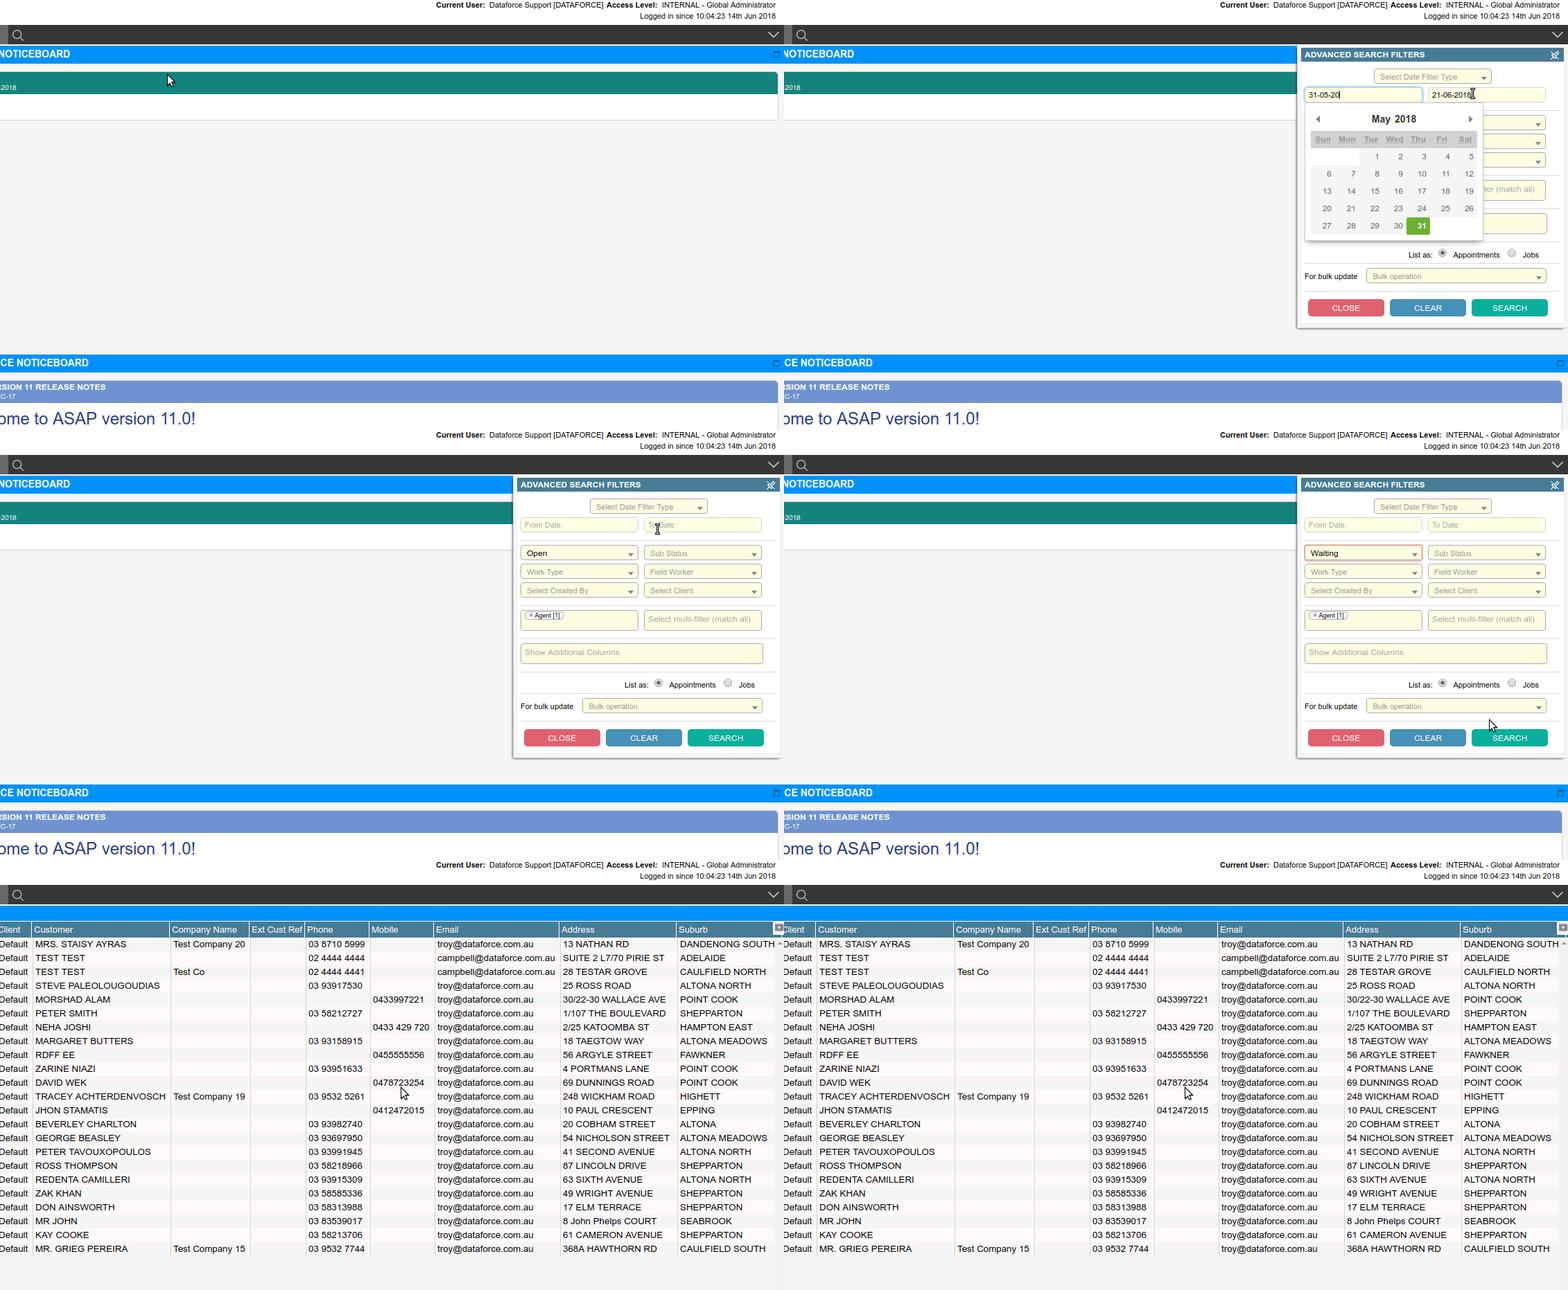
Search for Appointments on Waiting List
- Click the search bar to open the Advanced Search Filters dialog.
- Go to the dialog and clear the dates for a full search.
- From the status dropdown, select waiting.
- Click the search button in the Advanced Search Filters dialog.
- You will see a list of appointments load into the grid below, if matches were found.
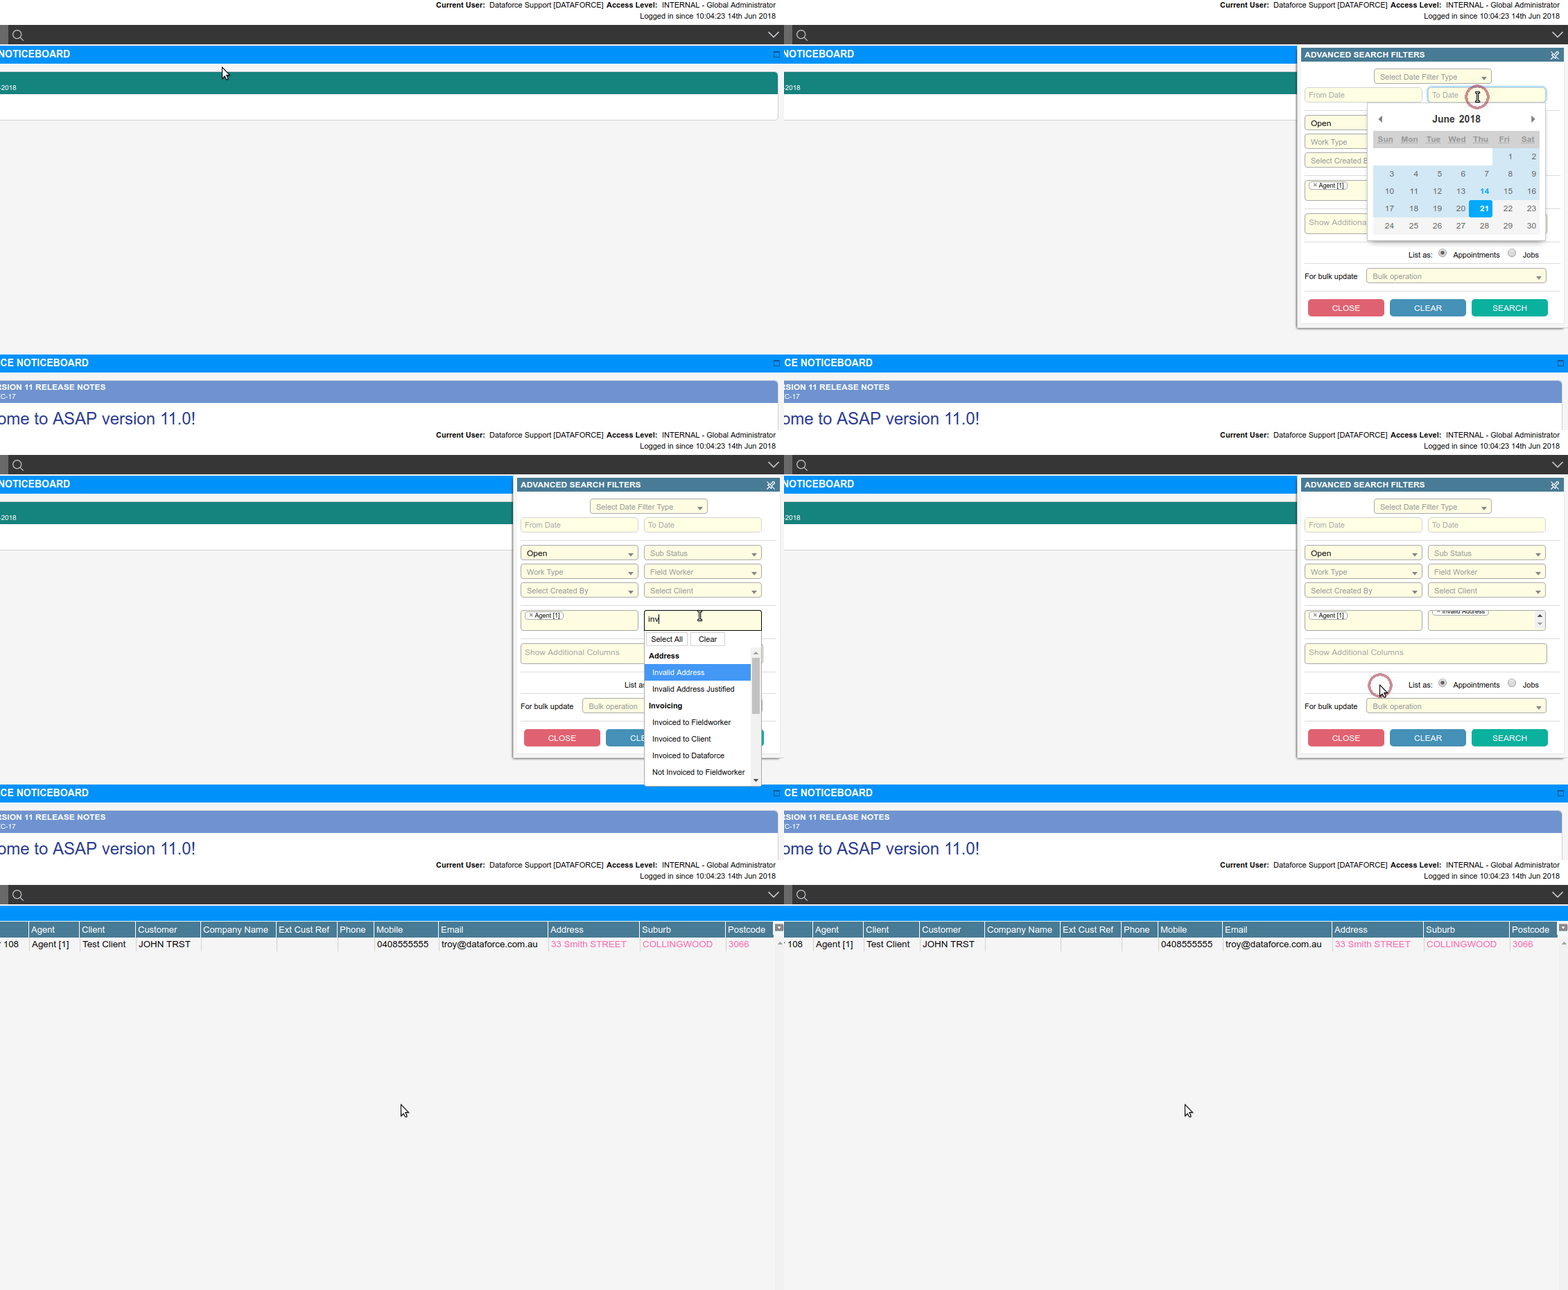
Search for Jobs with Invalid Addresses
- Click the search bar to open the Advanced Search Filters dialog.
- Go to the dialog and clear the dates for a full search.
- From the multi-filter dropdown, scroll down to the address group and select invalid address.
- Click the search button in the Advanced Search Filters dialog.
- You will see a list of jobs load into the grid below, if matches were found.
There are the following address filters in the multi-filter,
- Invalid Address - Address is flagged as invalid by our address validation provider.
- Valid Address - Address is valid.
- Invalid Address Justified - Customer has invalid address that been justified as correct by an operator.
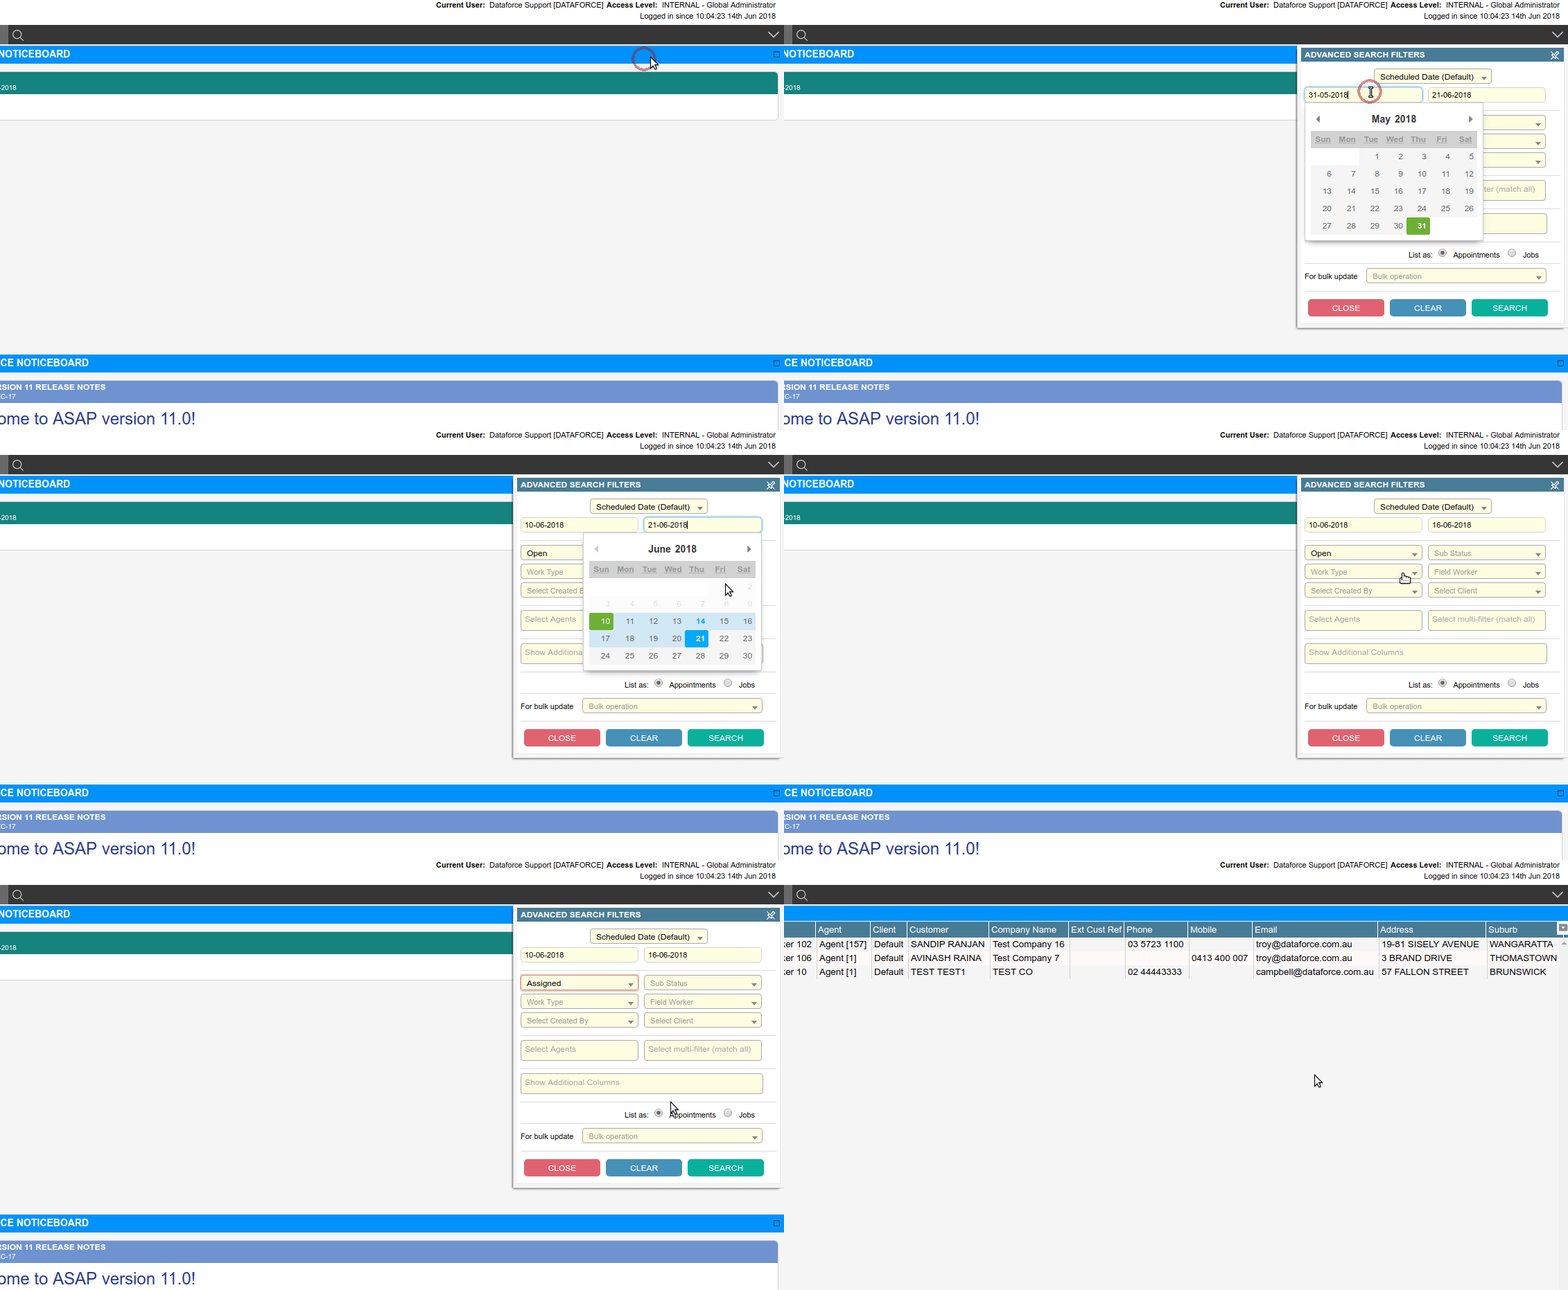
Search for the Appointment Scheduled this week
- Click the search bar to open the Advanced Search Filters dialog.
- Go to the select date filter type dialog and select schedule date from the dropdown.
- Change the dates to the required period.
- Change the status dropdown to assigned; leave sub status empty.
- Click the search button in the Advanced Search Filters dialog.
- You will see a list of appointments load into the grid below, if matches were found.
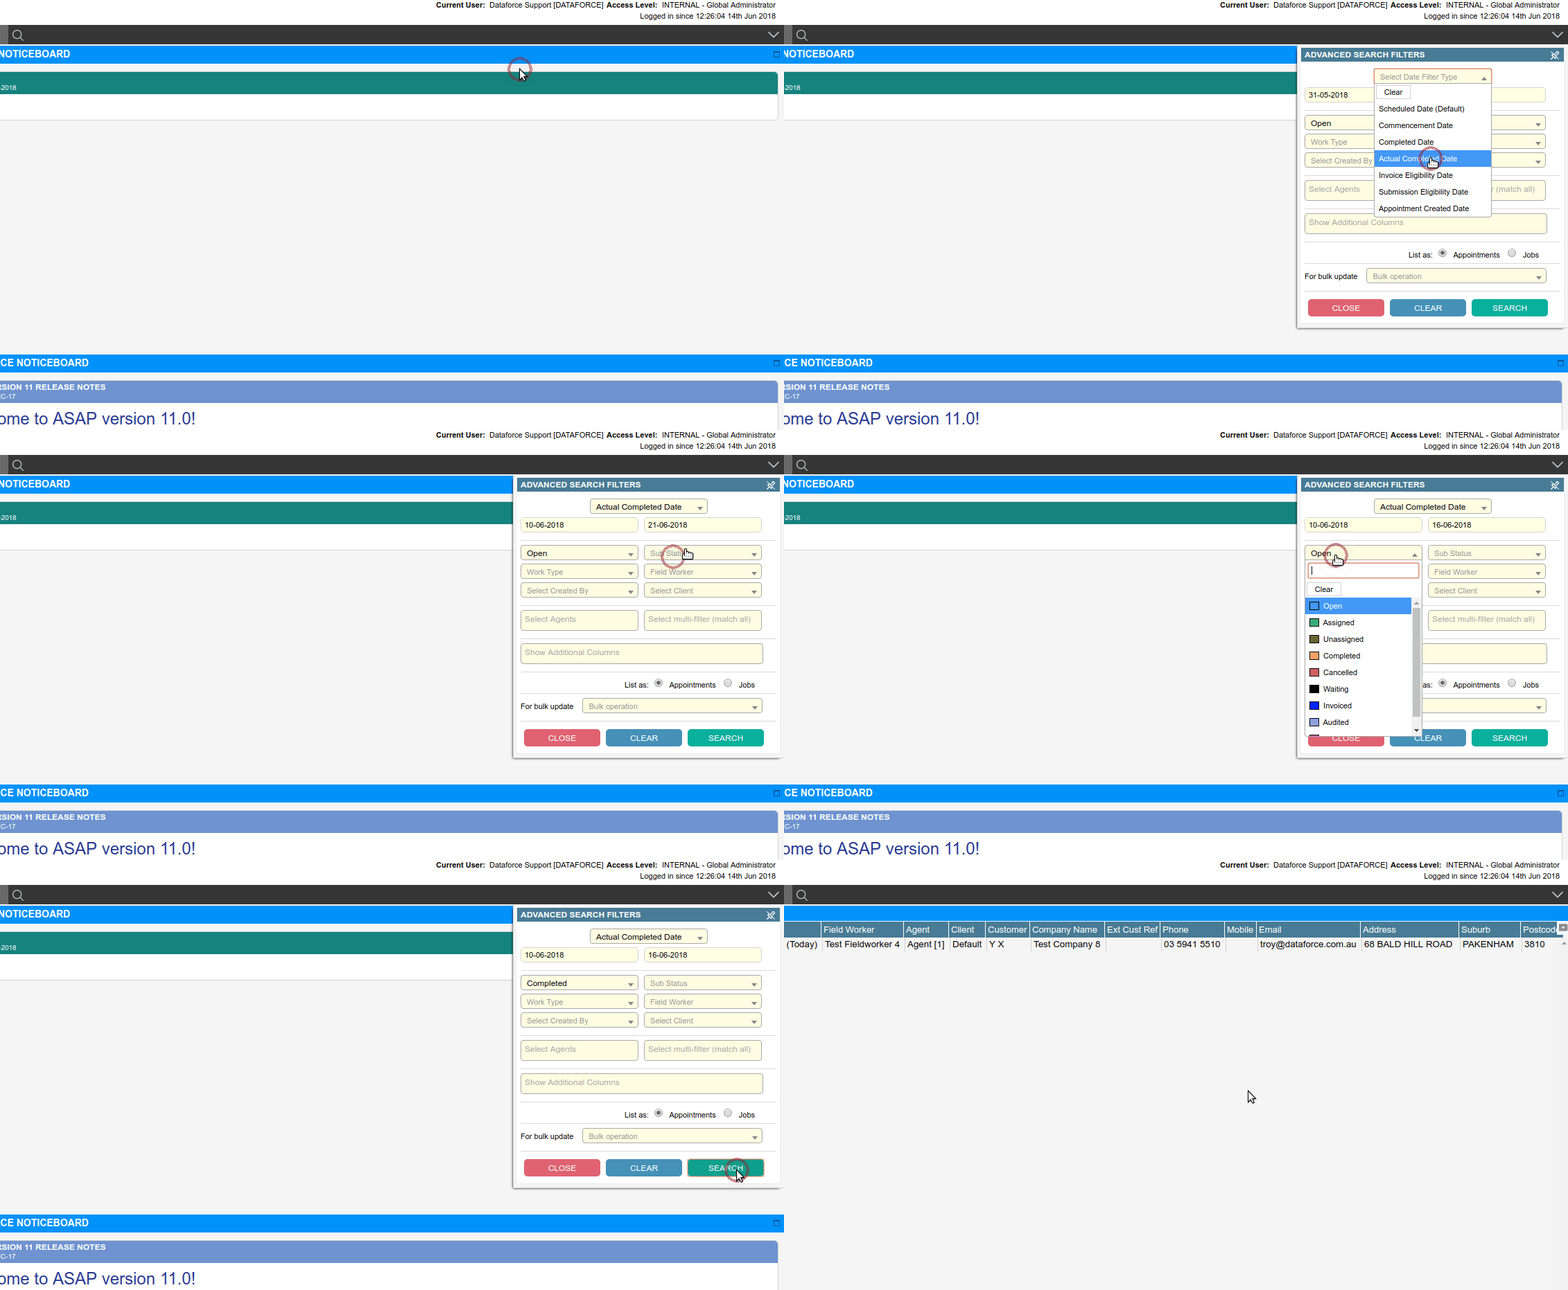
Search for Appointments Completed this week
- Click the search bar to open the Advanced Search Filters dialog.
- Go to the dialog and clear the dates for a full search.
- Change the list as radio button to jobs.
- Click the search button in the Advanced Search Filters dialog.
- You will see a list of appointments load into the grid below, if matches were found.
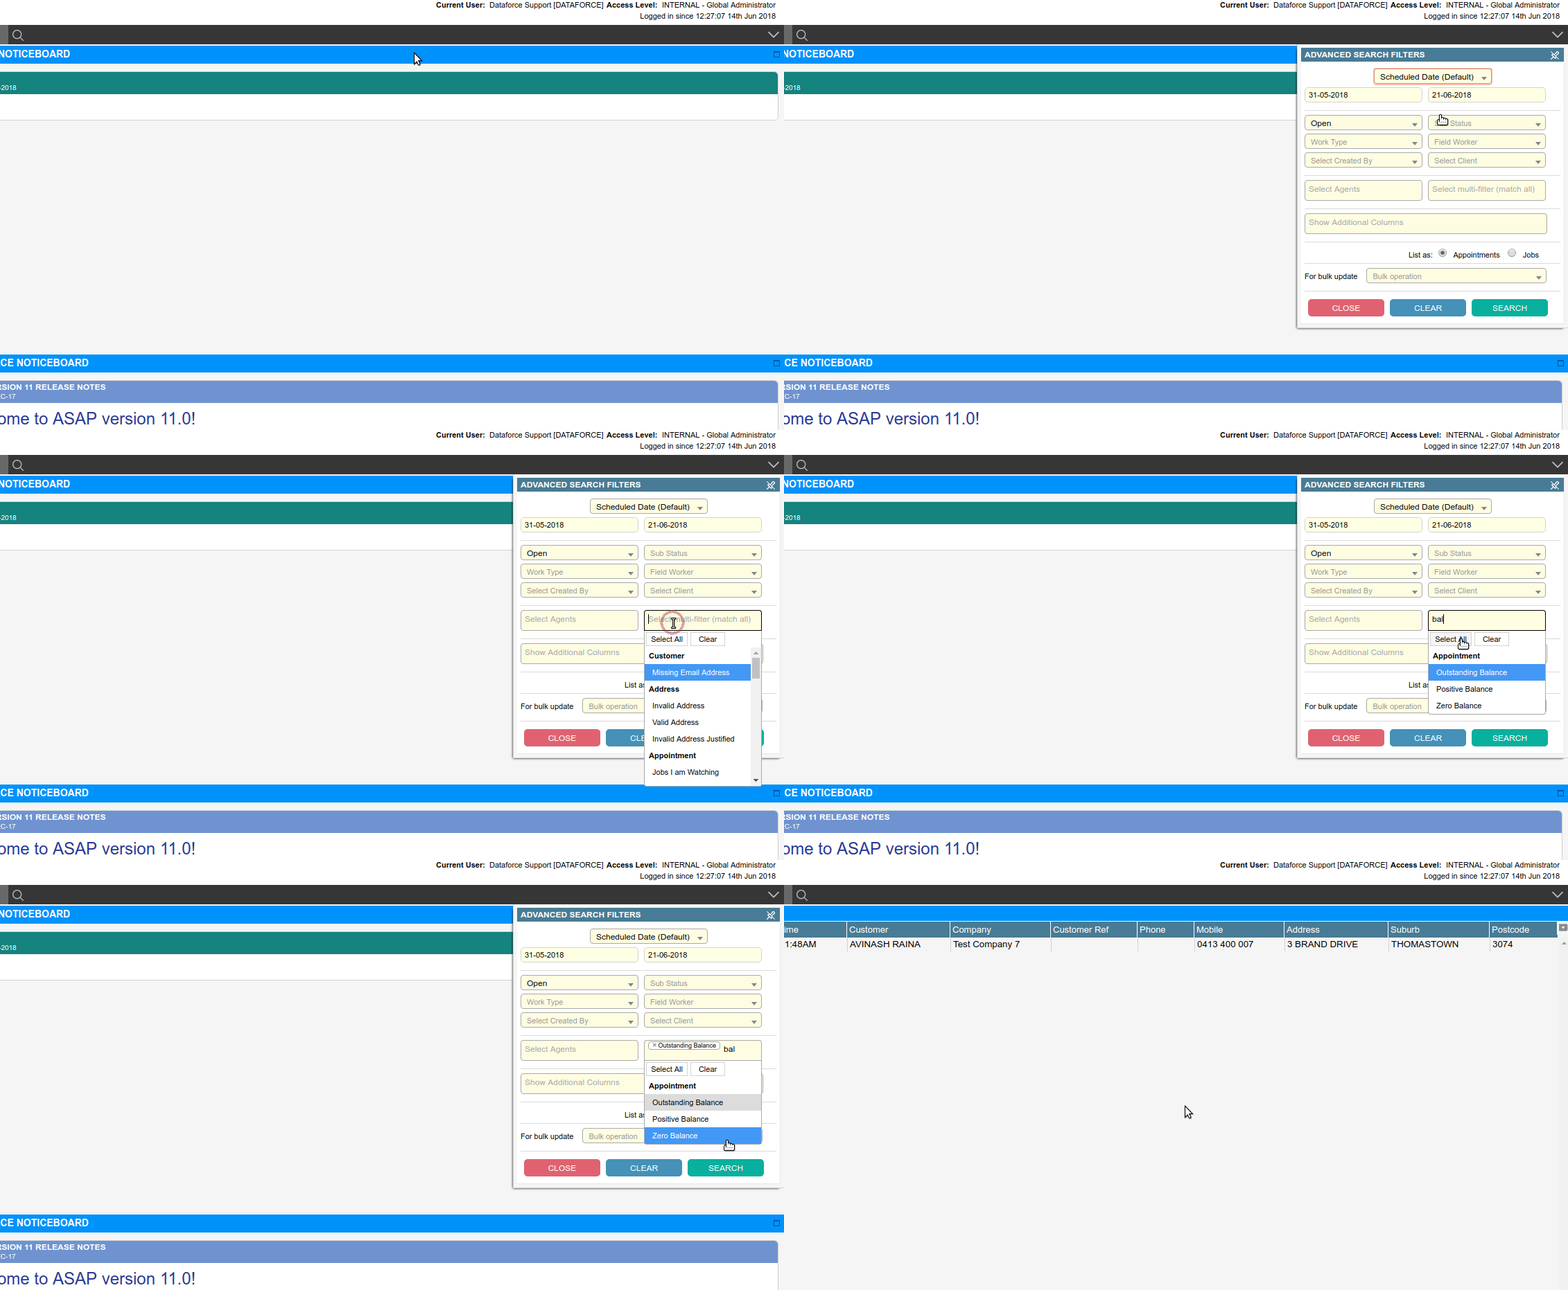
Search for Jobs with Balance Outstanding
- Click the search bar to open the Advanced Search Filters dialog.
- Go to the select date filter type dialog and select actual completed date from the dropdown.
- Change the dates to the required period.
- From the multi-filter dropdown, scroll down to the appointment group and select outstanding balance.
- Click the search button in the Advanced Search Filters dialog.
- You will see a list of jobs load into the grid below, if matches were found.
We have three options:
- Outstanding Balance - When customer has a balance outstanding to pay.
- Positive Balance - When the customer is owed a credit.
- Zero Balance - When customer has paid all outstanding charges.
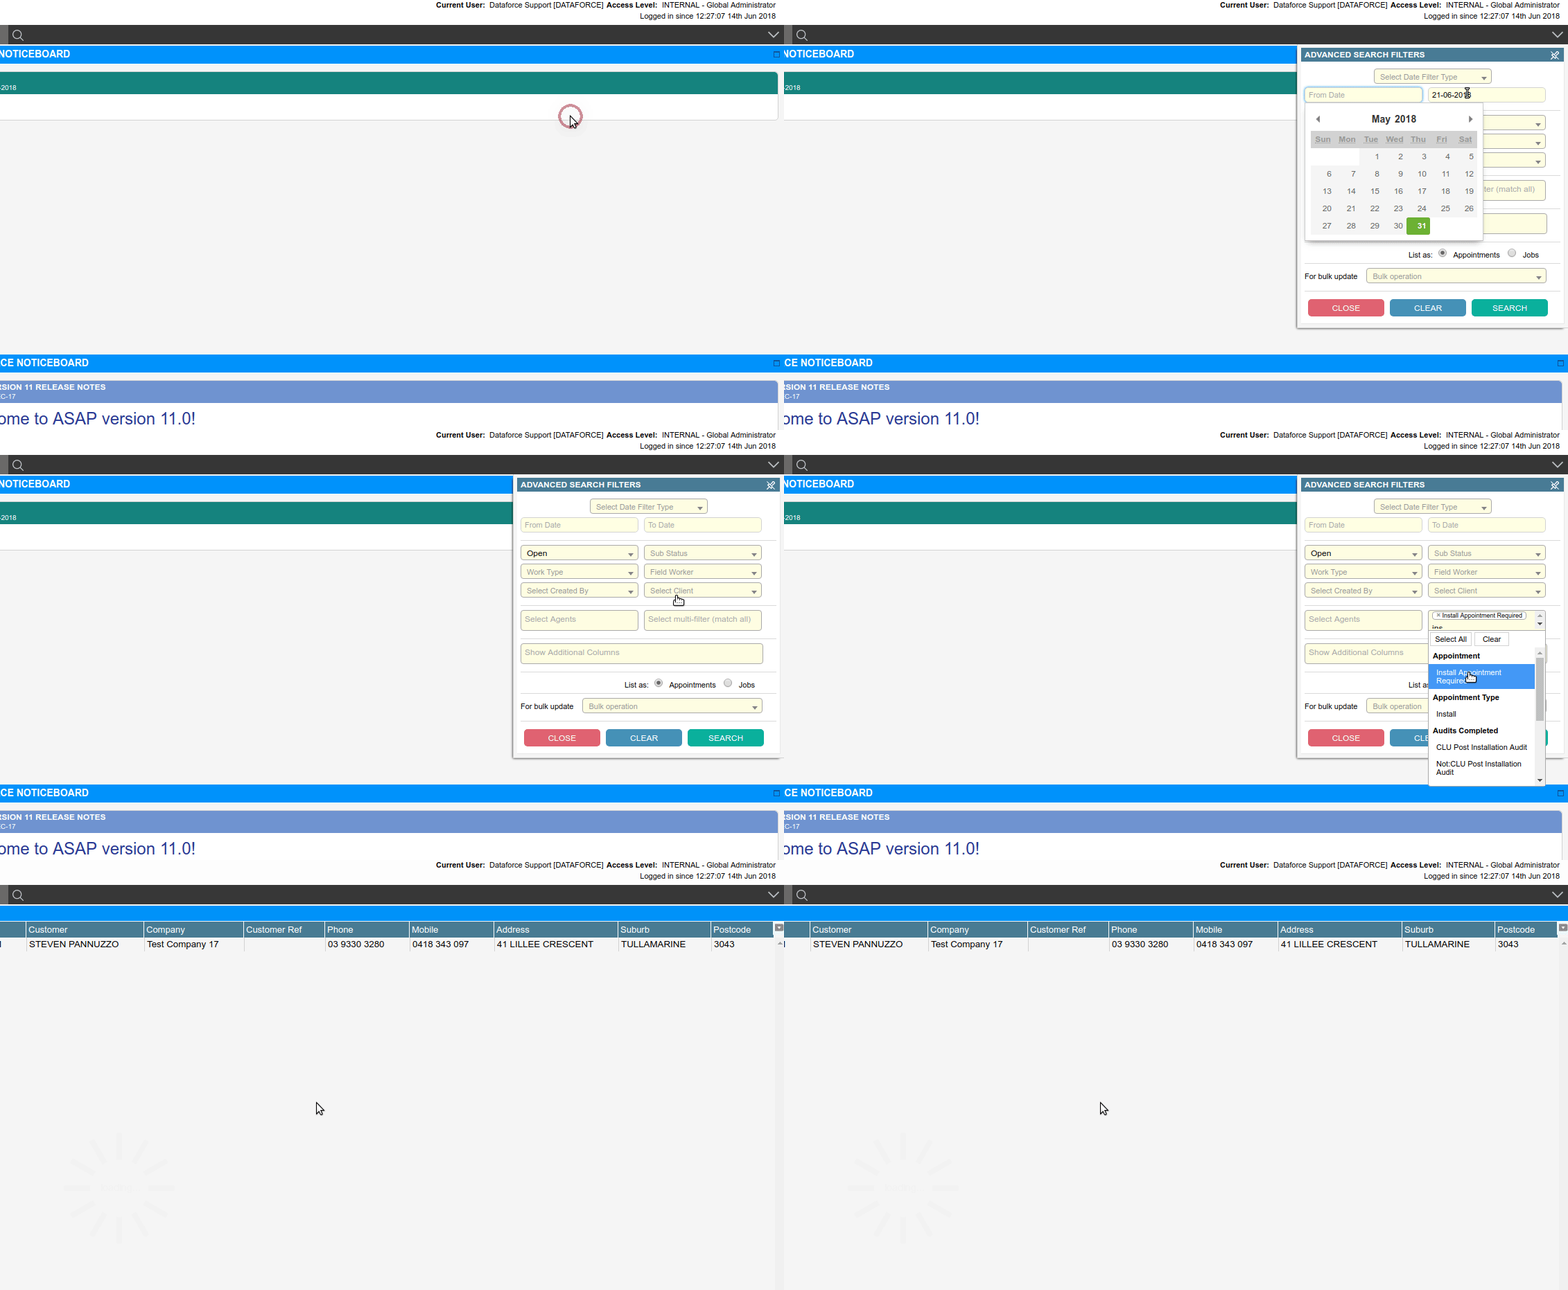
Search for Jobs where Installation is required
- Click the search bar to open the Advanced Search Filters dialog.
- Go to the dialog and clear the dates for a full search.
- From the multi-filter dropdown, scroll down to the appointment group and select install appointment required.
- Click the search button in the Advanced Search Filters dialog.
- You will see a list of jobs load into the grid below, if matches were found.
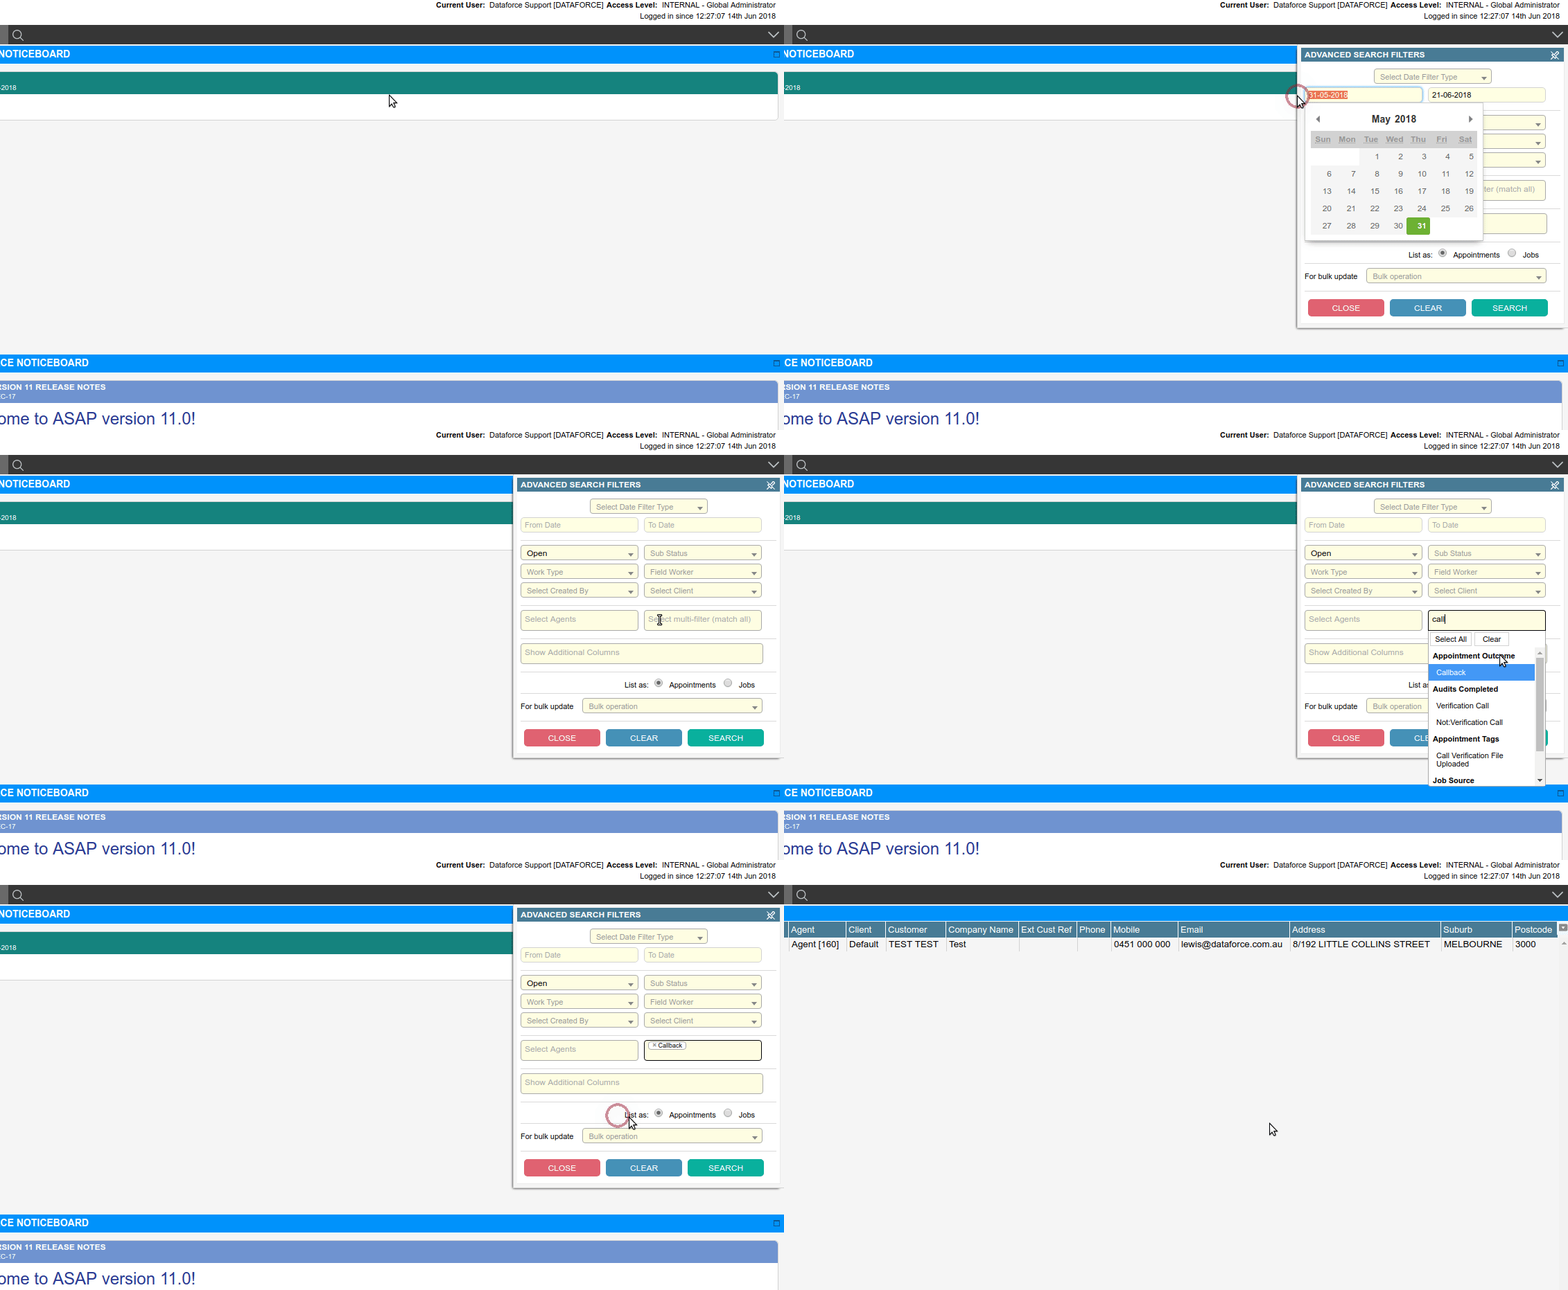
Search for Appointments with other Outcomes (Callback, No-Show)
- Click the search bar to open the Advanced Search Filters dialog.
- Go to the dialog and clear the dates for a full search.
- From the multi-filter dropdown, scroll down to the appointment outcome group and select the required options as outlined below.
- Click the search button in the Advanced Search Filters dialog.
- You will see a list of appointments load into the grid below, if matches were found.
There are the following address filters for the multi-filter:
- Normal - These are appointments completed without complications.
- Callback - These appointments are created to send the field worker back to the site after the primary appointment is completed.
- Customer No-Show - These appointments are where the field worker has completed the appointment as a no-show.
- Customer No-Show (Followup Required) - Jobs which require a new appointment, as the primary is marked as a no-show.
Search for Appointments with the value of the Compliance Flag
- Click the search bar to open the Advanced Search Filters dialog.
- Go to the dialog and clear the dates for a full search.
- From the multi-filter dropdown, scroll down to the compliant flag group and select the required options as outlined below.
- Click the search button, in the Advanced Search Filters dialog.
- You will see a list of appointments load into the grid below, if matches were found.
If an operator has flagged an appointment as non-compliant, this filter can be used:
- Compliant - Where the flag has been set to the compliant status or not set.
- Non-Compliant - Where the flag is enabled in the non-compliant status.
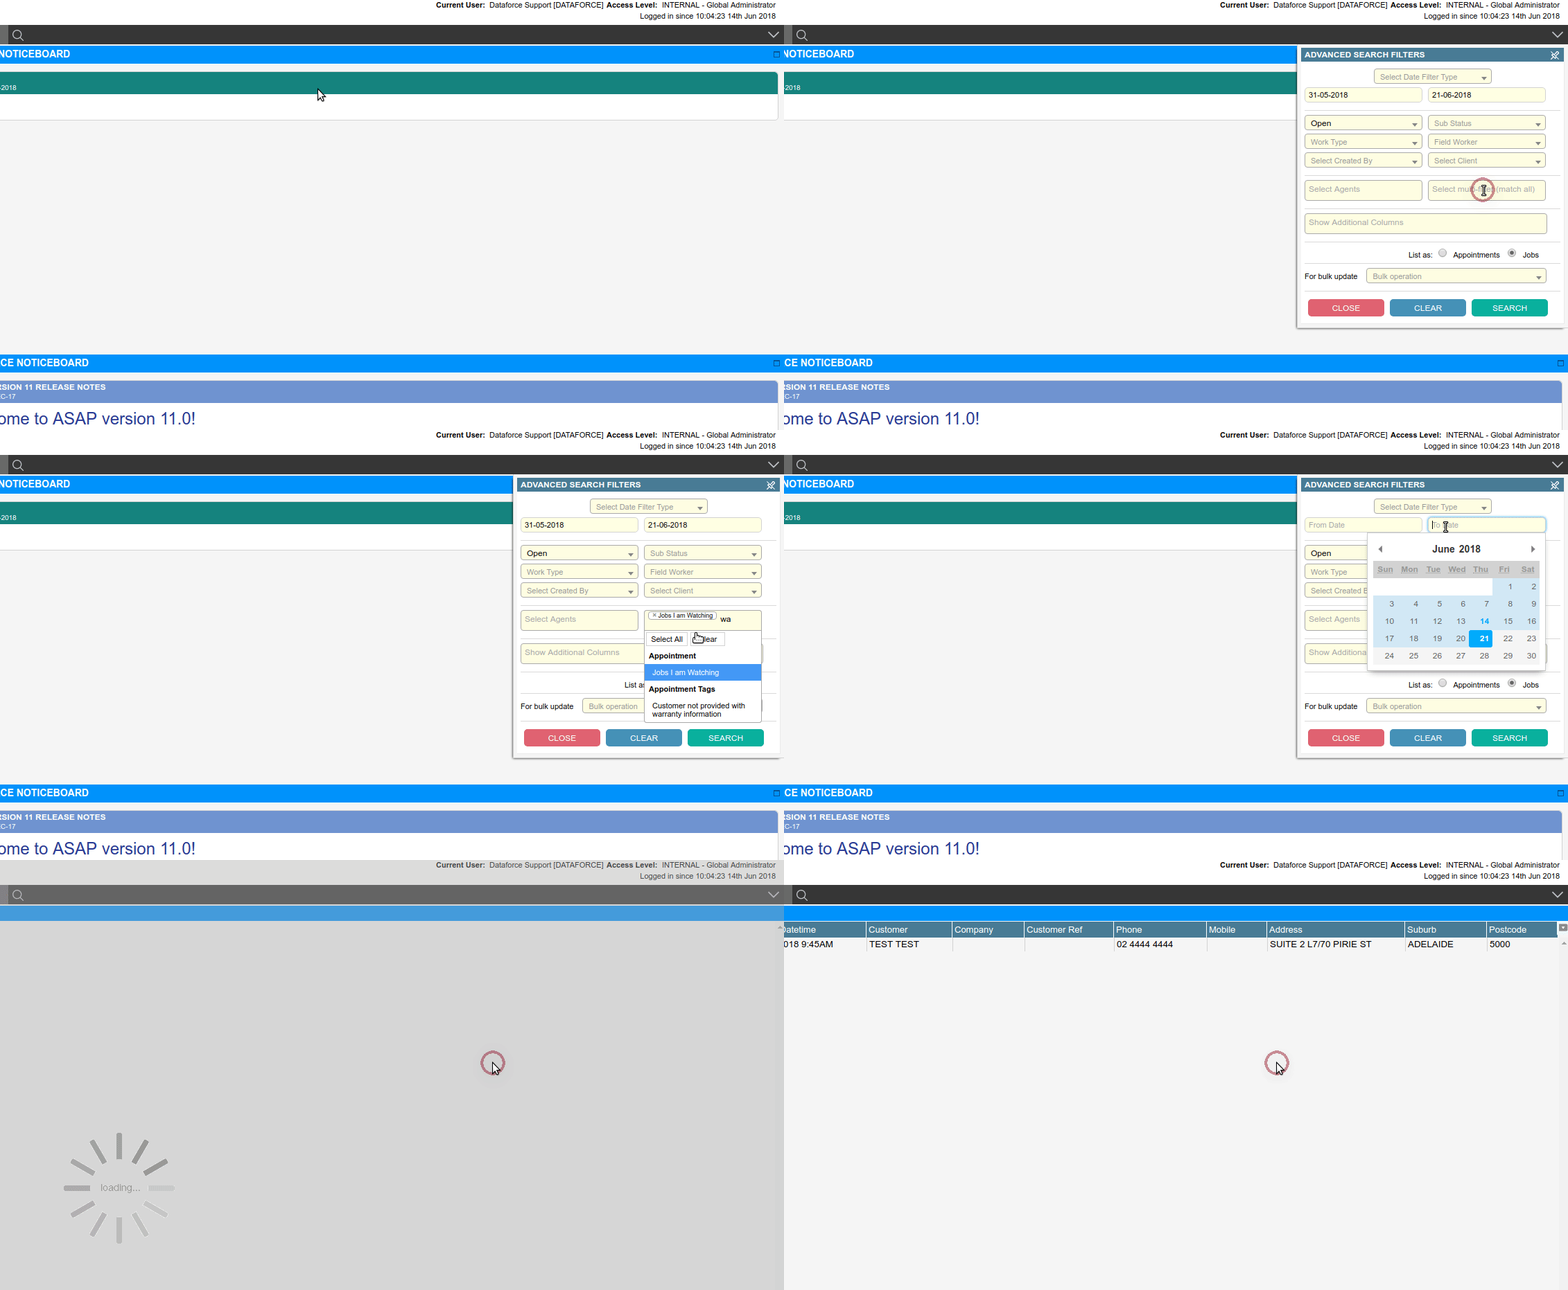
Search for Appointments I’m watching
- Click the search bar to open the Advanced Search Filters dialog.
- Go to the dialog and clear the dates for a full search.
- From the multi-filter dropdown, scroll down to the address group and select the option of, jobs I’m watching.
- Click the search button in the Advanced Search Filters dialog.
- You will see a list of appointments load into the grid below, if matches were found.
Search for Appointments using Tags
- Click the search bar to open the Advanced Search Filters dialog.
- Go to the dialog and clear the dates for a full search.
- From the multi-filter dropdown, scroll down to the tags group and select any tags that the appointment must have.
- Click the search button in the Advanced Search Filters dialog.
- You will see a list of appointments load into the grid below, if matches were found.
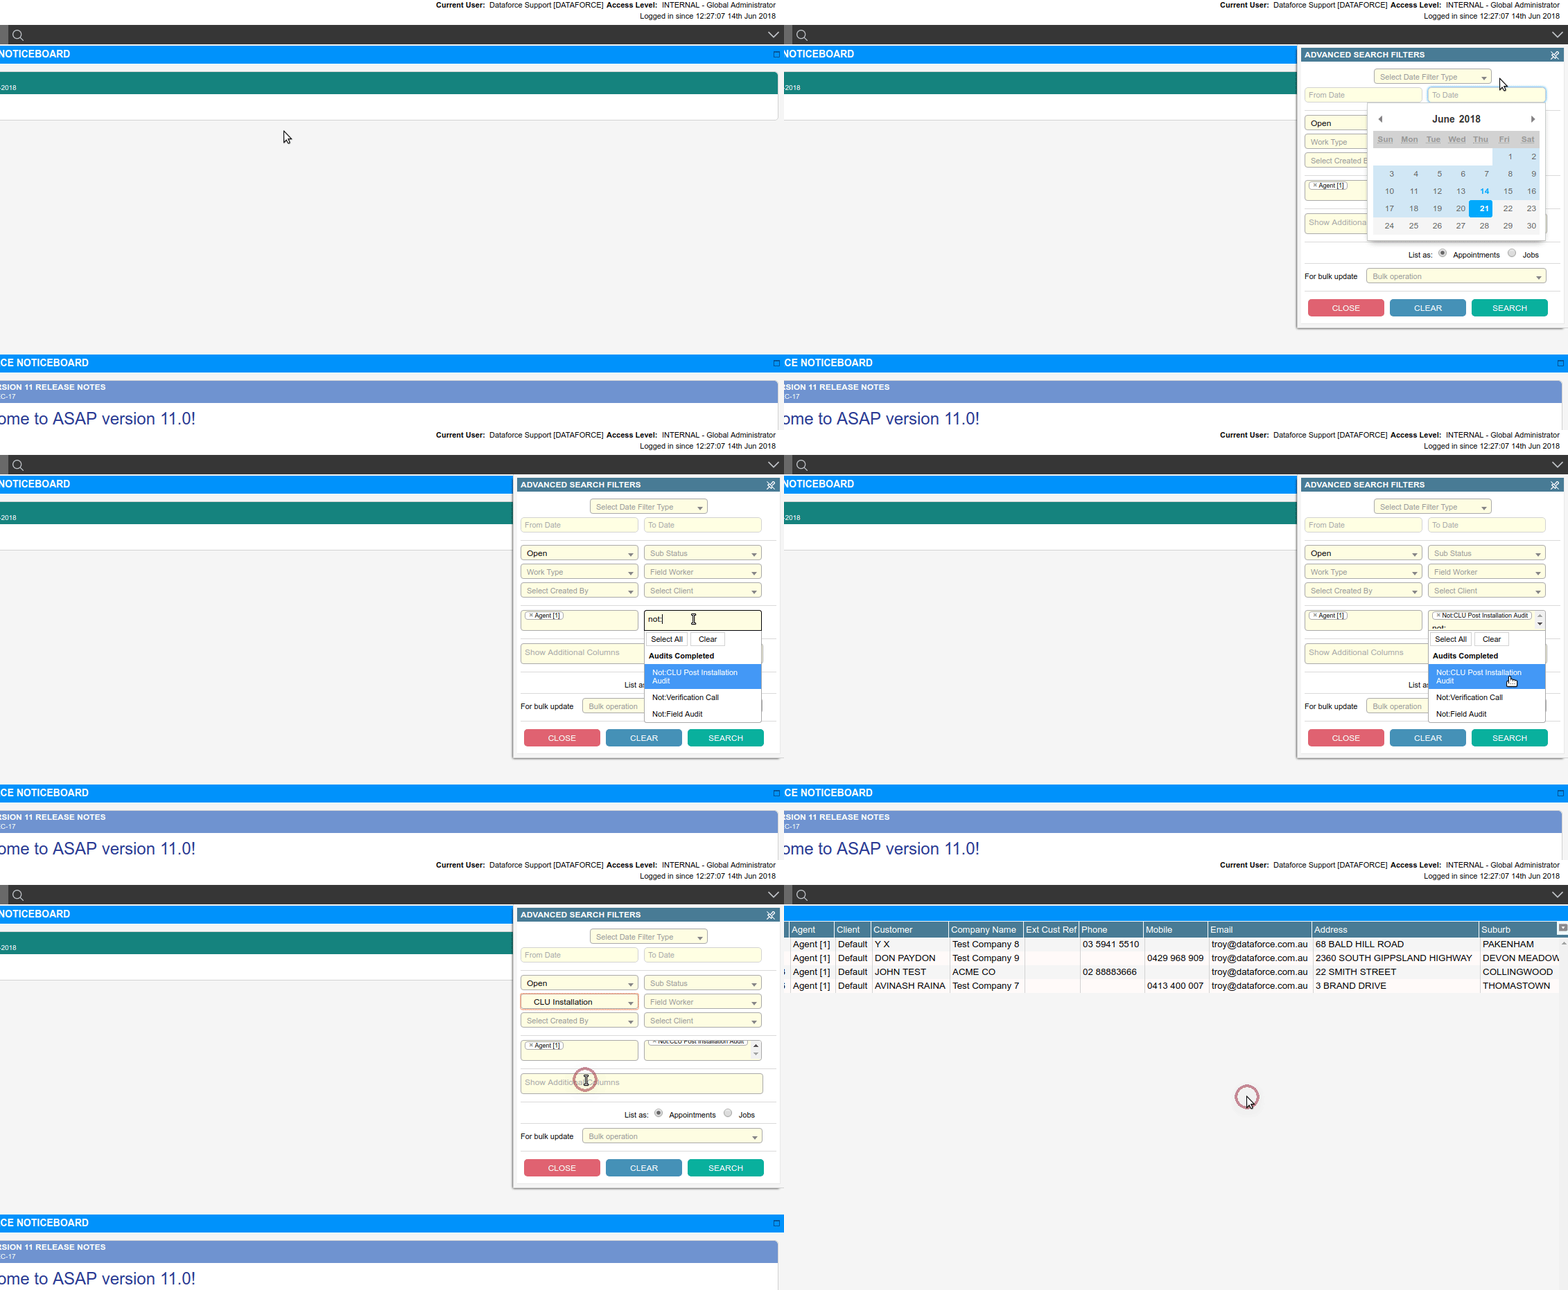
Search for Appointments requiring a Desktop Audit
- Click the search bar to open the Advanced Search Filters dialog.
- Go to the dialog and clear the dates for a full search.
- From the multi-filter dropdown, scroll down to the audits completed group and select one of the options, as outlined below.
- Click the search button, in the Advanced Search Filters dialog.
- You will see a list of appointments load into the grid below, if matches were found.
For every desktop audit type, Dataforce ASAP will add two filters to the audits completed filter group. One is a positive and other a negative, with the negative filter prefixed with ‘Not:’
- Selecting the negative filter applies a search where a desktop audit type has NOT started.
- Selecting the positive filter applies a search where a desktop audit type has started.
The status of the desktop audit type (Pass/Failed/Waived) does not affect this filter.
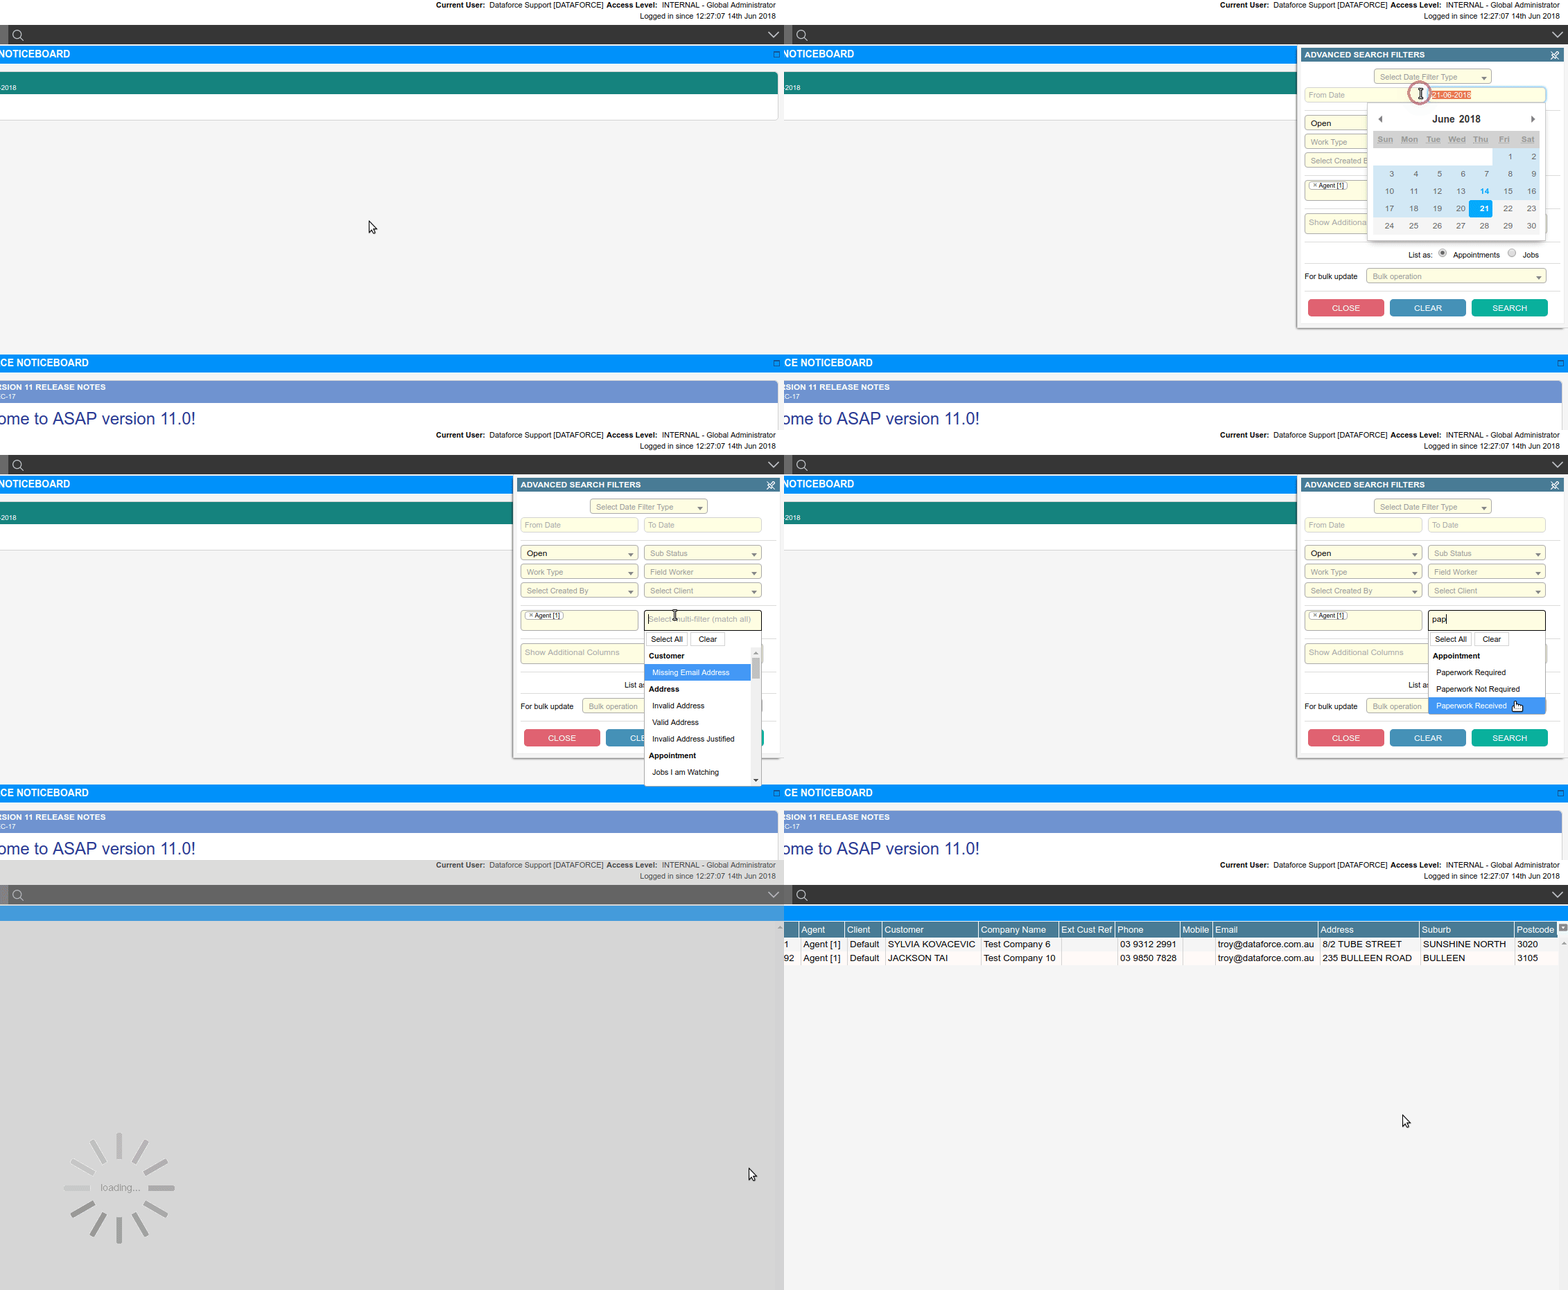
Search for Appointments that require Paperwork
- Click the search bar to open the Advanced Search Filters dialog.
- Go to the dialog and clear the dates for a full search.
- From the multi-filter dropdown, scroll down to the appointment group and select one of the options, as outlined below.
- Click the search button, in the Advanced Search Filters dialog.
- You will see a list of appointments load into the grid below, if matches were found.
These are the following paperwork filters in the multi-filter:
- Paperwork Required - Where the paperwork required flag is the required status.
- Paperwork Not Required - Where the paperwork flag is not enabled (either in the required or received status).
- Paperwork Received - If the field worker has used the paper form option, and the paperwork flag is set to received status.
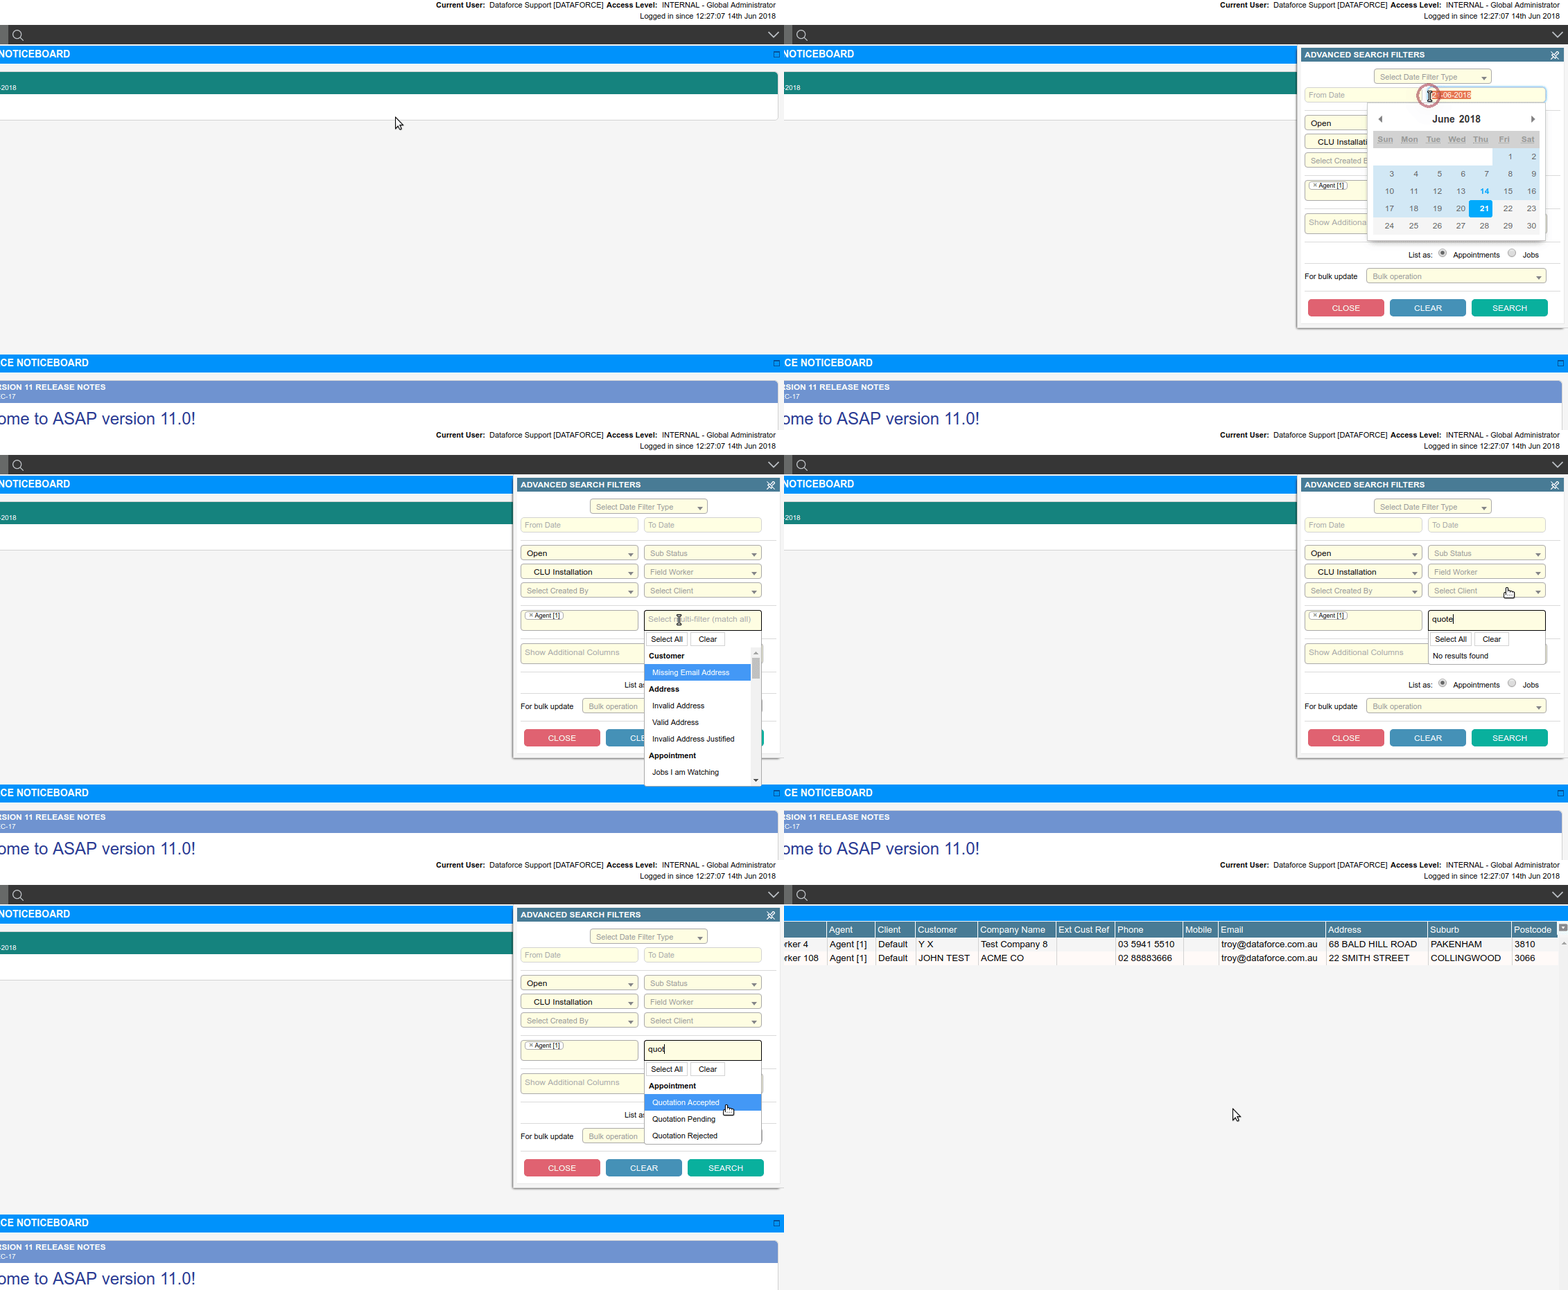
Search for Appointment by their Quotation Status
- Click the search bar to open the Advanced Search Filters dialog.
- Go to the dialog and clear the dates for a full search.
- From the multi-filter dropdown, scroll down to the appointment group and select one of the quotation status.
- Click the search button in the ‘Advanced Search Filters’ dialog.
- You will see a list of appointments load into the grid below, if matches were found.
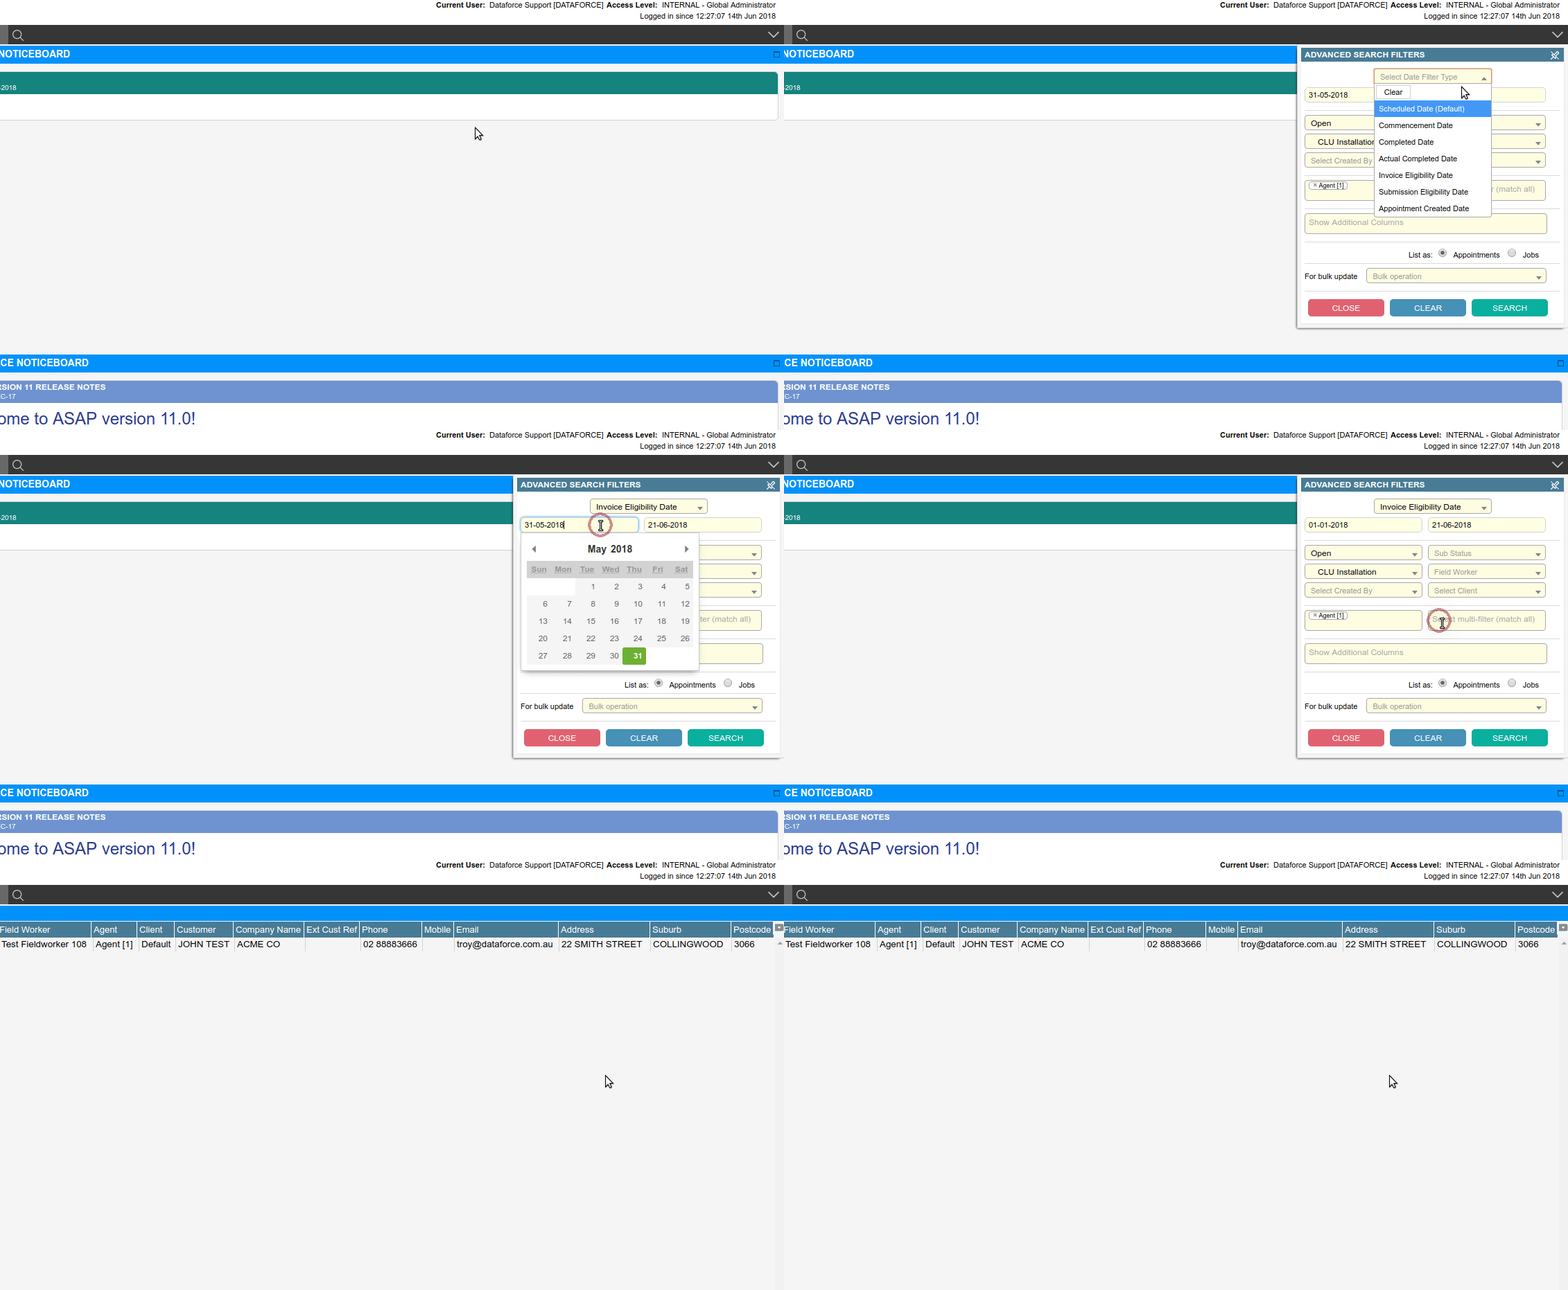
Find Appointments that are ready for RCTI
- Click the search bar to open the Advanced Search Filters dialog.
- Go to the dialog and change the date type to the invoice eligibility date.
- Change the date range to the period required.
- Click the search button in the Advanced Search Filters dialog.
- You will see a list of appointments load into the grid below, if matches were found.
We have multi-filter options that can be used if you need to use a date option like scheduled date.
The eligible filters include:
- Eligible Invoicing - Allows the search to return appointments that are ready for the next invoice.
- Not Eligible For Invoicing - Those that are held up due to bad data, for example, due to an invalid address or customer balance being outstanding.
FAQ.
Q: What are the search values in the dropdown?
| Filter | Description |
|---|---|
| Appointment ID | The appointment identification number. |
| Job ID | The job identification number. |
| Phone No | The customer’s phone number. |
| Datafile Export Batch Number | The batch number of the datafile export the appointment was included in. |
| Recycling Receipt Number | The receipt number associated with the appointment’s recycling batch. |
| Datafile Export Batch Number (Withdrawn Only) | Appointments in the batch which have certs that have been reverted for resubmission. |
| Property Address Postcode Search | The customer’s property postcode. |
| Company Name | The customer’s company name. |
| Customer Surname | The customer’s surname. |
| Customer Email | The customer’s email address. |
| Suburb | The customer’s property suburb. |
| Street Name | The customer’s property street name. |
| Employee Invoice Number | The number of the employee invoice that includes the appointment. |
| Agent Invoice Number | The number of the agent invoice that includes the appointment. |
| Contractor Invoice Number | The number of the contractor invoice that includes the appointment. |
| Client Invoice Number | The number of the client invoice that includes the appointment. |
| External Payment Transaction Number | The external payment number associated with the appointment. |
Q: What are the search filters in the search panel ‘Advanced Search Filters’?
| Filter | Description |
|---|---|
| Date Filter | The date value to be assessed by the next two filters. |
| From | The earliest possible date the value from the date filter can be. |
| To | The latest possible date the value from the date filter can be. |
| Status | Appointment status. |
| Sub Status | Appointment sub-status. |
| Work Type | The work type associated with the appointment. |
| Field Worker | The field worker assigned to the appointment. |
| Created By | The user that created the job. |
| Client | The client associated with the job. |
| Agent | The agent associated with the appointment. |
| Multi Filter | A list of preset filters, all selected must match the appointment. |
Q: How to export the search results?
To export the search, navigate to the bottom right of the grid, move the mouse over the small green Excel icon and click once. A download will begin of a CSV file that can be viewed in Excel.
