Creating a job is a multi step process.
- Enter the basic customer and address details.
- Answer Job Questions to generate a desktop quote.
- Review the quote and / or email a copy to customer.
- Schedule the first appointment.
- Enter in job instructions.
Step 1: Basic Customer and Address Details
In this step, the operator must collect the address and customer details; the fields that are required are detailed below.
Customer Details Field
| Field | Description |
|---|---|
| External Job ID | [Optional] This number can be used to reference the customer to an external record. |
| Title | The title of the customer. |
| First Name | The first name of the customer. |
| Surname | The surname of the customer. |
| Phone Number | At least one contact number is provided, either phone number or mobile number. |
| Mobile Number | At least one contact number is provided, either mobile number or phone number. |
| Customer Type | Customer type determines the type of job that will be created such as a residential job or business job. |
| Company Name | [Only for Business] This is a mandatory field if the selected customer type is business. |
| GST Registered | [Only for Business] This is a mandatory is the business is tax registered. |
| ABN/ACN | [Only for Business] ABN if tax registered and optional ACN if not. |
| Email Address | [Optional unless configured] This is the email address of the customer. |
Property Address Field
| Field | Description |
|---|---|
| Building Name | This number can be used to reference the customer to an external record. |
| Unit No | The unit number of the property. |
| Lot No | The lot number of the property. |
| Street No | The street number of the address. |
| Street Name | The name of the street. |
| Street Type Suffix | The type of street (road, lane, crescent etc). |
| Suburb | The suburb where the property is located. The selected suburb must exist in the suburb list. Refer to Suburb if the selected suburb is a new suburb which does not exist in the system yet. |
| State | The state where the property is located. |
| Postcode | The postcode where the property is located. The postcode must match with the postcode defined in the suburb list. |
Using Address Search
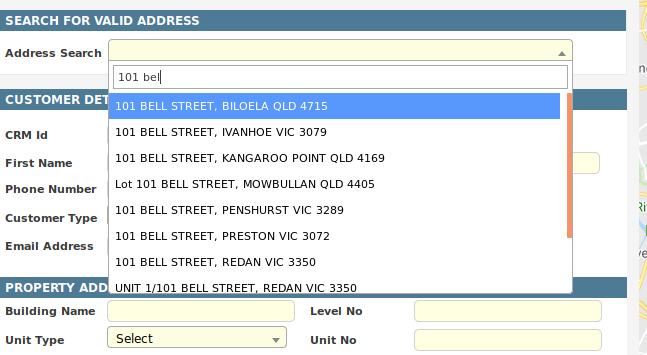
To save time, Dataforce ASAP has an address search. To search for an address, click the Address Search field and start typing an address, starting with the street or unit number. If the address matches, it can be selected from the drop down menu.
When an address is selected from the drop down, it automatically fills the address details in the associated fields on the page.
Adding Job Details
- Open the Create a New Job screen by clicking NEW JOB from the navigation bar.

- Complete the customer fields.
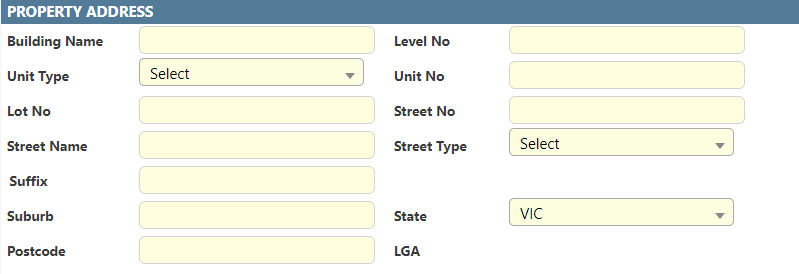
 Complete the address fields by either:
- Manually fill in the address details in the provided fields.
- Run an address search, as described above.
-
If the billing address differs from the property address, uncheck the billing address checkbox and fill in the billing address details. The address search only works for the property address.
- Select the agent and client to assign to the job.

- Select Create Job.
Validation Error: No Access or Suburb does not Exist.
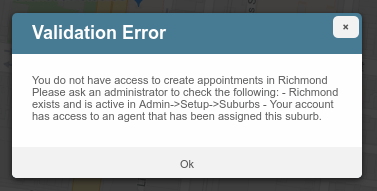

This error can occur when:
- The suburb does not exist in the current locality (state).
- The suburb is not assigned to the job agent as a sales territory.
- The suburb does not exist at the value entered in the postcode.
If you believe the suburb to be correct, please contact your Dataforce ASAP administrator and they can either enter the suburb into the database and / or assign this suburb to the creation agent.
Validation Error: Address Fails verification.
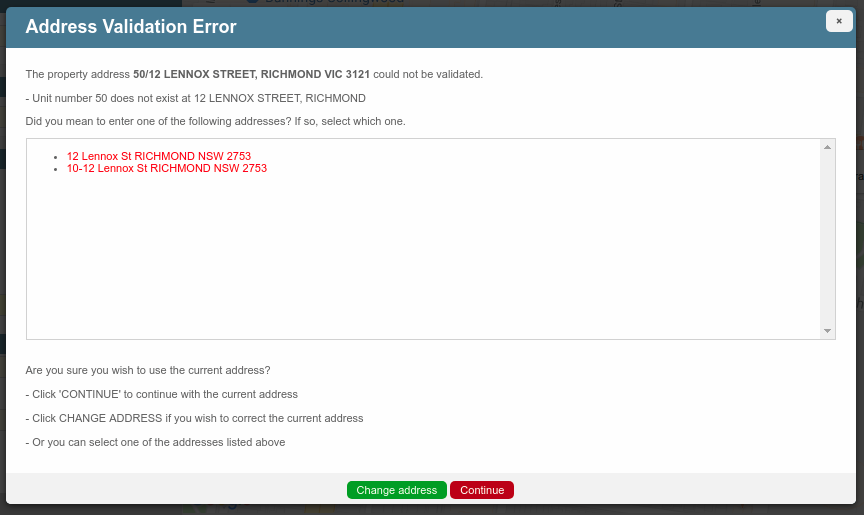
If the address has failed verification, the above model will be displayed.
If the verification service has suggestions, it will include them for the appropriate selection, if one of the suggestions is appropriate. Use the mouse to hover over the address and right click to switch the address to the suggestion and, after doing so, click the button, Save As to try again.
If you’d like to correct the address and try again, please click the green button, Change Address. If you’d like to use the current address, please click the red button, Continue. This will save the customer details and continue to step 2: Job Questions.
Step 2: Job Questions
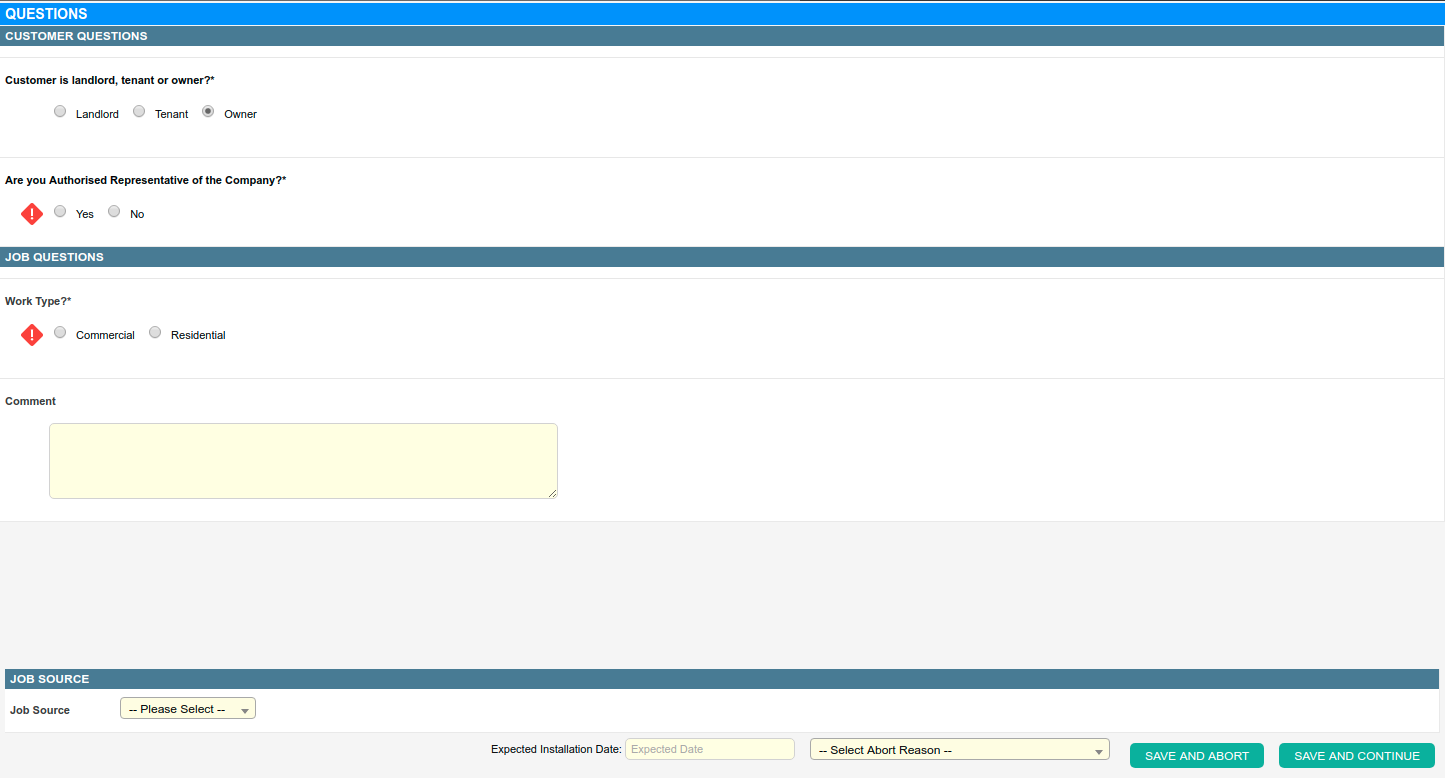
A page will now be displayed showing all relevant customer and job questions. These questions can create a desktop quote and choose the work type of the first appointment.
After the mandatory questions have been completed, select the SAVE AND CONTINUE button on the bottom right of the screen.
If, during the quotation process, the customer requests a stop or are no longer eligible, the job can be aborted by selecting an abort reason from the drop down menu and selecting the SAVE AND ABORT button on the bottom right.
Step 3: Review the Quote
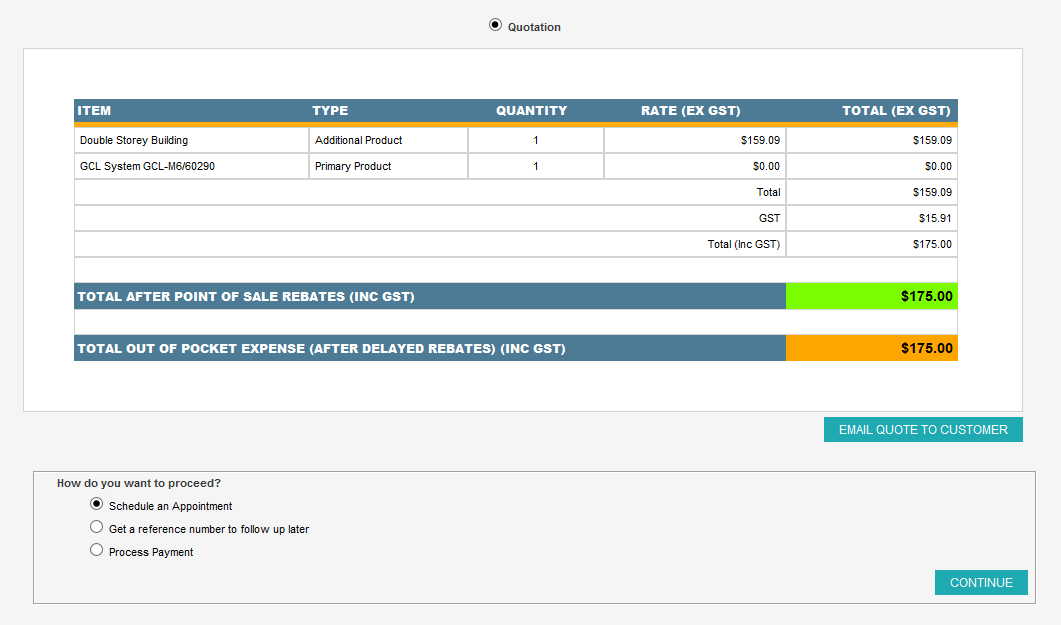
-
(Optional) Depending on the work type configuration, you may now be presented with a quotation based on the questions answered on the previous screen.
- You may click Email Quote To Customer to send the quote to the customer via email.
Important: For an email to be sent, an email type needs to be configured with its type set as quote. Please refer to Email configuration for details on setting up an email type.
- To continue, you may now select one of the following:
- Schedule an appointment.
- Get a reference number to follow up later.
- Process the payment.
- You may click Email Quote To Customer to send the quote to the customer via email.
Step 4: Schedule the Appointment
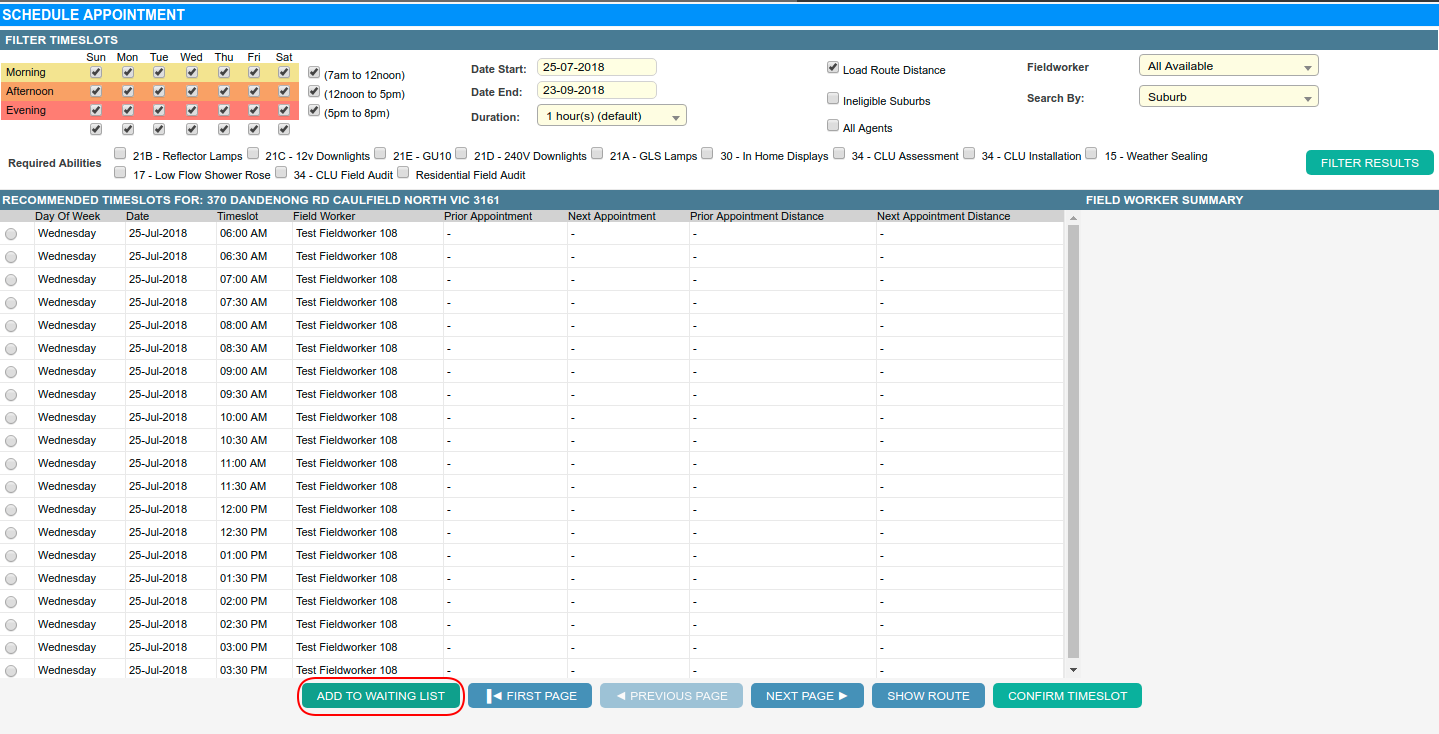
This step allows the appointment to be scheduled, and if a time cannot be determined, the appointment can be assigned to the waiting list by clicking the button shown above.
Please see the page, Using the Smart Scheduler, for help on scheduling the appointment.
Step 5: Job Instructions and Confirmation
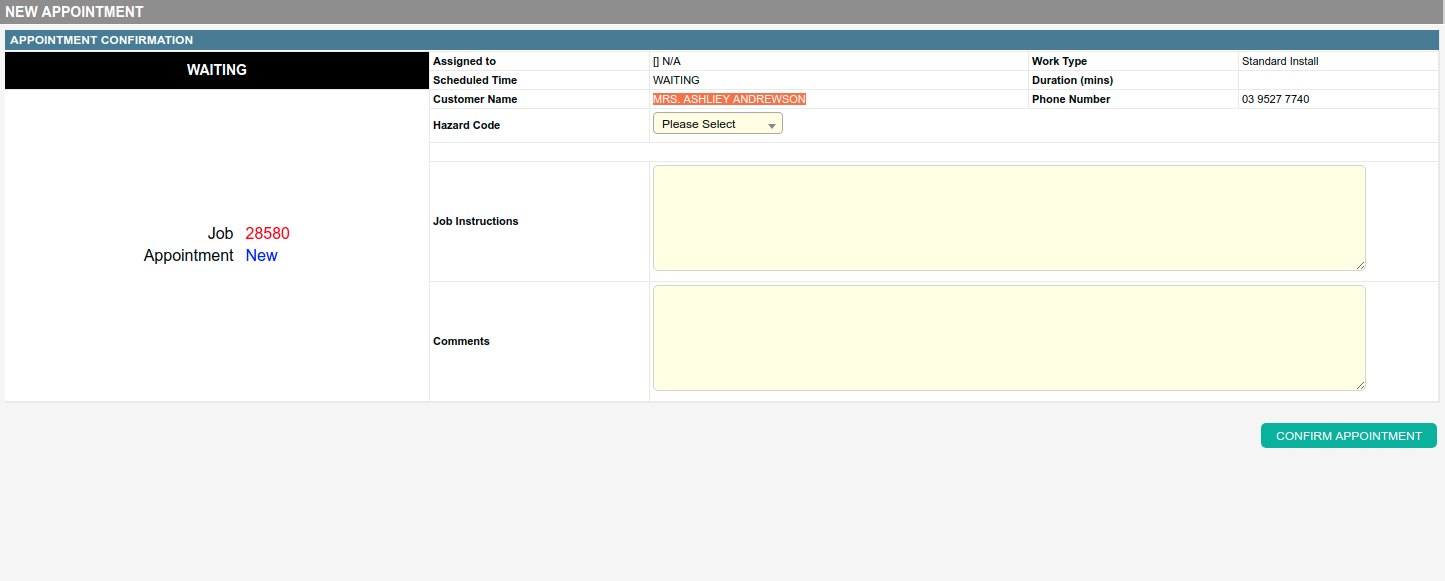
This screen allows the operator to enter a job instruction, e.g “Knock on door three times”, and another comment that’s for back-end operators but not the field worker.
Once these fields have been completed, please click the Confirm Appointment button to finish this new job process. The screen will be redirected and open into the new appointment.
