Overview
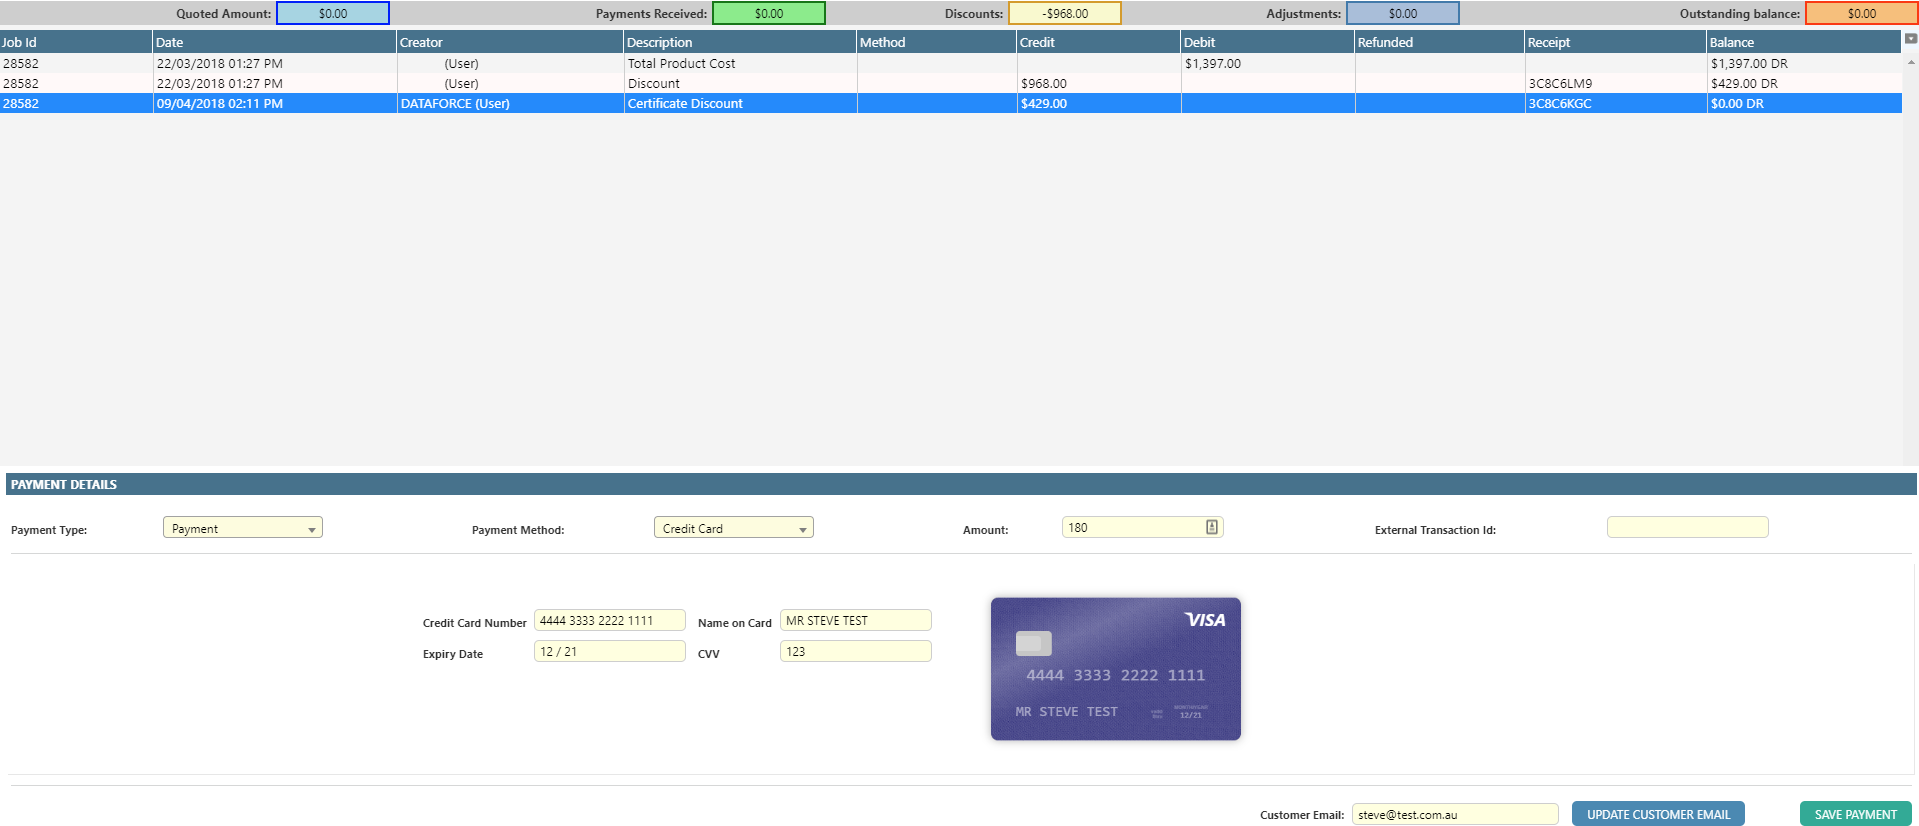
When a quote or installation is completed, it generates a set of transactions. From this screen, an operator can view these automatic transactions, record payments and take new credit card payments.
When processing payments, Dataforce ASAP does not store credit card details. Instead, the details are securely passed to a payment gateway where the transaction is processed.
Transaction Types
Transaction records on this screen fall under the following categories:
| Type | Description | Information |
|---|---|---|
| DEBIT | Total product cost | The quote/invoice amount, excluding any discounts (discount products / calculation discounts). |
| CREDIT | Certificate discounts | The summed value of all calculation discounts for the job. |
| CREDIT | Other discounts | The summed value of all discount products attached to the quote / invoice. |
| CREDIT/DEBIT | Manual transaction records | Records of any customer transaction relevant to the job, e.g. cash, bank transfers, etc. |
| CREDIT | Credit Card payments | Distinct from other transaction records as credit card transactions represent a record of a charge performed within Dataforce ASAP or Dataforce Runabout. |
Quote Transactions and Invoice Transactions
There are some differences in how Dataforce ASAP manages quote and invoices different transactions. Quote transactions are stored only against the job; there’s no value in the appointment column. Payments/deposits taken during the quote are assigned to the job too.
After the first installation is completed, quote transactions are purged and replaced with new transactions. These are assigned to the installation and have a value in the appointment column on this screen.
Payments/deposits that are not allocated to an appointment will be applied against this installation. If the appointment is later canceled or reverted, payments are released back to the job.
If a callback of the installation is completed, a new set of transactions will be created and linked to the callback appointment.
Installations and their callbacks each have a set of transaction records and payments, while quote transactions only exist once and are purged when the installation is completed.
Adding Transaction Records
To add a record of an external job transaction (e.g. cash, bank transfer, cheque), use one of the following processes:
- Open a job.
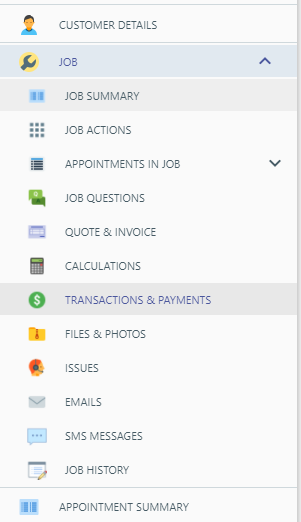
- Using the navigation menu, select Job Transaction.
- Select from the dropdown an installation appointment; if the dropdown is not visible then transactions are recorded against the quote/job.

-
Fill in the payment details.

- If necessary, update the customer email before processing the transaction to ensure the transaction confirmation email (if configured) is delivered correctly.
- Select Save Payment.
Processing Payments
Credit card payments can be processed through Dataforce ASAP or Dataforce Runabout.
Either process requires a payment gateway to be configured on the job’s agent.
The following steps will charge a customer and automatically create a transaction record within Dataforce ASAP:
- Open a job
- Use the navigation menu to select Job Transaction.
-
Select from the dropdown an installation appointment; if the dropdown is not visible, then transactions are recorded against the quote/job.

- Fill in the payment details, selecting ‘Credit Card’ as the payment method.
-
Fill in the credit card details.
- If necessary, update the customer email before processing the transaction to ensure the transaction confirmation email (if configured) is delivered correctly.
- Select Save Payment.
Payment Gateways
Payments gateways provide a method for securely processing card transactions through Dataforce ASAP.
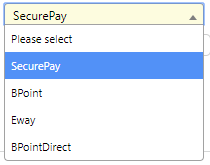
To add a gateway, you must first create an account with one of the following supported providers:
- SecurePay.
- BPoint.
- Eway.
- BPoint Direct.
Payment gateways are specified through an appointment’s agent, providing the ability for each agent to support a different gateway. If all agents are processed through the same system, simply add the same gateway details on all required agents.
Adding a payment gateway
- Open the required agent.
- Select the Payment Gateway Provider.
- Enter the Username and Password associated with your provider account.
- Select Save Details.
Payment Details
| Detail | Description |
|---|---|
| Payment Type | • Payment. • Deposit. • Adjustment. See below for a description. |
| Payment Method | The transaction’s method of payment. A number of new fields may appear to record pertinent transaction information. • Finance. • Credit Card (WILL CHARGE CUSTOMER). • Money Order. • Cash. • Cheque. • EFT (Electronic Funds Transfer). • Adjustment (Only valid for adjustments). • External Payment (use for any transaction that does not fall under the above categories). |
| Amount | The transaction amount as a decimal e.g. 12.49 |
| External Transaction Id | A reference number for transactions processed outside of ASAP. |
| Customer Email | The customer’s current email - field, provided for convenience to ensure transaction email (if configured) will be emailed to correct address. |
Payment Types
Payments fall under three distinct types within Dataforce ASAP:
-
Payment
Payments represent almost all credit transactions that can occur in relation to the customer; this can include entire payments, finance installments, partial payments, etc.
-
Deposit
Deposits represent the first credit transaction and for all intents and purposes and behave in the same manner as a payment transaction with two exceptions:
- Deposits are categorised differently, meaning they will appear under a different label/description throughout the system.
- Due to this categorisation, they may not appear in some data provider fields, e.g. if the provider contains two fields, payments and deposits, the payments field will not include any deposit transactions and vice versa.
-
Adjustment
Adjustments should be used only as an accounting transaction (i.e. a financial journal entry) and should not represent an actual customer transaction (these would fall under a payment transaction).
Refund a Payment
When the refund action is used, the full amount of the selected payment will be refunded to the credit/debit card that was used to make the payment.
-
Open the job/appointment which you wish to create a refund for
-
Access the Transactions & Payments menu for that job
-
Select the transaction which you wish to refund
-
At the bottom of the page, select the reason for the refund from the drop down box.
- Click Refund Payment to finalize the refund
Assign a Payment to a different Appointment in the Job
- Select the Entire Job / Quote from the Show transactions For dropdown in the top left of the Job Transactions screen
-
Select the payment you wish to reassign
-
In the Payment Details section, select the appointment which you want to allocate the payment to
-
Click Apply Payment To Appointment


