Overview
As of June 2025, the Essential Services Commission (ESC) has updated their VEU Portal backend.
The new VEU Portal requires that all bulk submissions for certificate creation are done using an API-based submission (Applicant Program Interface).
This change replaces the previous manual submission process (manual file uploads) and introduces a more efficient way to handle VEU submissions.
This guide provides detailed instructions for both individual ACPs and aggregators on how to configure and use the new VEU submission process in Dataforce ASAP.
This guide assumes you:
- Are an Accredited Person under the VEU scheme for activities you wish to claim.
- Have your ACP Account Number.
- Have authorised Dataforce to submit bulk creation requests on your behalf by:
- submitting the online form provided by ESC (Before 29th May 2025)
- opening a case in the VEU Portal (Post 3rd June 2025)
Submission Scenarios
1. Submitting data from your own Dataforce ASAP instance
Follow these steps if you are:
- an Accredited Provider (ACP) creating certificates for jobs in your own Dataforce ASAP instance
- an Accredited Provider (ACP) doing aggregation for multiple companies, with all data contained within your own Dataforce ASAP instance
- Configuring the Integration
- Datafile Format Changes
- Creating a Submission Batch
- Submitting Batches to the VEU Portal
- Uploading the VEU Response File
- Handling Validation Errors
- Handling Failed Registrations
- Legacy Batches & Duplicate Protection
2. Submitting data from another Dataforce ASAP instance
Follow these steps if you are:
- wanting to submit data from another Dataforce ASAP instance (e.g., a client or partner’s instance who is not an ACP)
- Configuring the Integration
- Datafile Format Changes
- Manual Datafile Upload & Submission
- Uploading the VEU Response File using the VEU Submission Queue
- Handling Validation Errors
- Handling Failed Registrations
Configuring the Integration
Dataforce ASAP Pro Accounts
- Navigate to Settings (⚙️) > Integrations > Integration Settings.
Dataforce ASAP LITE Accounts
- Go to Admin > Agent > Agent Register.
- Select your agent record, then click Edit Agent.
- Open the Integrations tab.
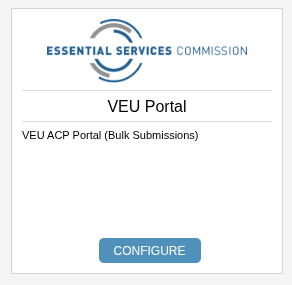
Locate VEU Portal Integration and click Configure.
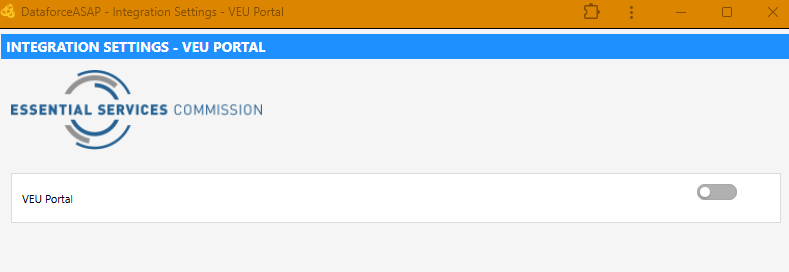
Enable the integration with the toggle, then complete the settings:
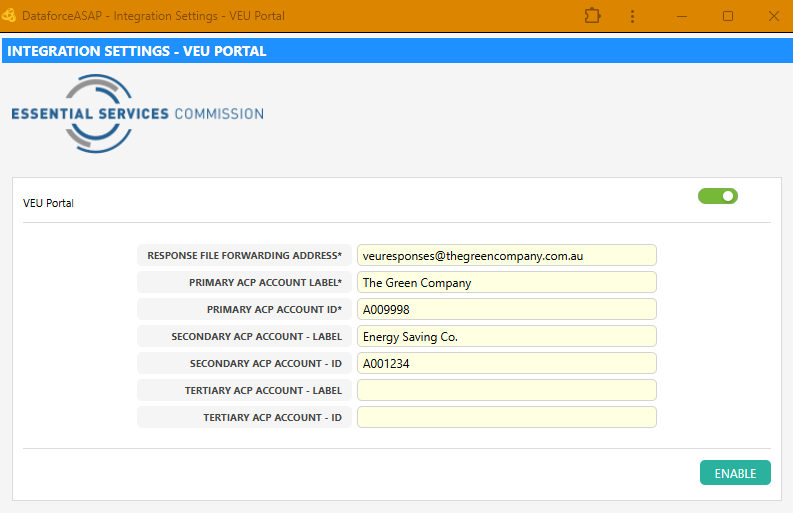
Response File Forwarding Address
Enter an email address where we can forward the VEU registration response emails. These responses will indicate which registrations have been successfully processed and which have failed.
It is important that operators who create submissions in Dataforce have access to this email account.
Please avoid using personal email addresses; we recommend using a shared mailbox.
Account IDs
You may enter up to three ACP Account IDs. You must have authorised Dataforce to submit on your behalf for each account ID.
To help identify each account, you can also enter a label for each.
Only the primary account is mandatory; the secondary and tertiary are optional.
Click Enable to save the settings and activate the integration.
Activity Datafiles - Format Changes
Although the VEU portal no longer accepts manual file uploads, Dataforce ASAP still generates datafiles for a number of reasons:
- To export data for other purposes, such as internal reporting or analysis.
- To provide a backup of the data in a structured format.
- To facilitate data sharing with other systems or stakeholders.
- To enable users to review and validate data before submission.
- To continue supporting legacy processes that may still require datafiles.
- To maintain flexibility in mapping of internal data structures to the VEU Portal requirements.
- To provide a consistent and reliable method for generating datafiles, even with the changes in the submission process.
Beginning June 2025, VEU activity-related datafiles have been modified to accommodate the new API-based submission process. The following changes apply:
- Fieldworker Details: All installer related fields, including names, company names, license numbers etc, have been replaced with Scheme Participant IDs.
- Address Format: Standardized property address fields to match VEU Portal requirements.
-
Increased Capacity:
- Activity 17: Now supports up to 4 product types
- Activity 44: Now supports up to 12 upgrade areas
- Activities 34: Now supports up to 75 upgrade areas
- Activities 35: Now supports up to 75 upgrade areas
- Activity 6: Now supports up to 6 upgrade areas
Creating and Submitting a Submission Batch
This process has not changed; you will continue to use the Create Submission Batch screen to create submission batches.
For more details on creating a submission batch, refer to Review Start a New Submission
Steps to Create a Submission Batch
- Open Tasks Submissions and Datafile Create Submission Batch to define your batch.
- Review Start a New Submission for detailed steps.
- Open Tasks Submissions and Datafile Manage Submission Batches to manage your submission batch
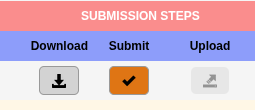
Submitting Batches to the VEU Portal

- In Submission Batches, click the Download button to review your file.
- After clicking Download, the Confirm button will unlock, allowing you to proceed with submission.
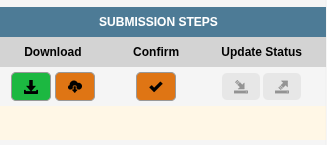
- Click Confirm to push this batch to the VEU Submission Queue.
- Select the ACP Account that this batch will be claimed under (defined in your integration settings).
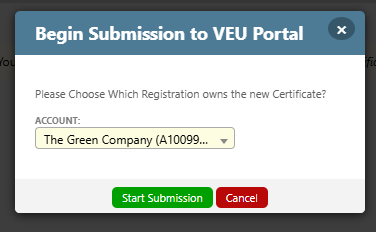
-
Click Start Submission, then Validate and Submit.

- On validation failure, errors display on-screen. See Handling Validation Errors.
- On validation success, the batch submits to the VEU API.
- A Success screen will appear once accepted.

- Click Return to Recent Submissions
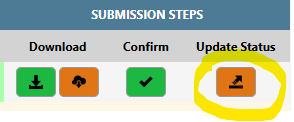
Uploading the VEU Response File
The below steps are only required if you are manually uploading a response file.
- In Manage Submission Batches, click Upload Response File button for the the relevant.
- On VEU Submission Response File Upload, select and upload the response file.

-
Uploaded records will be matched and validated based on the applicantReference number. The results of the import will be displayed.

Manual Datafile Upload & Submission
For Aggregators who generate or receive datafiles from other clients Dataforce ASAP systems, we have added an option to load datafile batches directly into your own VEU Submission Queue.
Once loaded into the VEU Submission Queue, you can submit them directly to the VEU portal.
- Go to Tasks Submissions and Datafile VEU Submission Queue

- Click Add Manual Submission

-
Provide:
- VEU Accreditation: Choose ACP you wish to claim the certificates under.
- Activity: Select the matching activity datafile definition.
- Run Date: Default to today.
-
- File: Select the datafile to upload.
- Click Upload and Validate (no immediate portal submission).
On success, the batch appears in the VEU Submission Queue

Submitting from the VEU Submission Queue
-
In VEU Submission Queue, click Submit for the desired batch.
-
Confirm Send to VEU Portal.

-
On acceptance, the VEU will process the submission and email a response file.
-
Return via Return to VEU Submission Queue

Uploading the VEU Response File using the VEU Submission Queue
The below steps are only required if you are manually uploading a response file.
- In VEU Submission Queue, filter for Incomplete batches.
- Click Upload next to your batch.
- Choose the response file and click Upload and Validate.
- View full processing results on success.
Handling Validation Errors
During Submission to VEU Submission Queue
When submitting a batch from the Submission Batches screen, or adding a manual submission via the VEU Submission Queue the submission data will undergo a validation process to ensure that the data is in the correct format and is not missing any mandatory information.
If any validation errors are encountered during this process, an itemised table containing the errors is displayed.
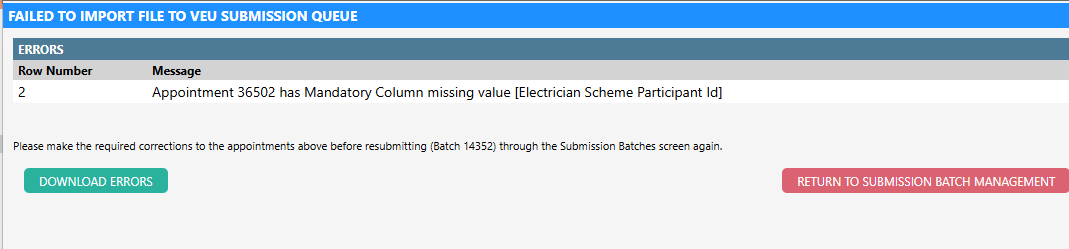
- Errors are displayed with a row number, and description.
- You may download the errors via the Download Errors button.
Common issues:
- Missing appointment details.
- Missing product attribute details.
- Incomplete customer information.
- Missing Scheme Participant IDs on installers.
- Invalid datafile column setup.
- Duplicate submission, ie, record has already been submitted to VEU and accepted
After resolving all issues, you may retry the submission, or retry uploading the manual submission batch (if using a manual submission batch)
Handling Failed Registrations
The response file will contain a record for each activity in the batch. Records will have a status of success or error.
After a response file is imported:
- Activities with a status of success will have their submission status updated to accepted.
- Activities with a status of error will have their submission status updated to rejected.
The submission status of individual activities can be viewed through the Certificate Submissions tab within an appointment.
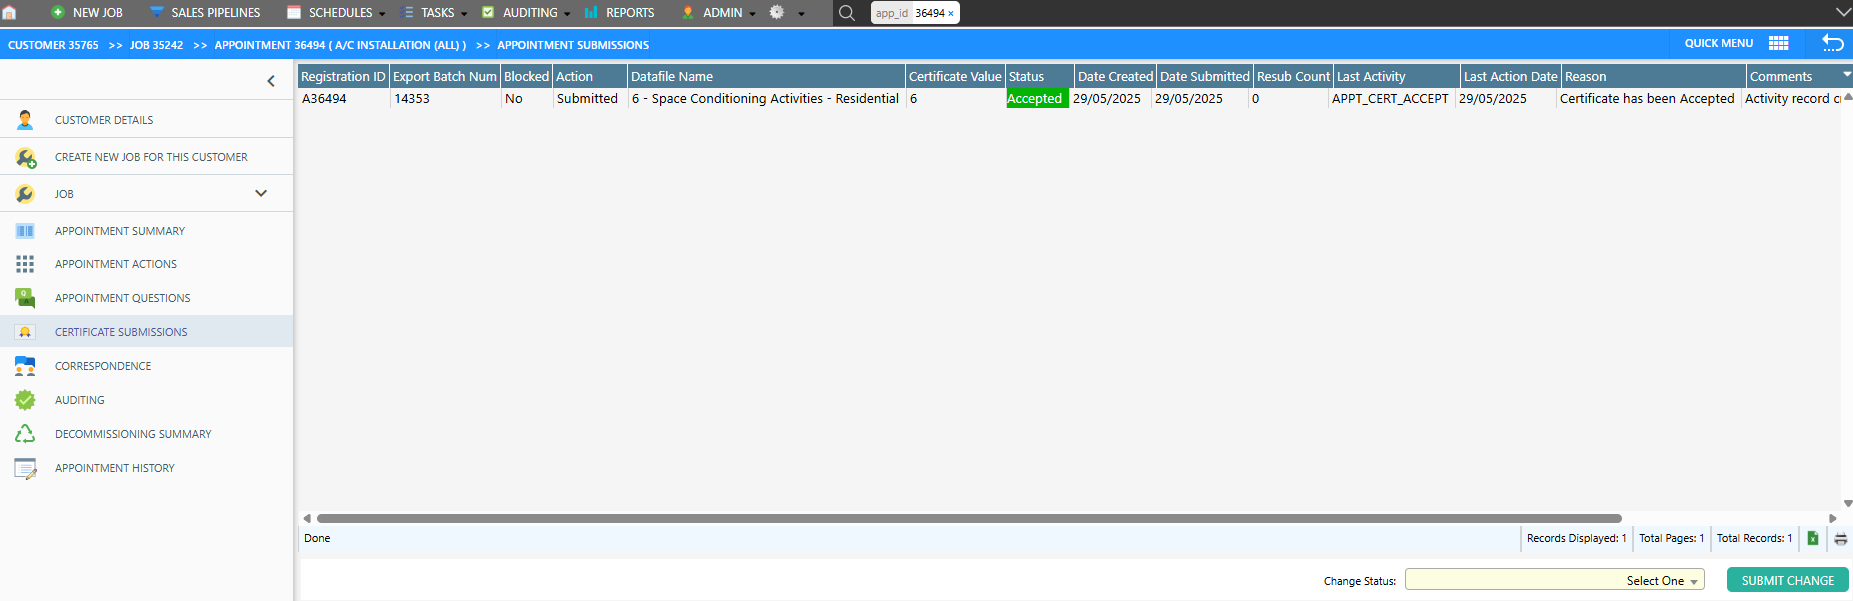
Activities in Dataforce with a rejected status, can be resubmitted in a new batch. Before submitting these activities in a new batch you should ensure that all errors have been corrected.
Correcting errors on an appointment may require you to perform additional actions first.
For example, non-super users cannot edit question on an appointment while the appointment is in a passed audit status. Therefore, you will need to fail the audit on the appointment before you can make corrections. After making the required corrections, you will need to pass the audit again for the appointment to become submission eligible again.
When creating a new batch to re-submit rejected appointments, use the status option of ‘Ready for Re-Submission’. This will pickup activities that have a rejected submission status, but are still submission eligible.

Legacy Batches & Duplicate Protection
- Legacy Batches (pre-June 2025) can be deleted; accepted appointments may be resubmitted manually.
- API Duplicate Protection applies to appointments submitted after June 6,2025.
- Once an API batch is deleted, avoid re-uploading accepted appointments to prevent duplicates.
Scheme Participant IDs and Multiple AP Accounts
Scheme Participant IDs are unique to each Accredited Provider (AP) in the VEU portal. If you submit under multiple AP accounts, each fieldworker must have a separate Scheme Participant ID for each AP account.
A new section, Scheme Participants, has been added to the Fieldworker Profile screen:
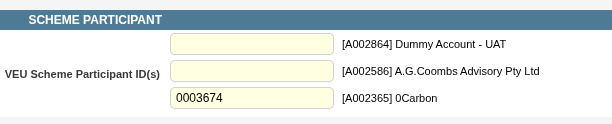
The available AP accounts must be configured by Dataforce. If any are missing, please contact our support desk with the list of AP accounts to enable editing.
A bulk upload screen is available using an Excel template, found at Admin > Field Workers > Upload VEU Scheme Participant IDs.
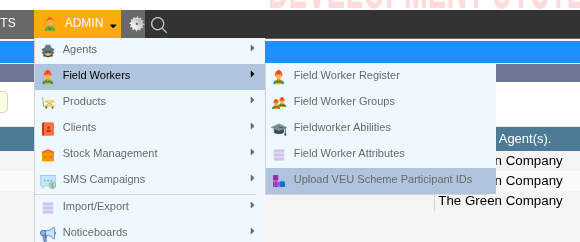
To identify missing VEU Participant IDs, use the report titled VEU Scheme Participants.

If an ID has not been provided, it will appear as an empty row (see example below).

You can download this report as a CSV file, fill in the missing values, and upload it to the Upload VEU Scheme Participant IDs screen.