Overview
If a datafile attends an appointment and cannot commence due to inaction by the customer, an appointment can be completed as a customer no show. This completion leaves the appointment in a completed status but with no question answers or products included in the appointment. It can be later invoiced in an RCTI to pay the datafile for attendance only.
A no show can have a new appointment booked at a later date to complete the job.
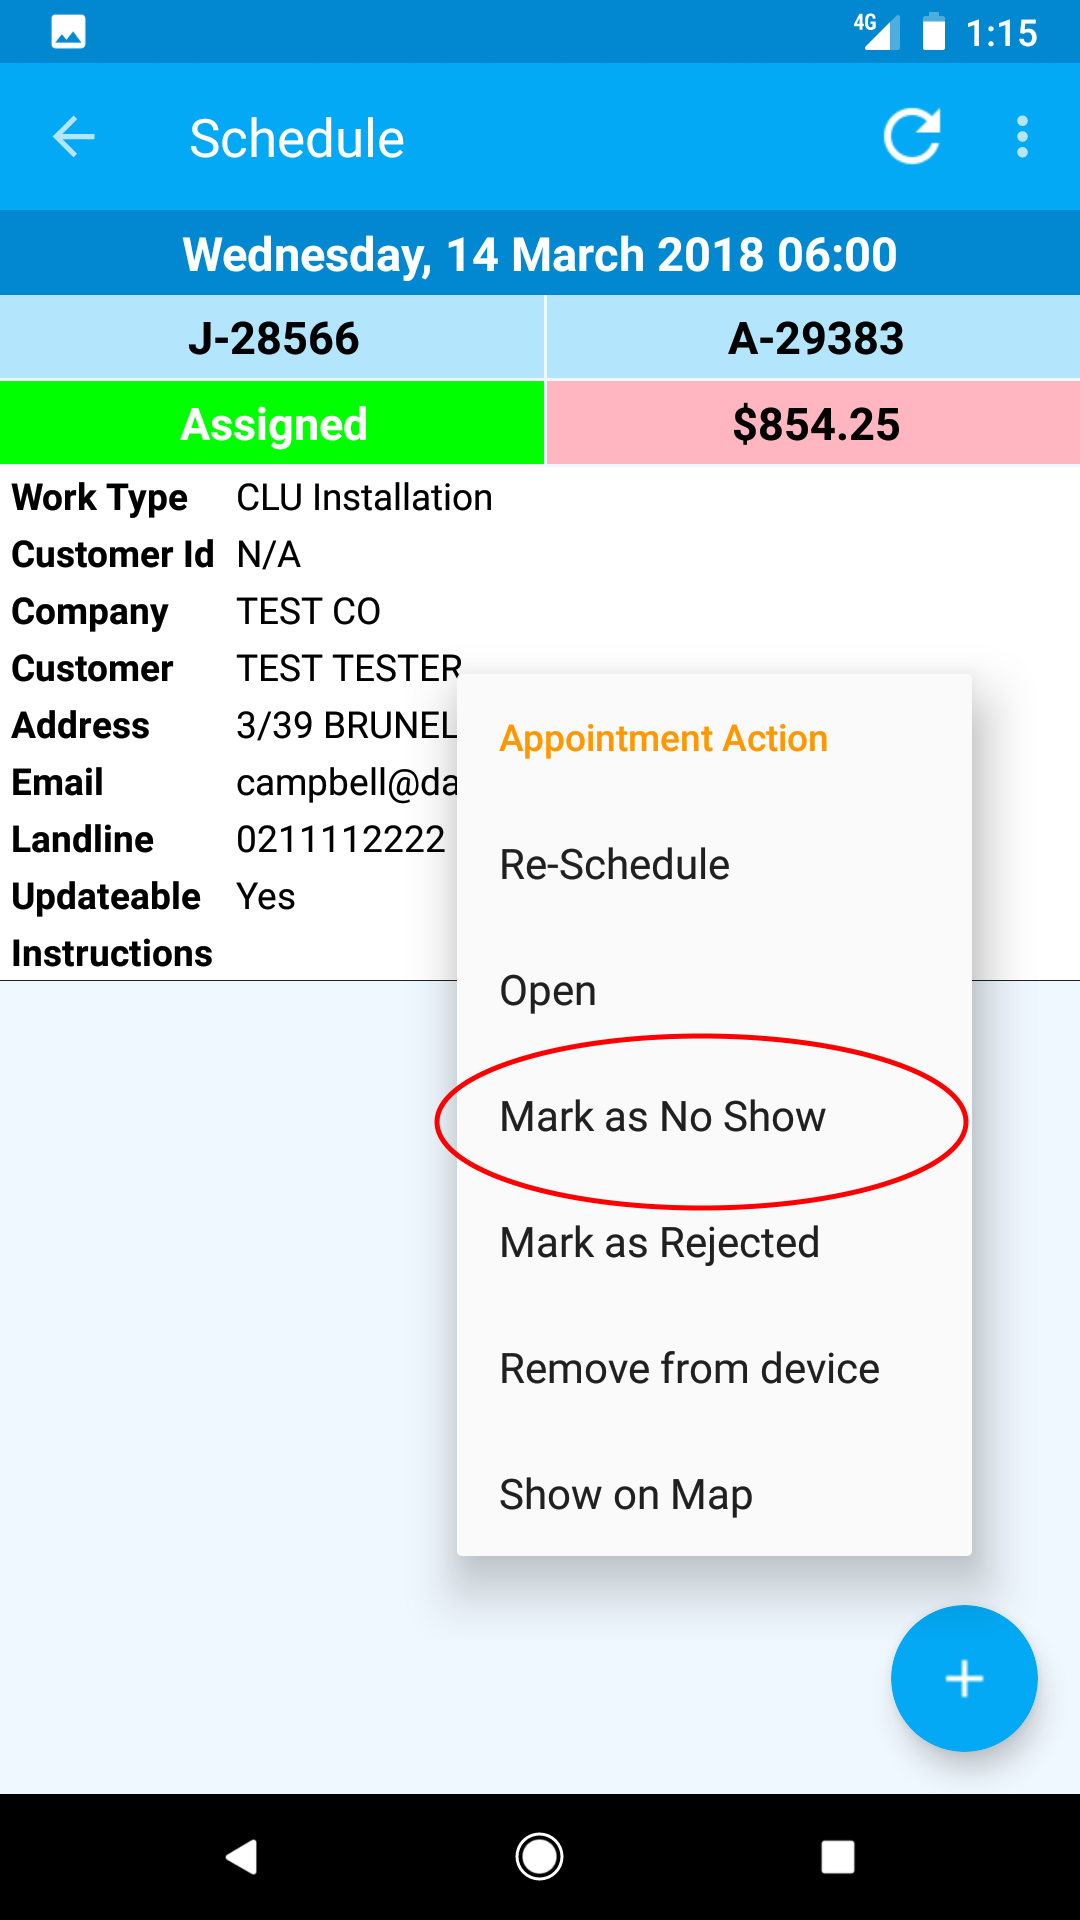
Completing an Appointment as a No Show on Dataforce Runabout.
A datafile can complete an appointment as a no show by doing the following:

- In Dataforce Runabout, open the schedule day with the appointment.
- Hold down on the appointment until the Appointment Action popup appears.
- Select the Mark as No Show option.
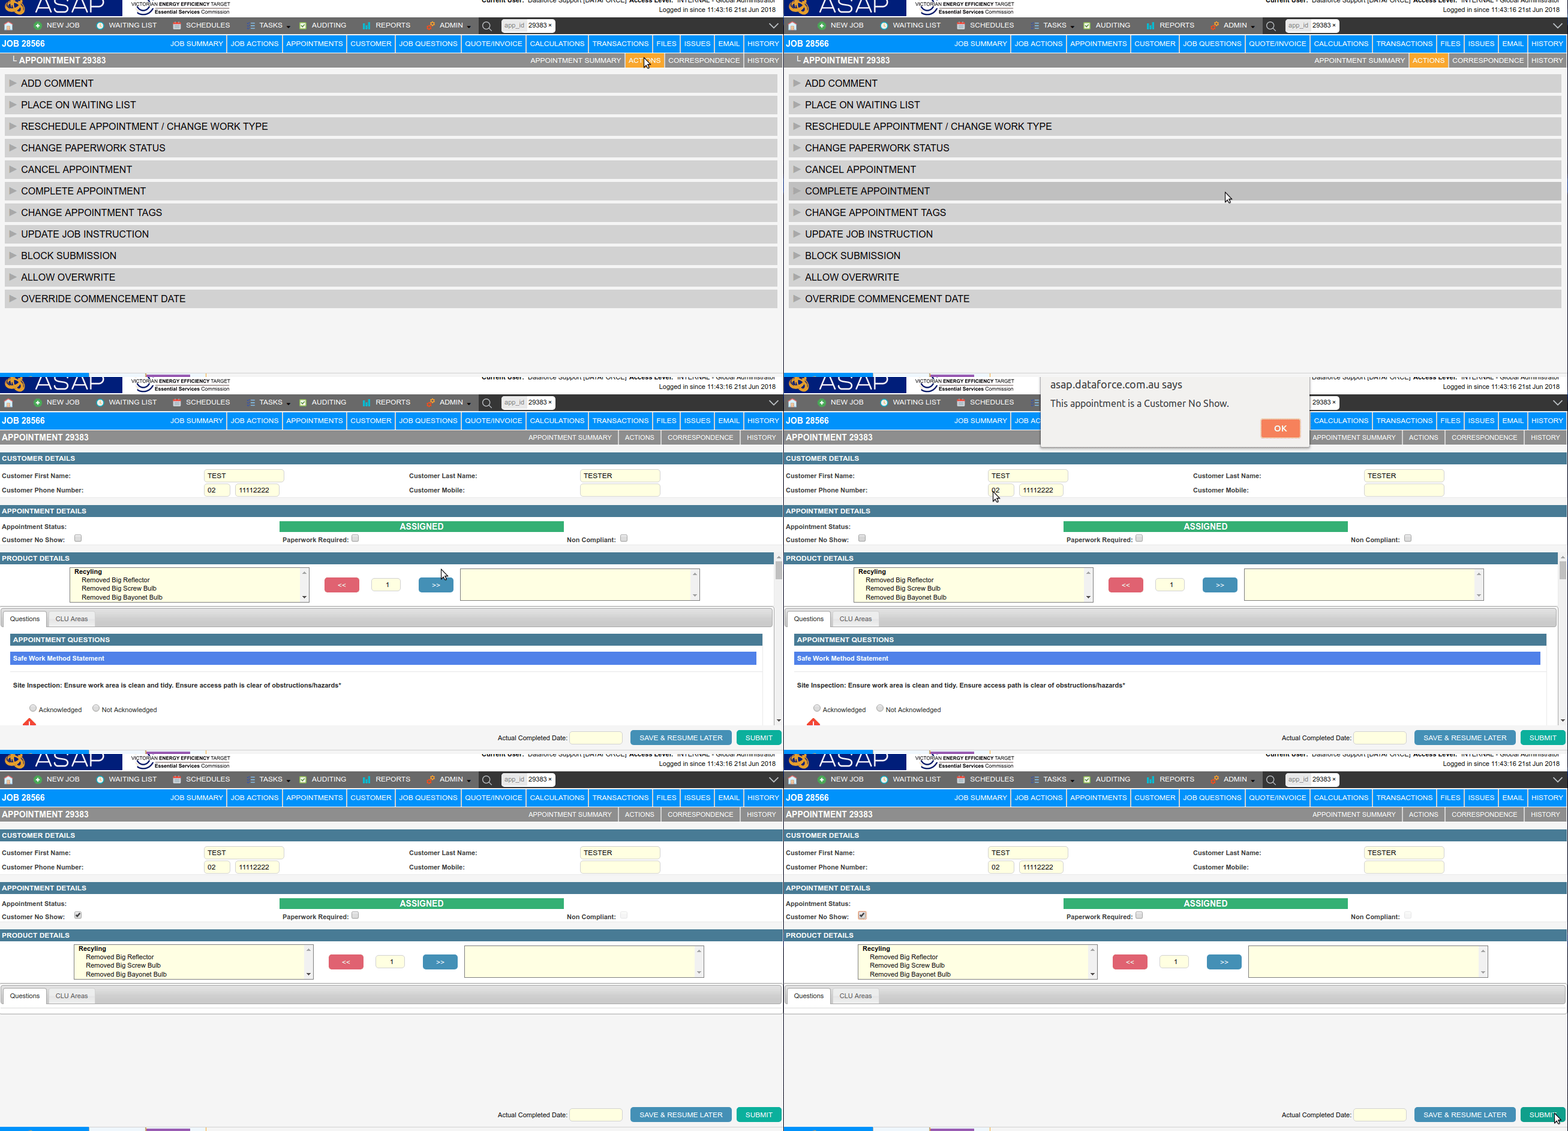
Complete an Appointment as a No Show
- Open the appointment in Dataforce ASAP.
- Navigate to the Appointment Actions tab.
- Select the Complete Appointment action.
- Select the Customer No Show Checkbox at the top of the screen.
- Click Ok to the notification Pop-up.
- Click the Save Button.
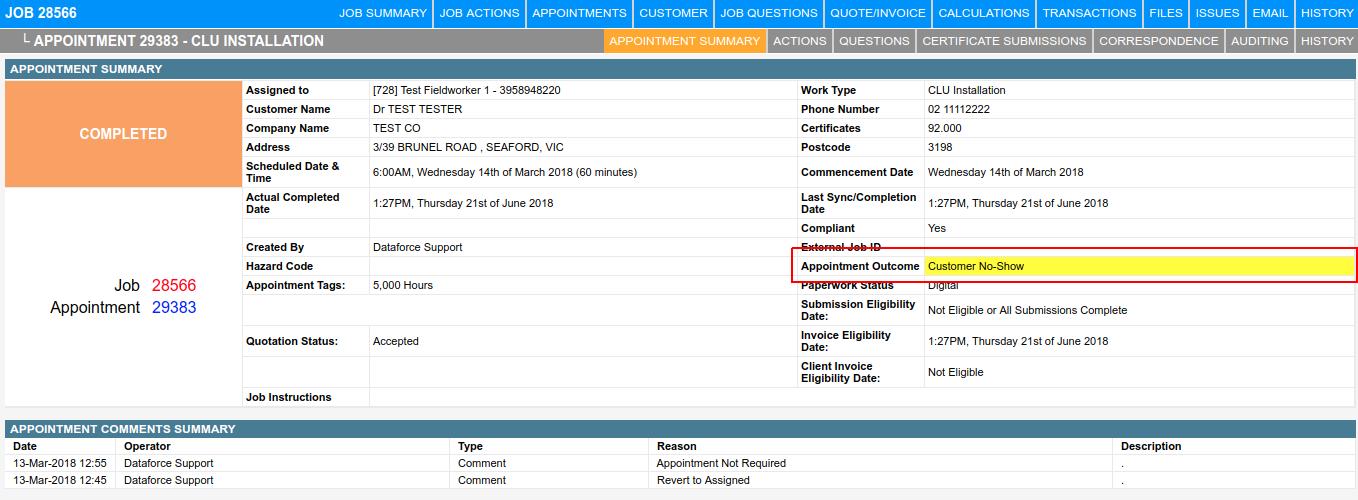
Check the Appointment Outcome
The appointment outcome can be checked from the Appointment Summary tab.
Search for No Show Appointments.
See the Appointment Search page for more details on how to search for appointments with this outcome.
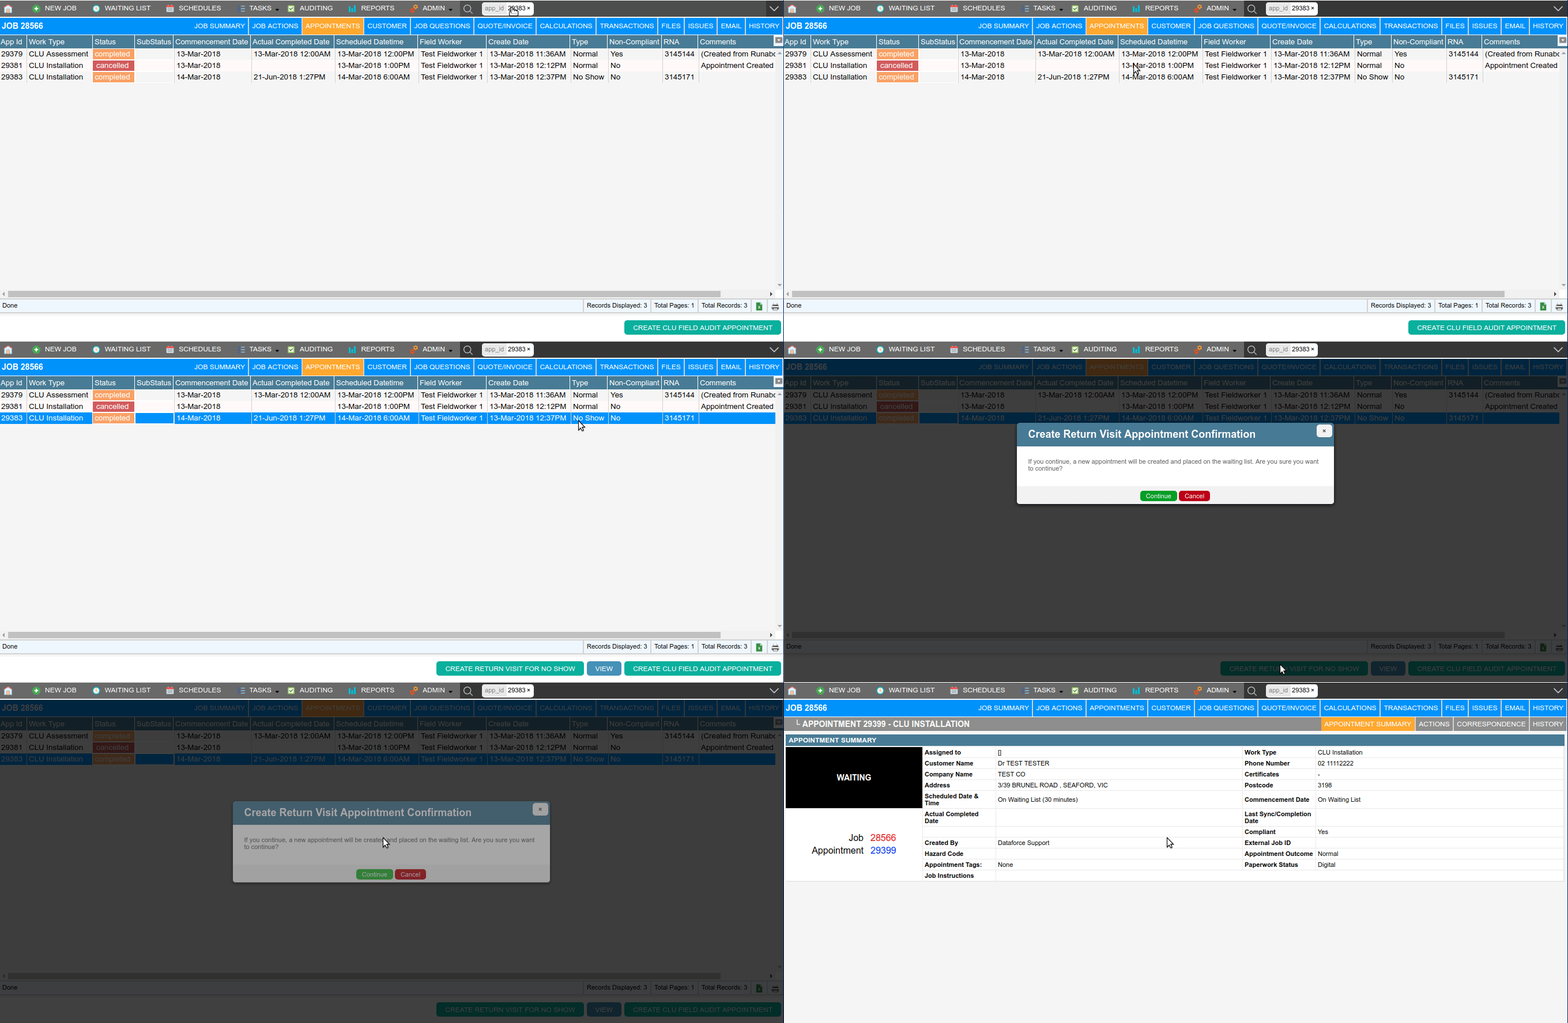
Booking a Follow-Up Appointment.
Booking a followup appointment can be done from the Appointments Tab in the Job Bar.
- Open the job in Dataforce ASAP.
- Navigate to the Appointments tab on the job bar.
- Select the No Show Appointment from the grid.
- Click the Create Return Visit From No Show button.
- Click Continue on the notification Pop-up.
- Now schedule the new appointment.


